> ## Documentation Index
> Fetch the complete documentation index at: https://io.net/docs/llms.txt
> Use this file to discover all available pages before exploring further.
# Deploy CaaS
> Flexible & High-Performance Containers built for rapid deployment and scalable AI workloads
[io.net](http://io.net) offers a simple and powerful interface for deploying containers using high-performance infrastructure. Whether you are running inference, training models, or hosting APIs, the Containers system gives you flexibility and speed.
This guide will help you deploy using IO Cloud API keys on our CaaS clusters. For detailed API usage, refer to our [API Reference](/reference/get-started-with-caas-api).
Support for *AWS ECR* private images is not available at this time for **CaaS**.
## Deploy Container
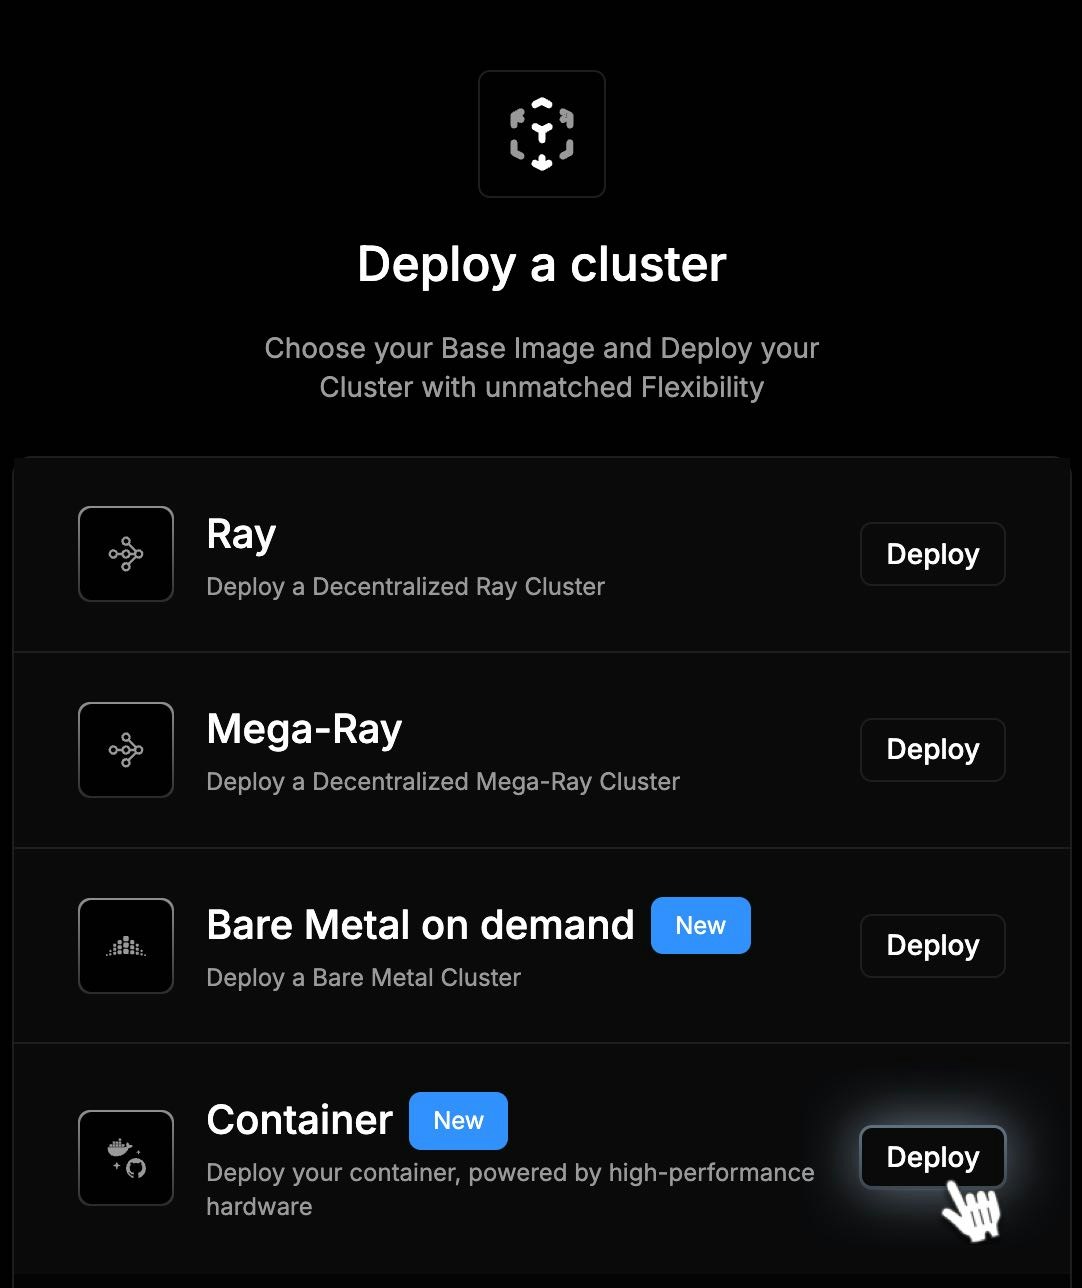
Click the **Deploy Container** button to launch a wizard that guides you through the deployment process.
## Container Deployment Wizard
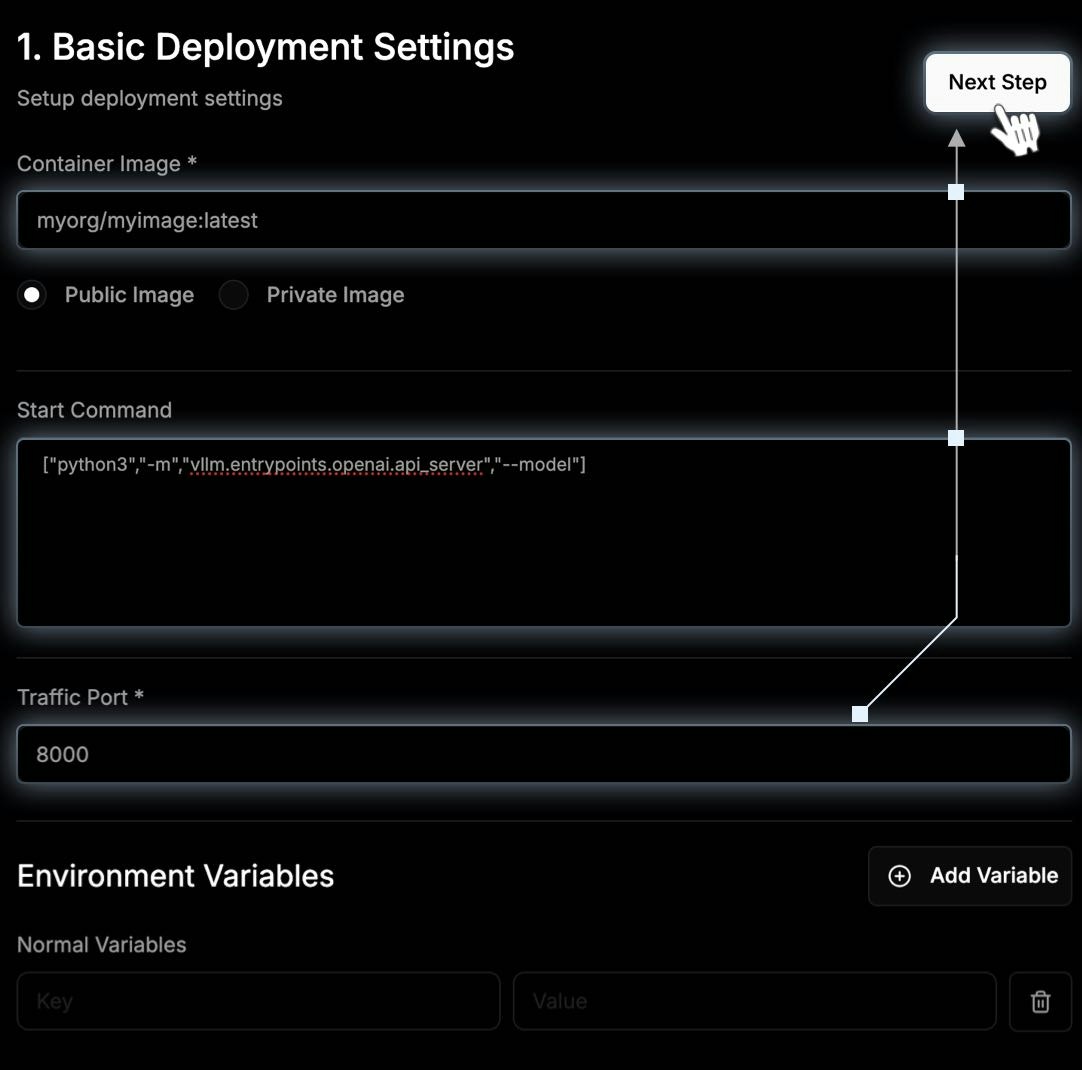
### Step 1: Basic Deployment Settings
Configure your container:
* **Container Image** *(required)* Example: `myorg/myimage:latest`
* **Image Type**
* Public Image
* Private Image
* **Start Command** Enter the start command in JSON array format, example:
```json json theme={null}
["python3","-m","vllm.entrypoints.openai.api_server","--model"]
```
* **Traffic Port** *(required)* Default: `8000`
* **Environment Variables** Click **Add Variable** to define key-value pairs. Options:
* Normal Variable
* Private Variable You can add or remove variables as needed.
Once all required fields are completed, click **Next Step**.
To avoid deployment failures:
* Always define environment variables in the `env_variables` section.
* Do not substitute variables directly in the `entrypoint` or `args`.
* When referencing variables in the entrypoint, **escape**`$`**as** `$$`.
Example:
```json theme={null}
"entrypoint": [
"sh", "-c", "echo 'Variable value: $${TEST_VAR}' && sleep 3600"
],
"env_variables": {
"TEST_VAR": "This is a test"
}
```
* **Correct:** `$${TEST_VAR}` prints the variable value inside the container.
* **Incorrect:** `$TEST_VAR` may cause deployment failure.
* Always use `env_variables` for variable management.
For advanced users: There is a known issue where Terraform variable interpolation (`$`) may conflict with service-layer substitution. Escaping with `$$` resolves this issue.
### Step 2: Select Your Cluster Processor + Location
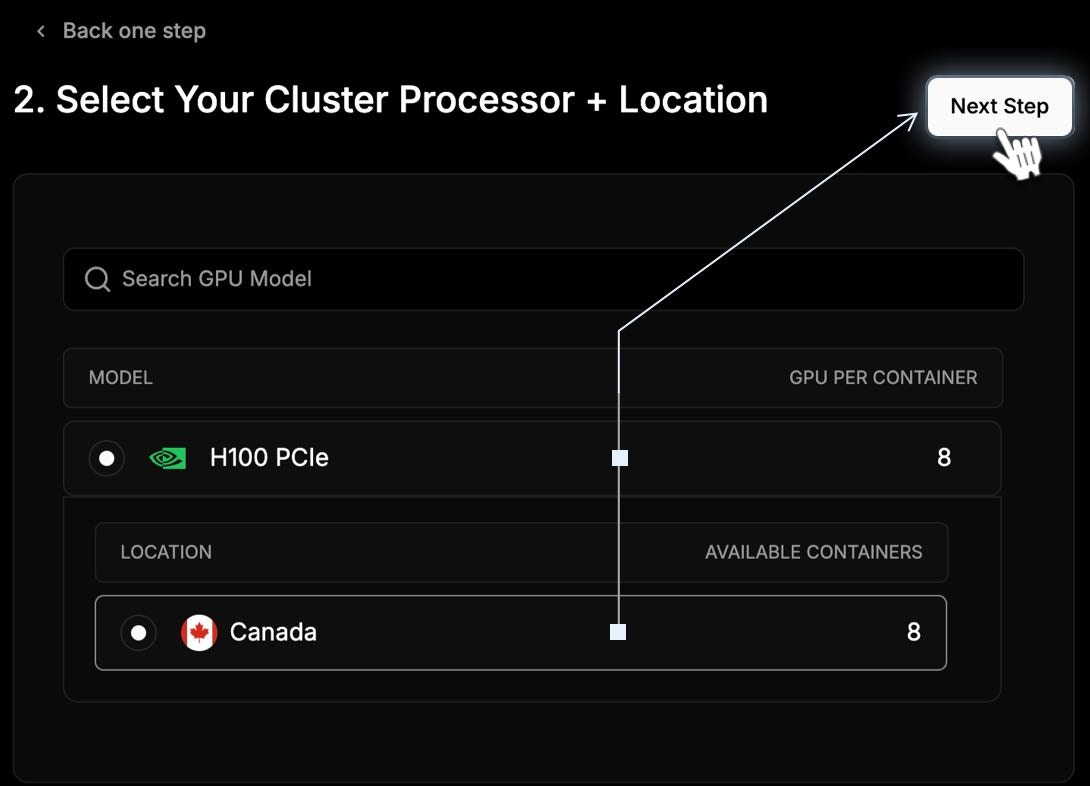
Choose the hardware and region for your deployment:
* **Available GPUs** Search by GPU model and view:
* GPU Model
* GPUs per Container
* **Location Selection** After selecting a GPU, you'll see a list of locations showing:
* Region (e.g. Canada, Germany)
* Available containers per location
Once both **GPU** and **location** are selected, proceed to the **next step**.
### Step 3: Summary
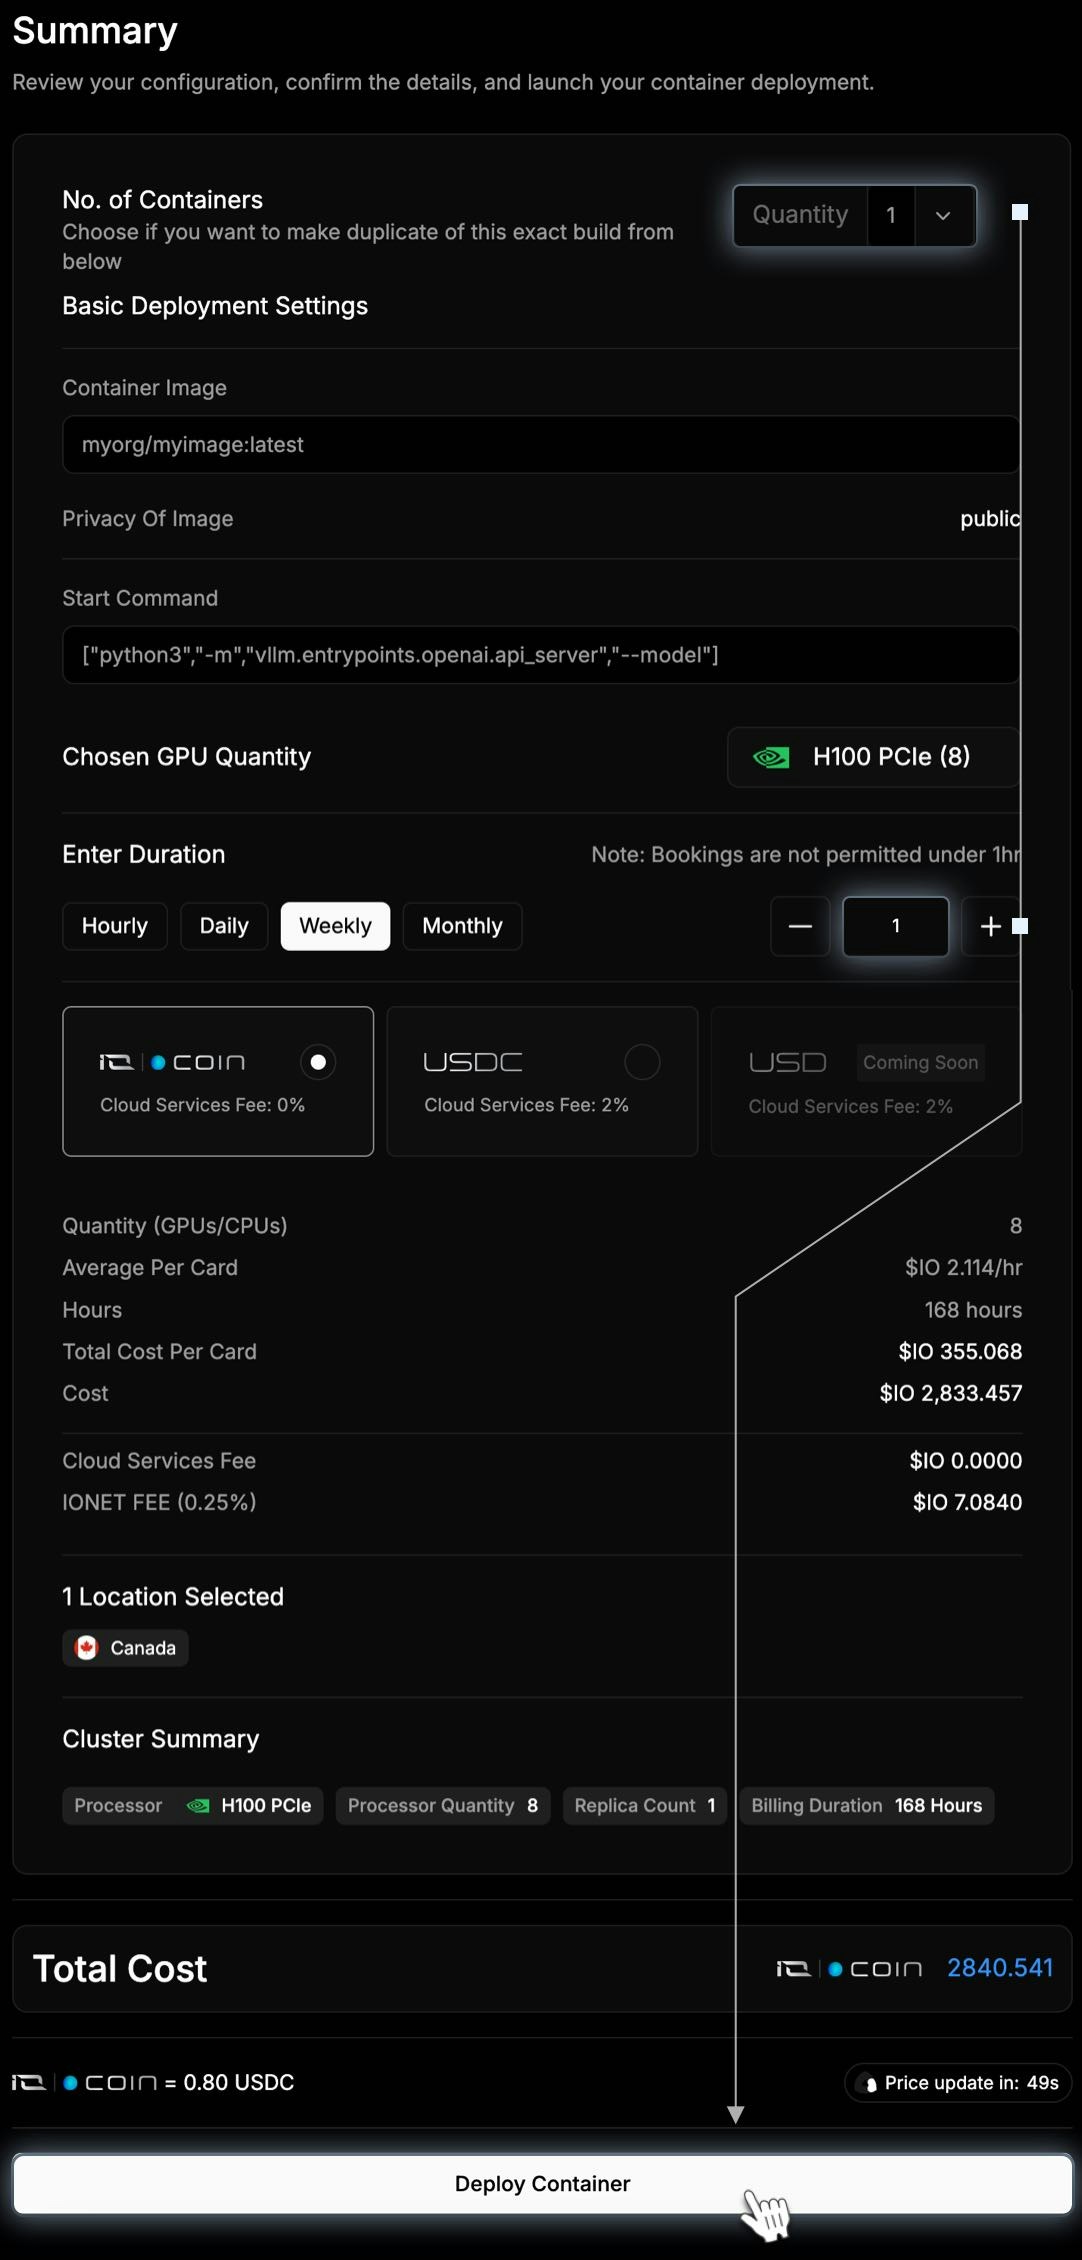
On the Summary page, the choices you made in the process are displayed. You must select the number of Containers and the duration of time that you will use them.
1. In the **No. of Containers** field, select the number of Containers in the dropdown. 2 Containers will increase the cost.
2. In the **Enter Duration** field, select the length of time: Hourly, Daily, or Weekly. To the right, you can increase the quantity.
3. Review all the details of your cluster, including the **Total Cost**.
4. Click **Deploy Cluster**.
### View Cluster
After payment is processed you can view your cluster loading.
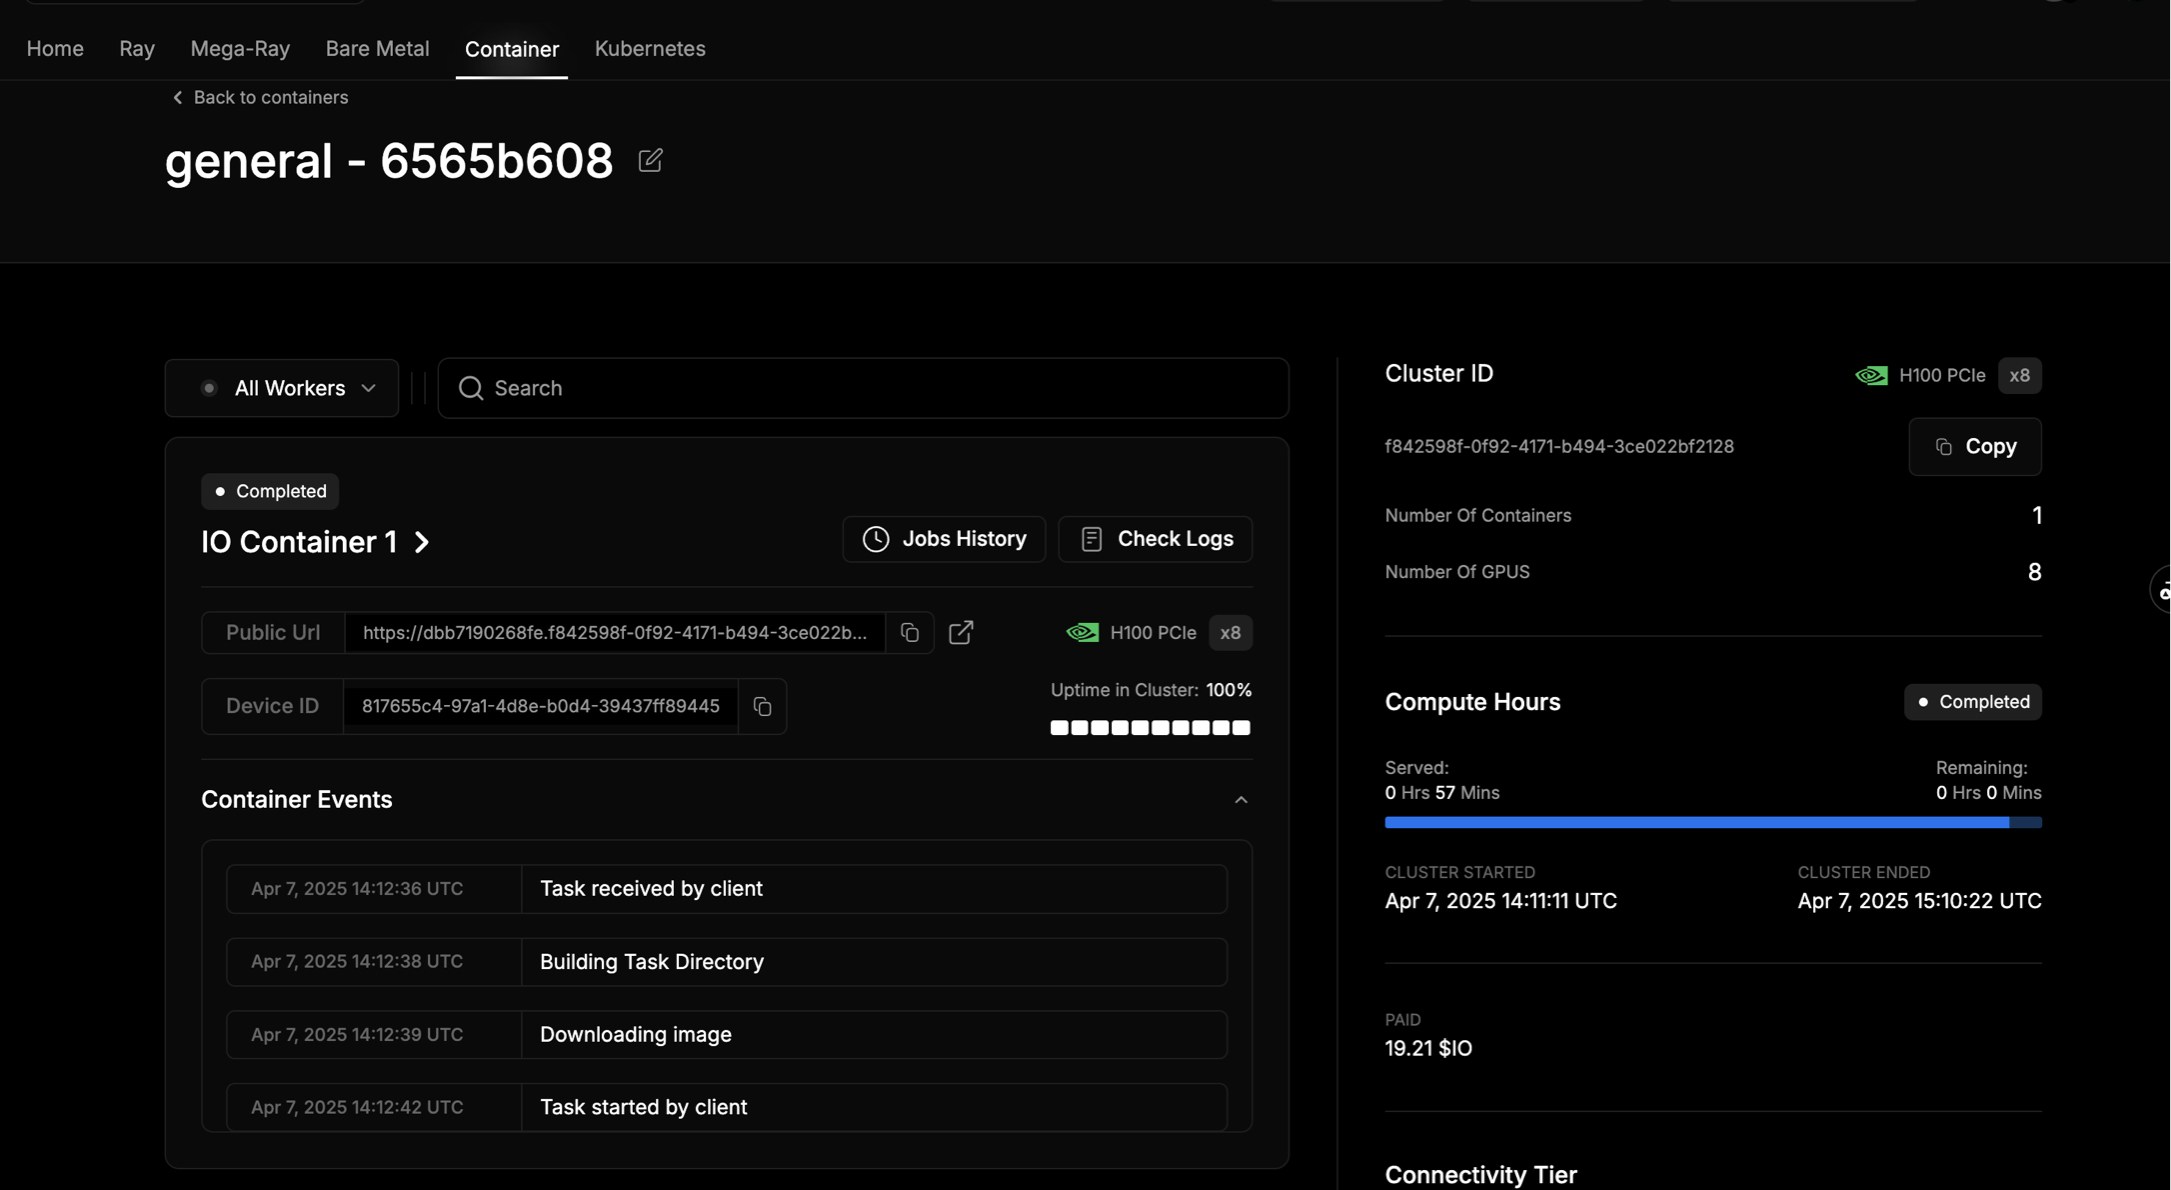
Click **Return to Clusters** after your cluster is successfully deployed. The screenshot below is a detail page of your cluster.
> 🚧 Troubleshooting Container Issues
>
> If your container is not running, you do not need to delete the whole cluster. Instead, open the deployment settings, adjust any incorrect details (for example, the image name or registry credentials), and redeploy.
>
> This way, you avoid the minimum 1-hour charge for deleting and recreating a cluster.
>
>
 ## Container Deployment Wizard
### Step 1: Basic Deployment Settings
Configure your container:
* **Container Image** *(required)* Example: `myorg/myimage:latest`
* **Image Type**
* Public Image
* Private Image
* **Start Command** Enter the start command in JSON array format, example:
## Container Deployment Wizard
### Step 1: Basic Deployment Settings
Configure your container:
* **Container Image** *(required)* Example: `myorg/myimage:latest`
* **Image Type**
* Public Image
* Private Image
* **Start Command** Enter the start command in JSON array format, example:
 ### Step 3: Summary
On the Summary page, the choices you made in the process are displayed. You must select the number of Containers and the duration of time that you will use them.
1. In the **No. of Containers** field, select the number of Containers in the dropdown. 2 Containers will increase the cost.
2. In the **Enter Duration** field, select the length of time: Hourly, Daily, or Weekly. To the right, you can increase the quantity.
3. Review all the details of your cluster, including the **Total Cost**.
4. Click **Deploy Cluster**.
### Step 3: Summary
On the Summary page, the choices you made in the process are displayed. You must select the number of Containers and the duration of time that you will use them.
1. In the **No. of Containers** field, select the number of Containers in the dropdown. 2 Containers will increase the cost.
2. In the **Enter Duration** field, select the length of time: Hourly, Daily, or Weekly. To the right, you can increase the quantity.
3. Review all the details of your cluster, including the **Total Cost**.
4. Click **Deploy Cluster**.
 ### View Cluster
After payment is processed you can view your cluster loading.
### View Cluster
After payment is processed you can view your cluster loading.
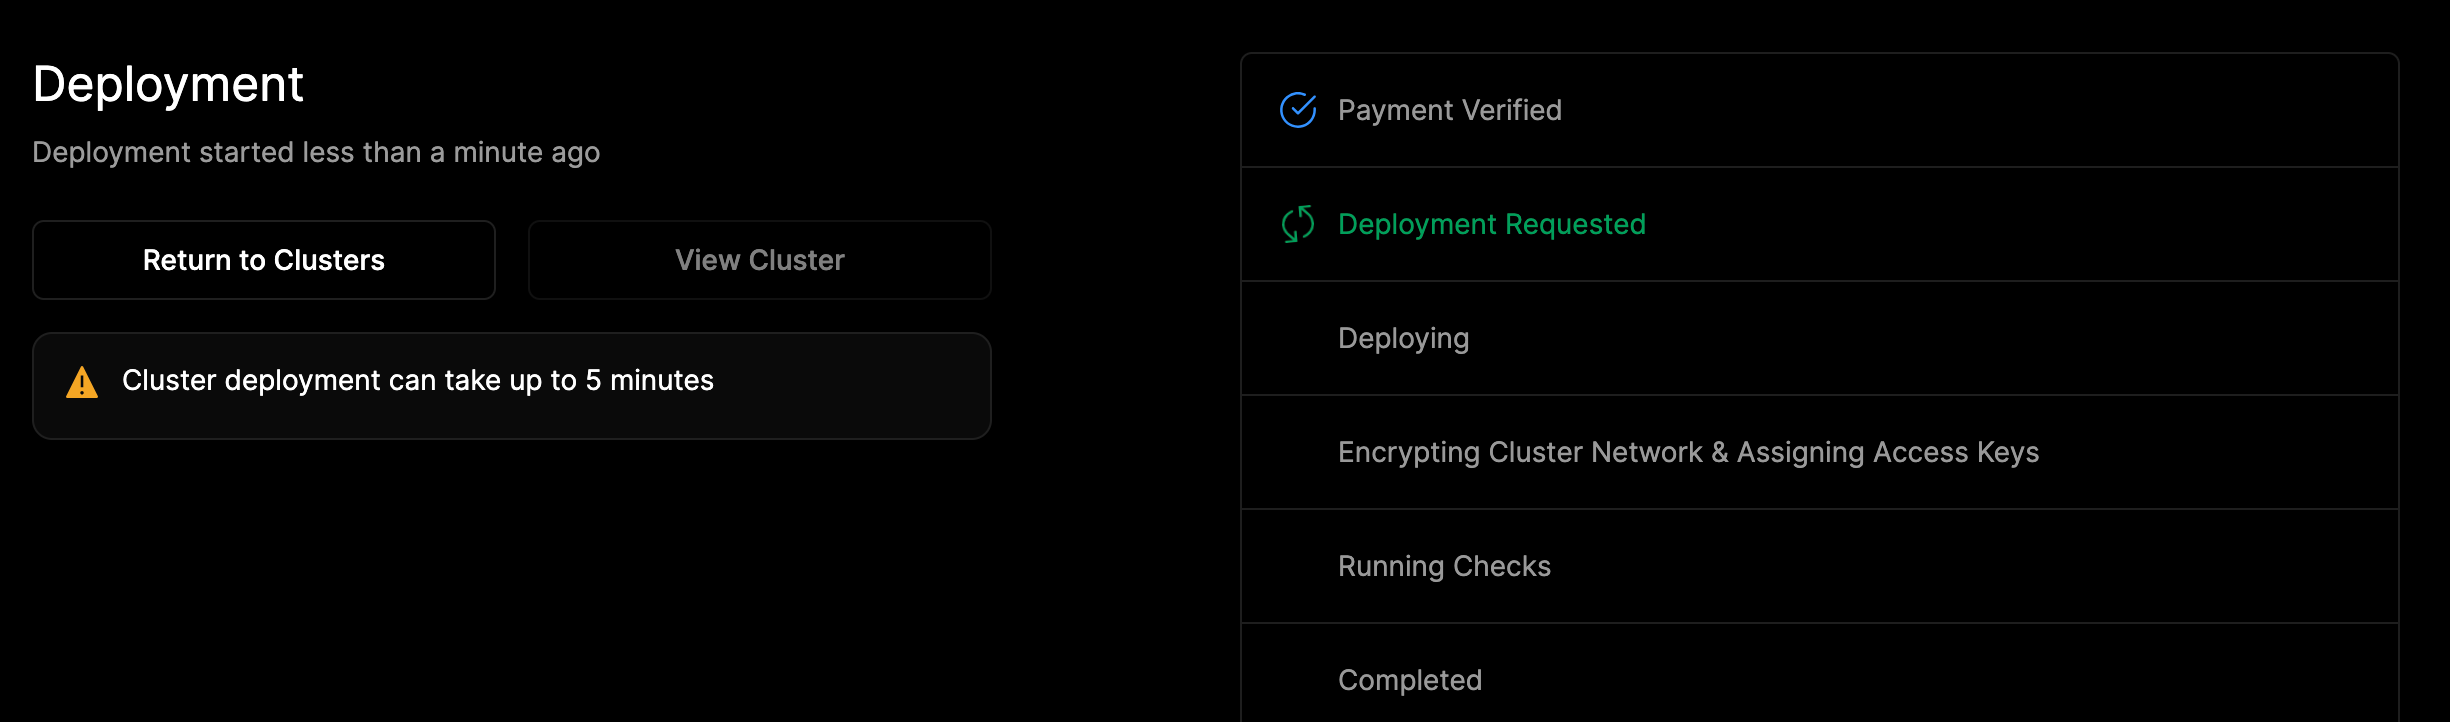 Click **Return to Clusters** after your cluster is successfully deployed. The screenshot below is a detail page of your cluster.
 > 🚧 Troubleshooting Container Issues
>
> If your container is not running, you do not need to delete the whole cluster. Instead, open the deployment settings, adjust any incorrect details (for example, the image name or registry credentials), and redeploy.
>
> This way, you avoid the minimum 1-hour charge for deleting and recreating a cluster.
>
>
> 🚧 Troubleshooting Container Issues
>
> If your container is not running, you do not need to delete the whole cluster. Instead, open the deployment settings, adjust any incorrect details (for example, the image name or registry credentials), and redeploy.
>
> This way, you avoid the minimum 1-hour charge for deleting and recreating a cluster.
>
> 