> ## Documentation Index
> Fetch the complete documentation index at: https://io.net/docs/llms.txt
> Use this file to discover all available pages before exploring further.
# Aptos Wallet
> This document discusses Aptos and provides instructions on how to create a Aptos Wallet.
## What is a Aptos Wallet?
An Aptos Wallet is a digital wallet designed for securely storing and managing Aptos tokens, sending and receiving transactions, and interacting with decentralized applications (DApps) on the Aptos blockchain. It offers features such as private key management, encryption, and a user-friendly interface for monitoring balances and transaction history. Additionally, it integrates with various blockchain services and platforms, and can be available as mobile apps, browser extensions, or hardware wallets.
## How to Create a Aptos Wallet
You can create any Aptos (APT) wallet from the official list here: [Aptos Ecosystem](https://aptosfoundation.org/ecosystem/projects/wallets).
For this example, we will use a popular option - Petra, and demonstrate how to configure and use the wallet:
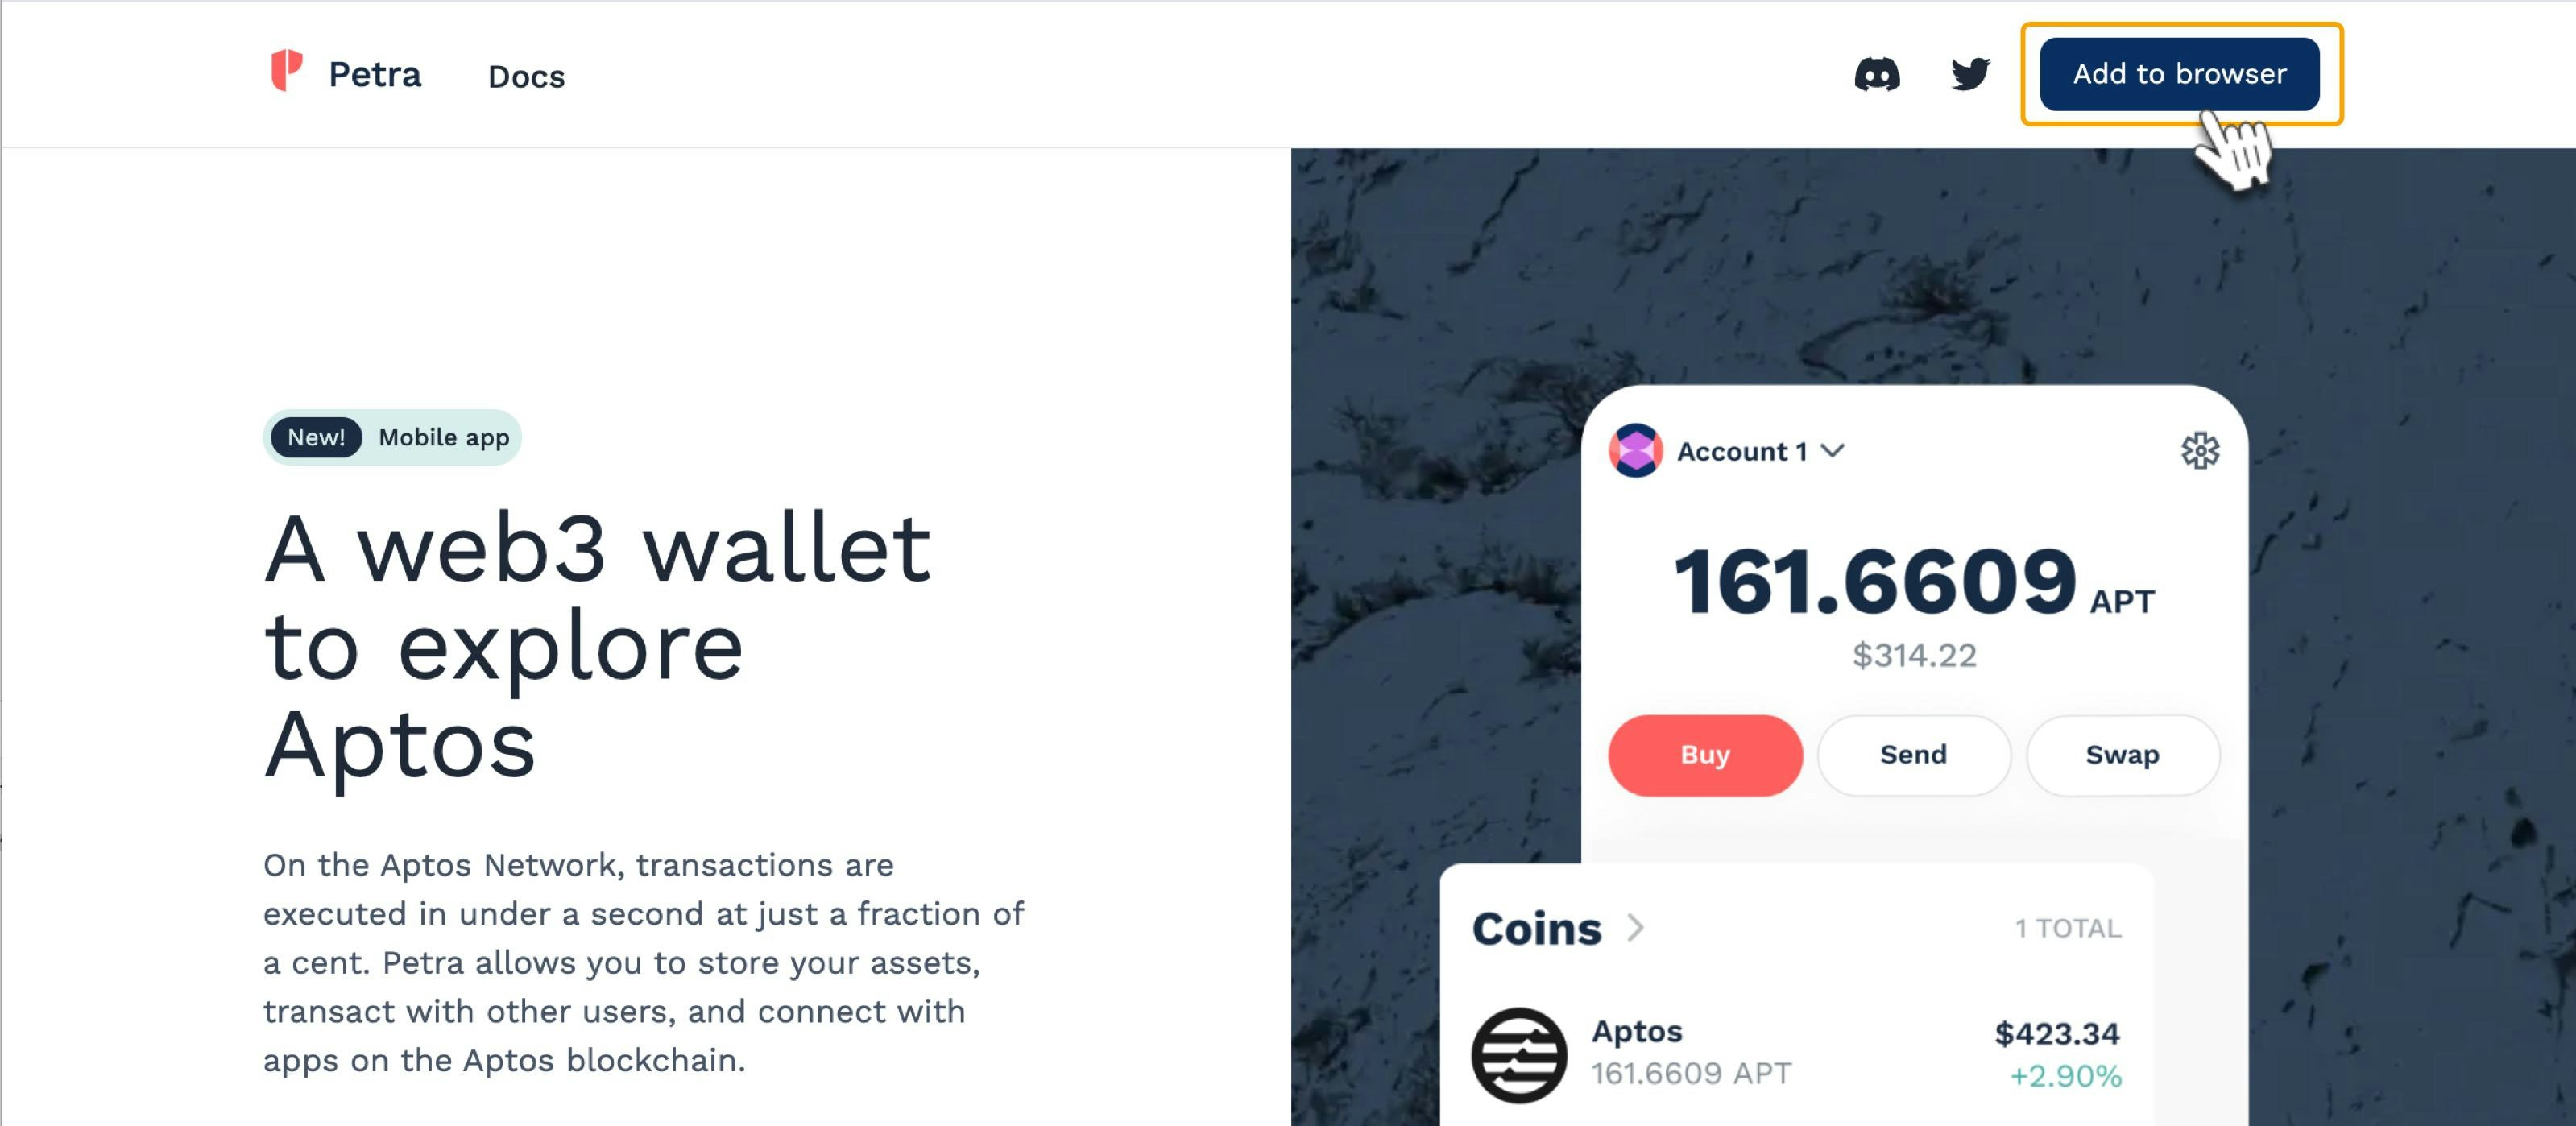
**1. Go to** [Petra Wallet.](https://petra.app/)
1. Select the browser to install Petra on. In this example, we use Chrome.
2. Click **Add to browser**.
 **2. Add to Chrome**
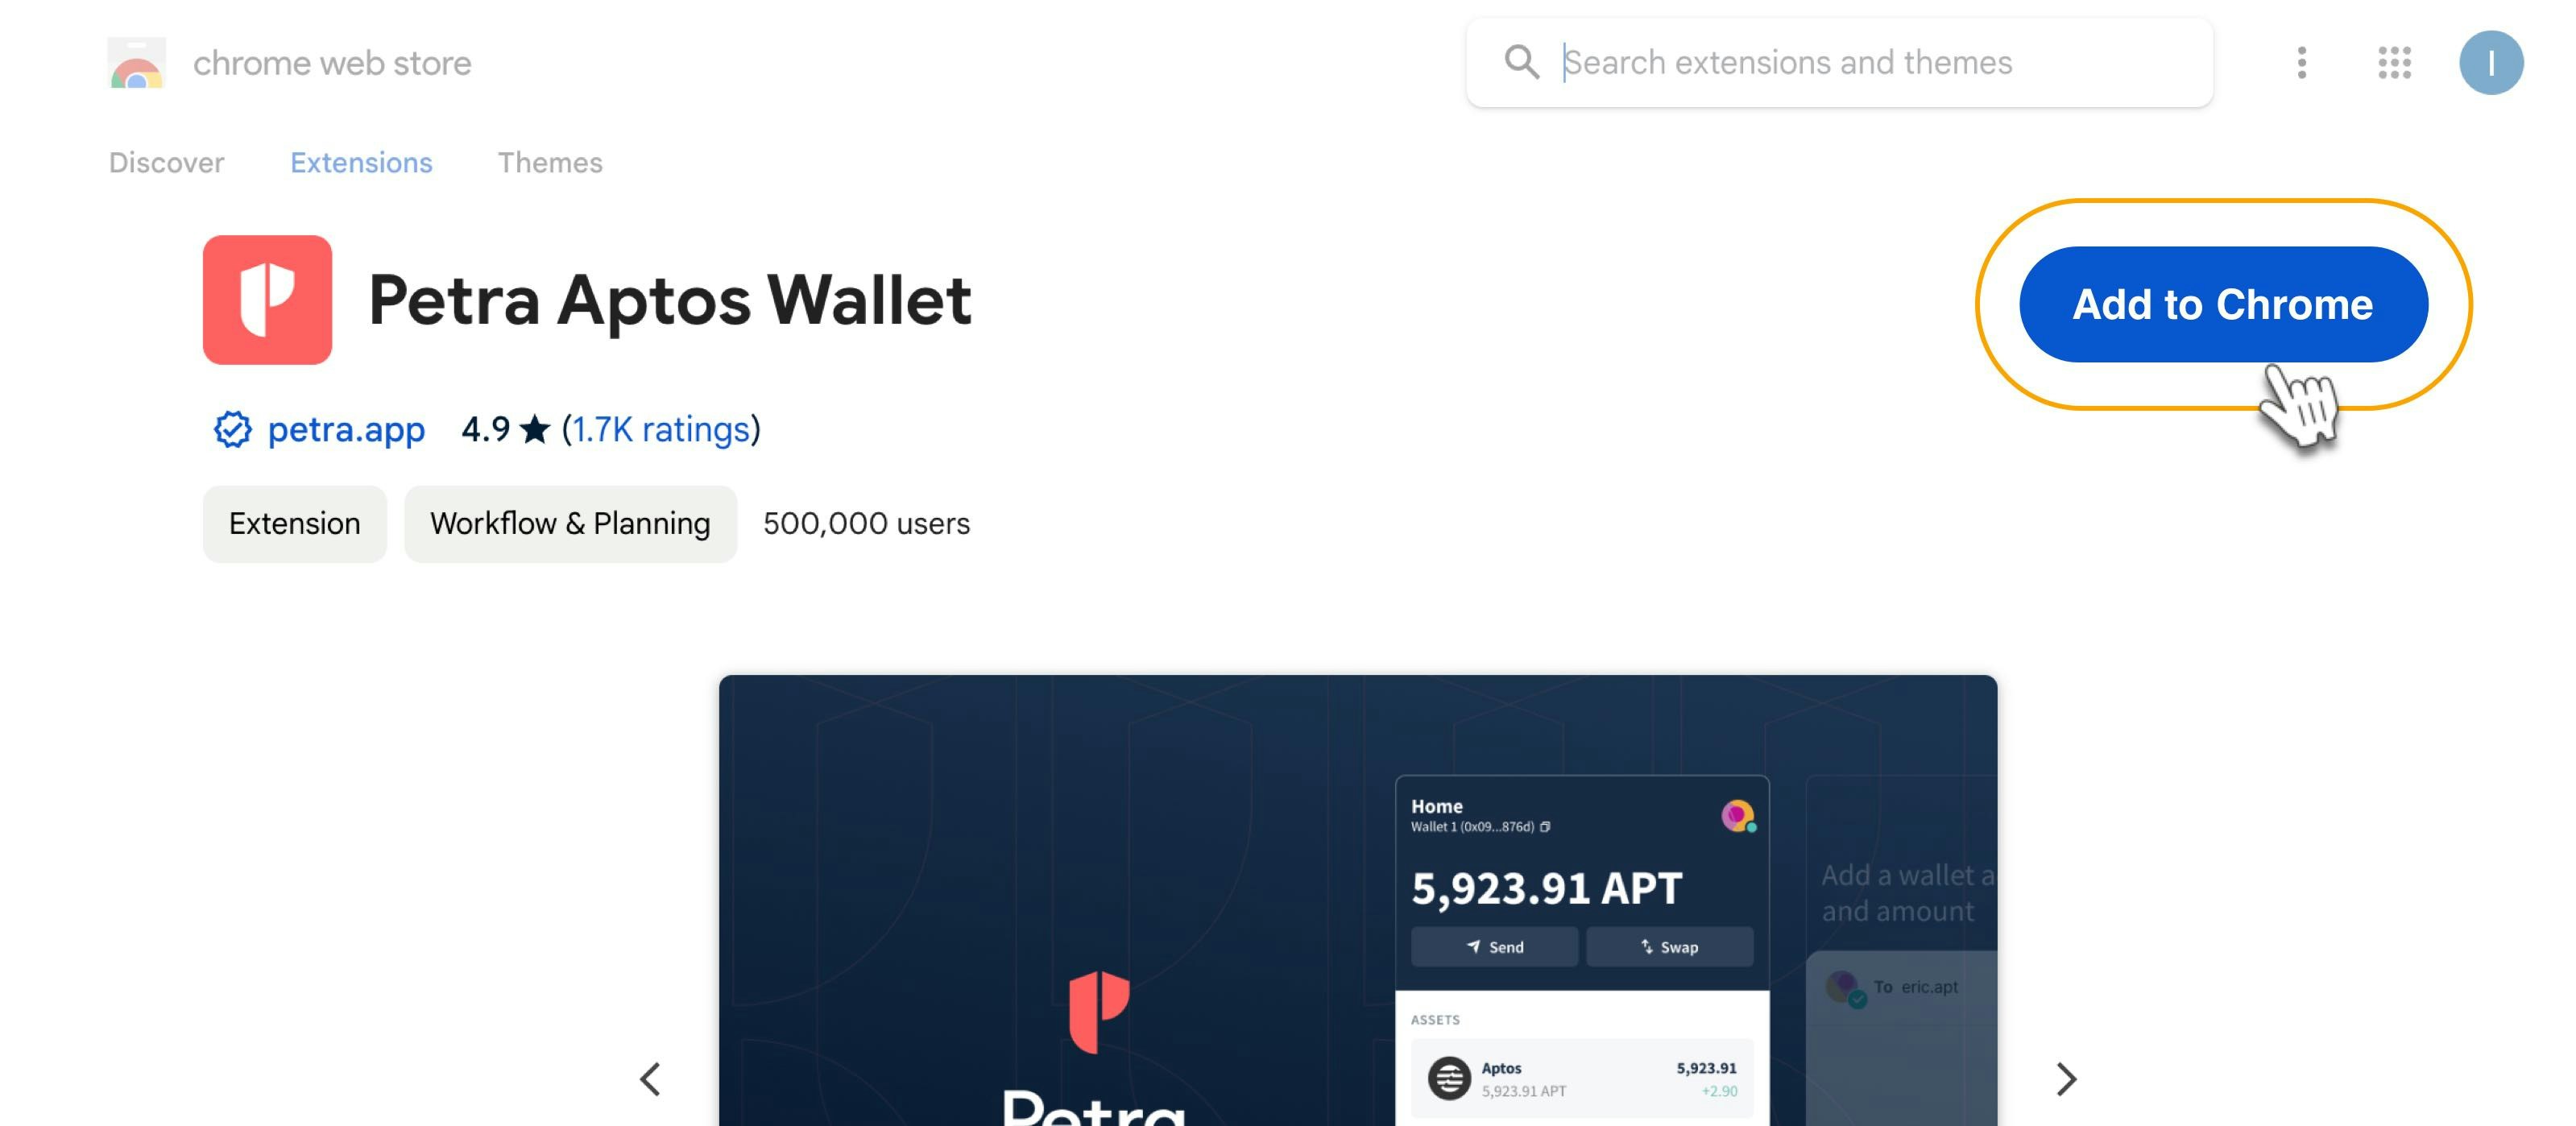
After you click **Add to browser**, you're redirect to the extension download page.
Click **Add to Chrome** to add the extension to Chrome.
**2. Add to Chrome**
After you click **Add to browser**, you're redirect to the extension download page.
Click **Add to Chrome** to add the extension to Chrome.
 **3. Open the Petra extension**
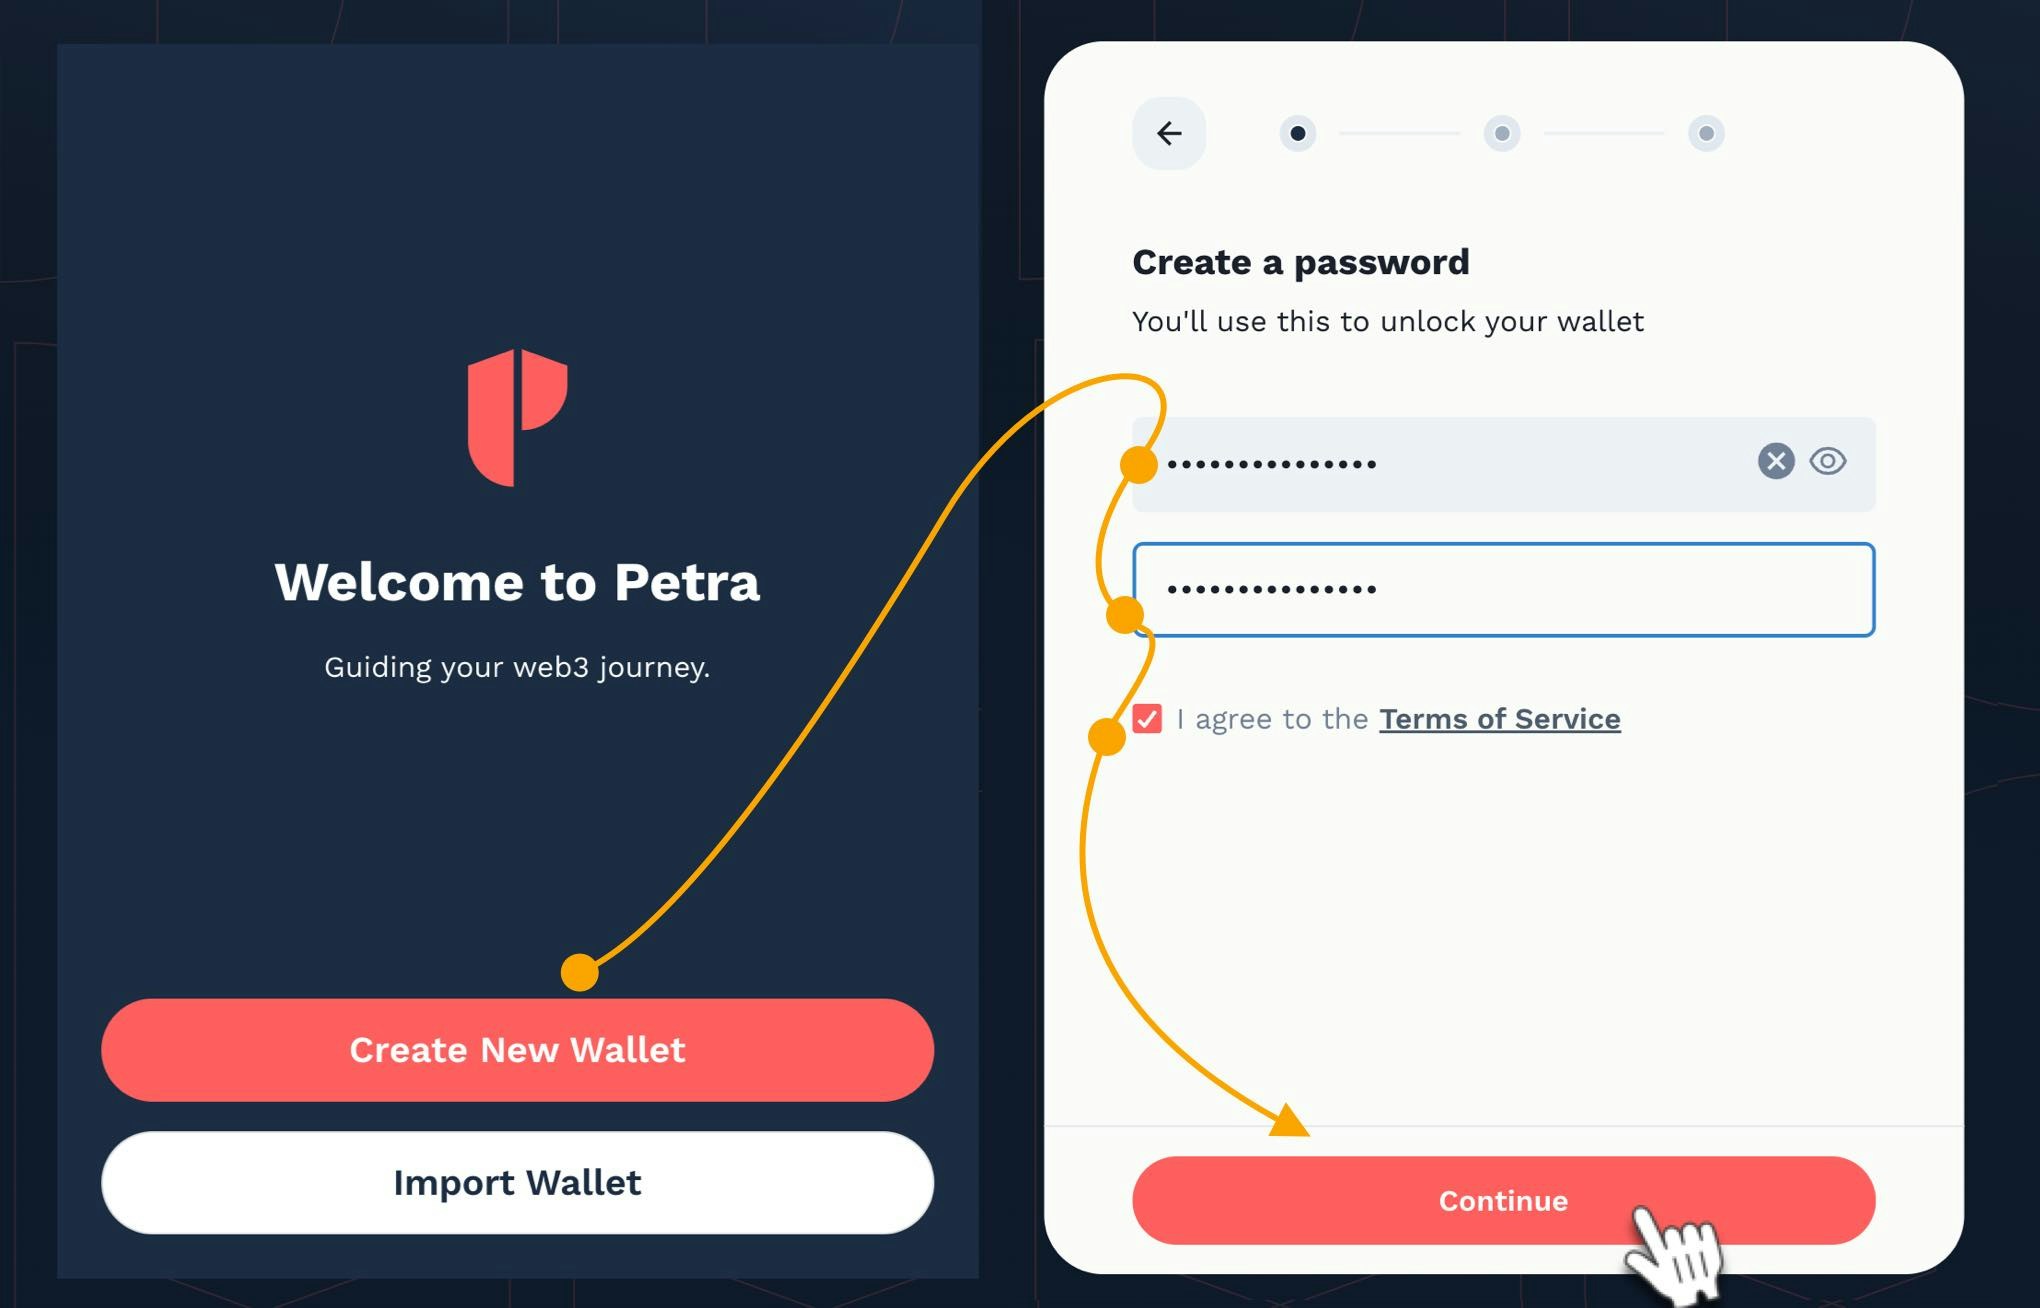
1. Click **Create New Wallet**.
2. Create a password for your wallet.
3. Click **Continue**.
If you forget your password you will need to restore your wallet using your seed words, provided in the next step. Also, if you clear the browser cache, you cannot login using a password. You must restore wallet again using the seed word.
**3. Open the Petra extension**
1. Click **Create New Wallet**.
2. Create a password for your wallet.
3. Click **Continue**.
If you forget your password you will need to restore your wallet using your seed words, provided in the next step. Also, if you clear the browser cache, you cannot login using a password. You must restore wallet again using the seed word.
 **4. Store the Recovery Phrase**
1. In the **Secret Recovery Phrase** page, copy and store your 12 word Secret Recovery phrase. You can save them on password managers like **Keepass**.
2. Click **Continue**.
**4. Store the Recovery Phrase**
1. In the **Secret Recovery Phrase** page, copy and store your 12 word Secret Recovery phrase. You can save them on password managers like **Keepass**.
2. Click **Continue**.
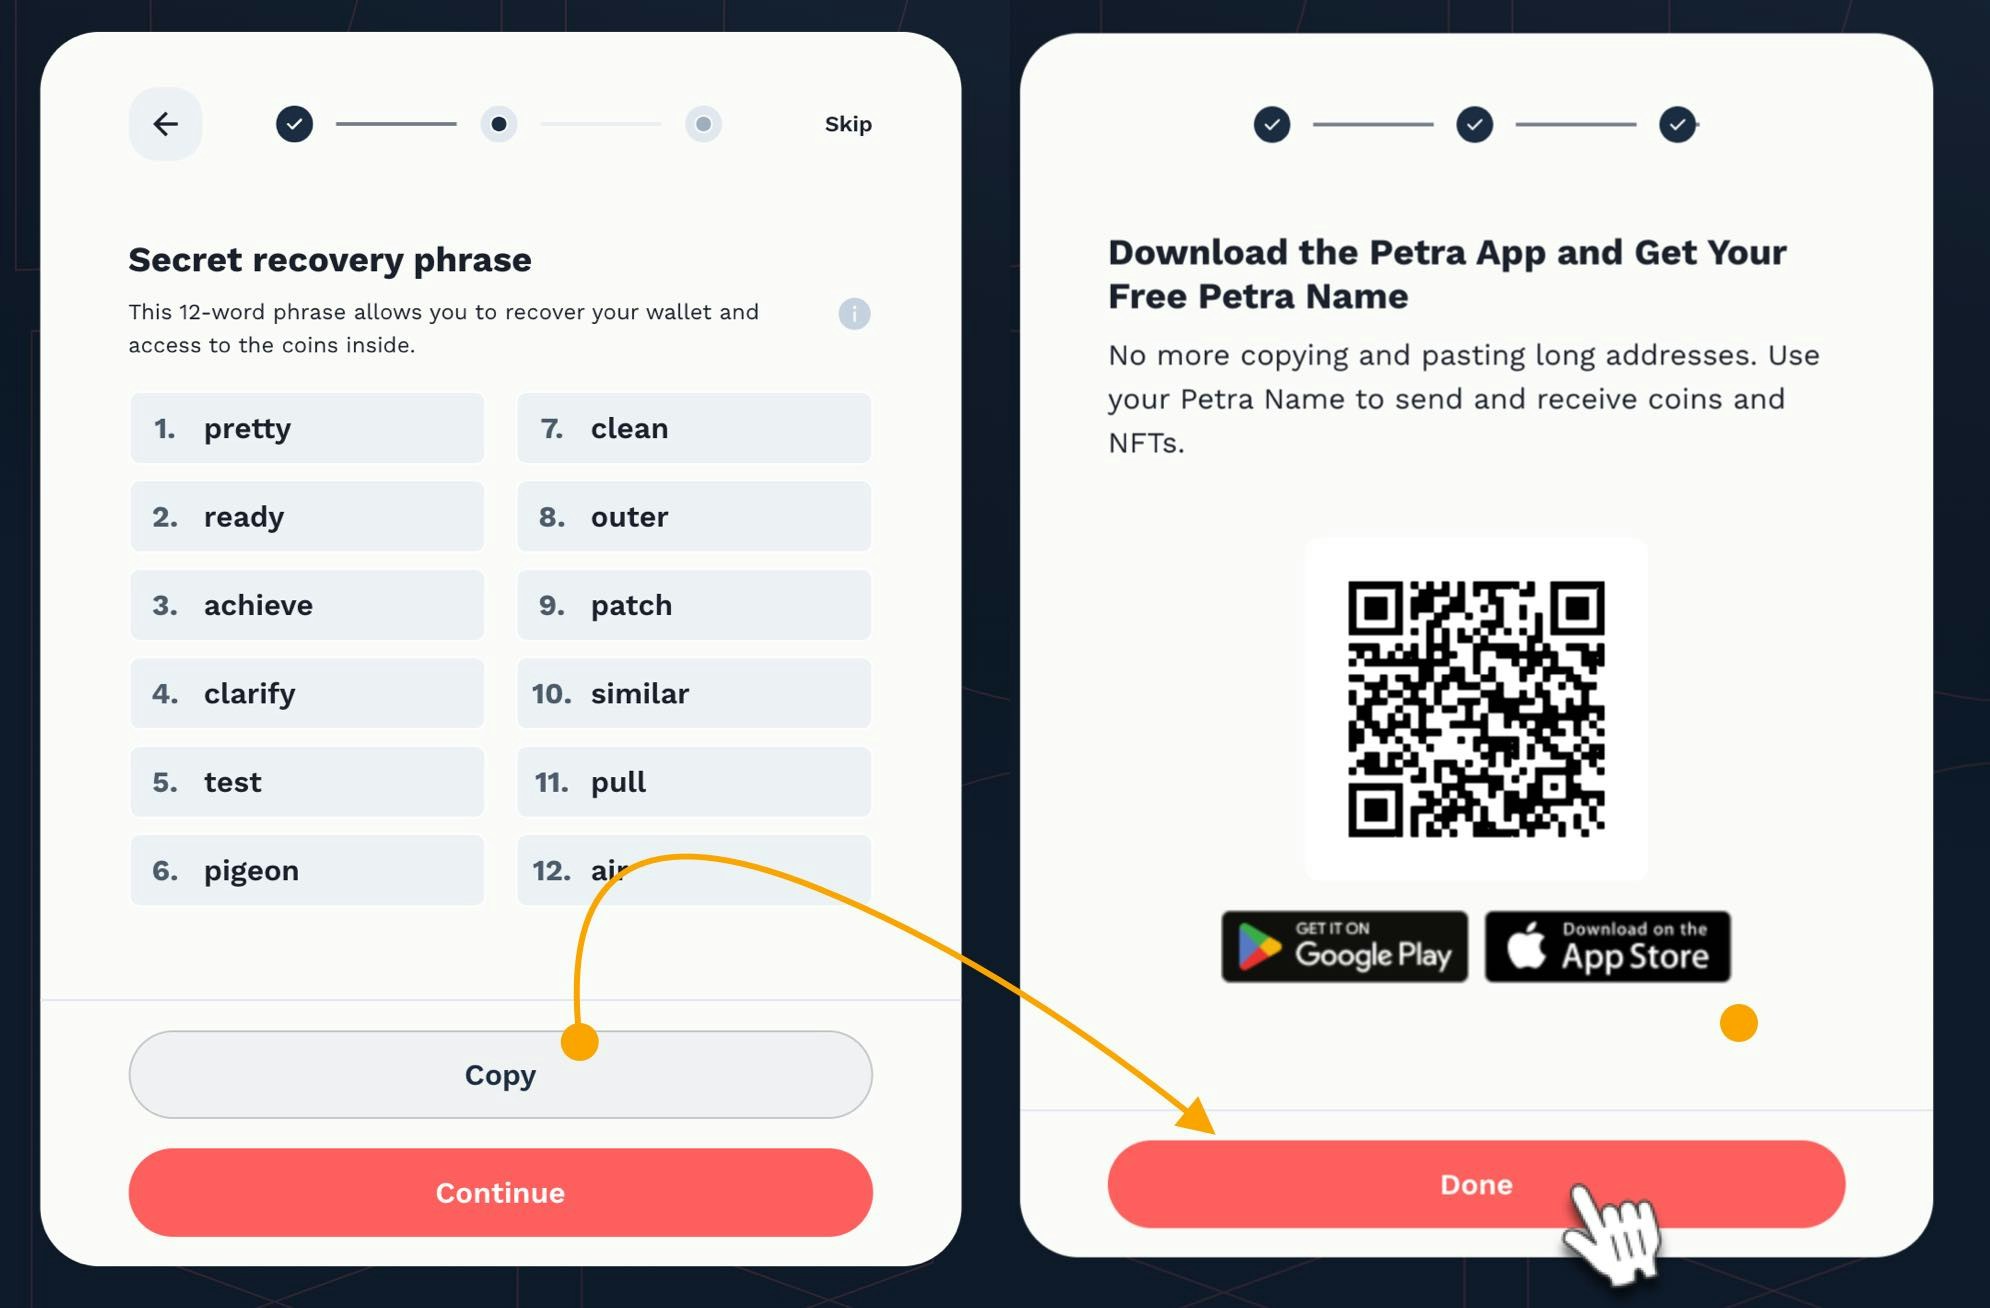 Failure to save your Secret Recovery Phrase can result in an inability to access your account. You may lose access to your coins.
**5. Copy the APT Address**
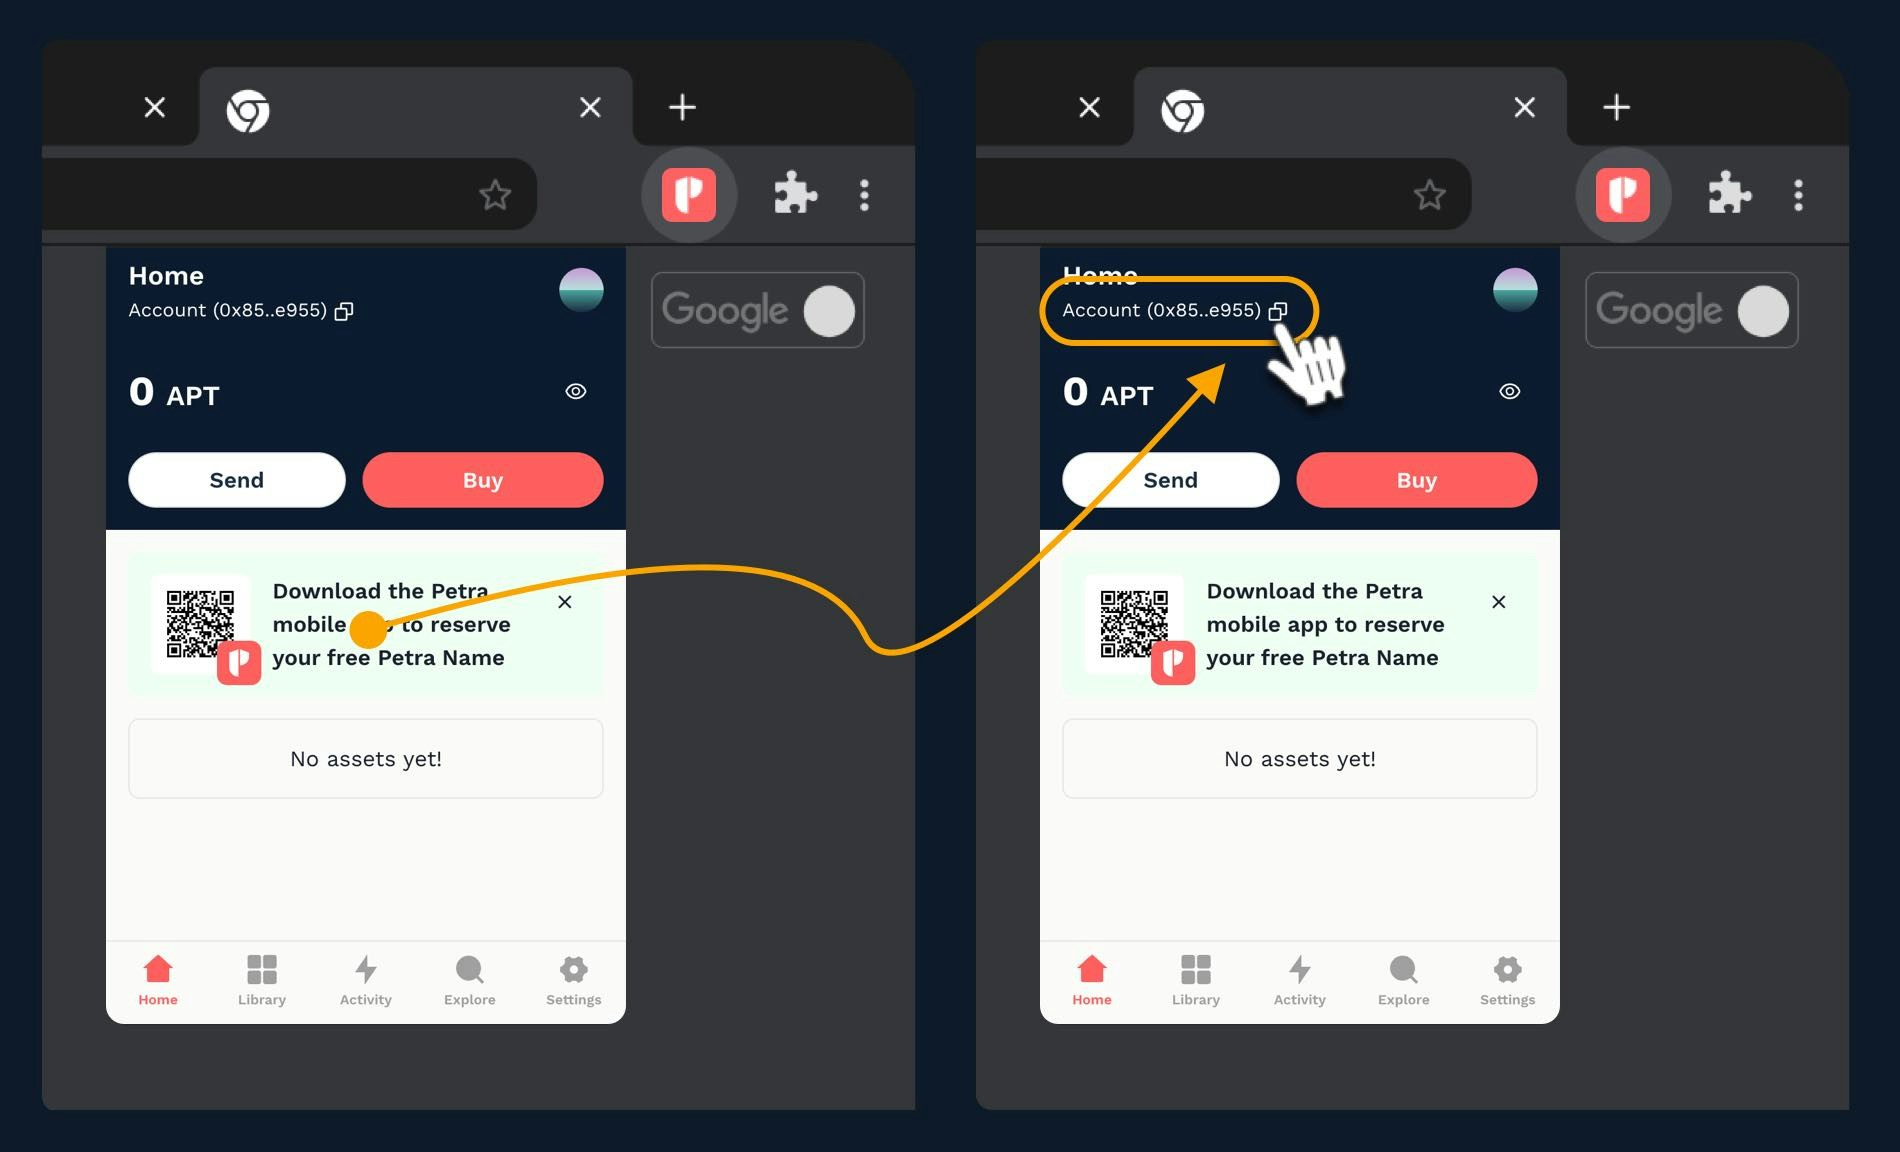
After you click **Continue**, the wallet generates a new APT address. This is the address used to receive coins.
To copy your APT address:
1. Click on Aptos wallet extension.
2. Click **Receive**.
3. At the top of the extension, click **Copy** icon to copy deposit address.
Failure to save your Secret Recovery Phrase can result in an inability to access your account. You may lose access to your coins.
**5. Copy the APT Address**
After you click **Continue**, the wallet generates a new APT address. This is the address used to receive coins.
To copy your APT address:
1. Click on Aptos wallet extension.
2. Click **Receive**.
3. At the top of the extension, click **Copy** icon to copy deposit address.
 **6. Go to your IO ID account to set your new APT wallet address.**
Follow the steps below to set your APT wallet address.
1. Log in to your io.net account.
2. Go to your **IO ID** profile.
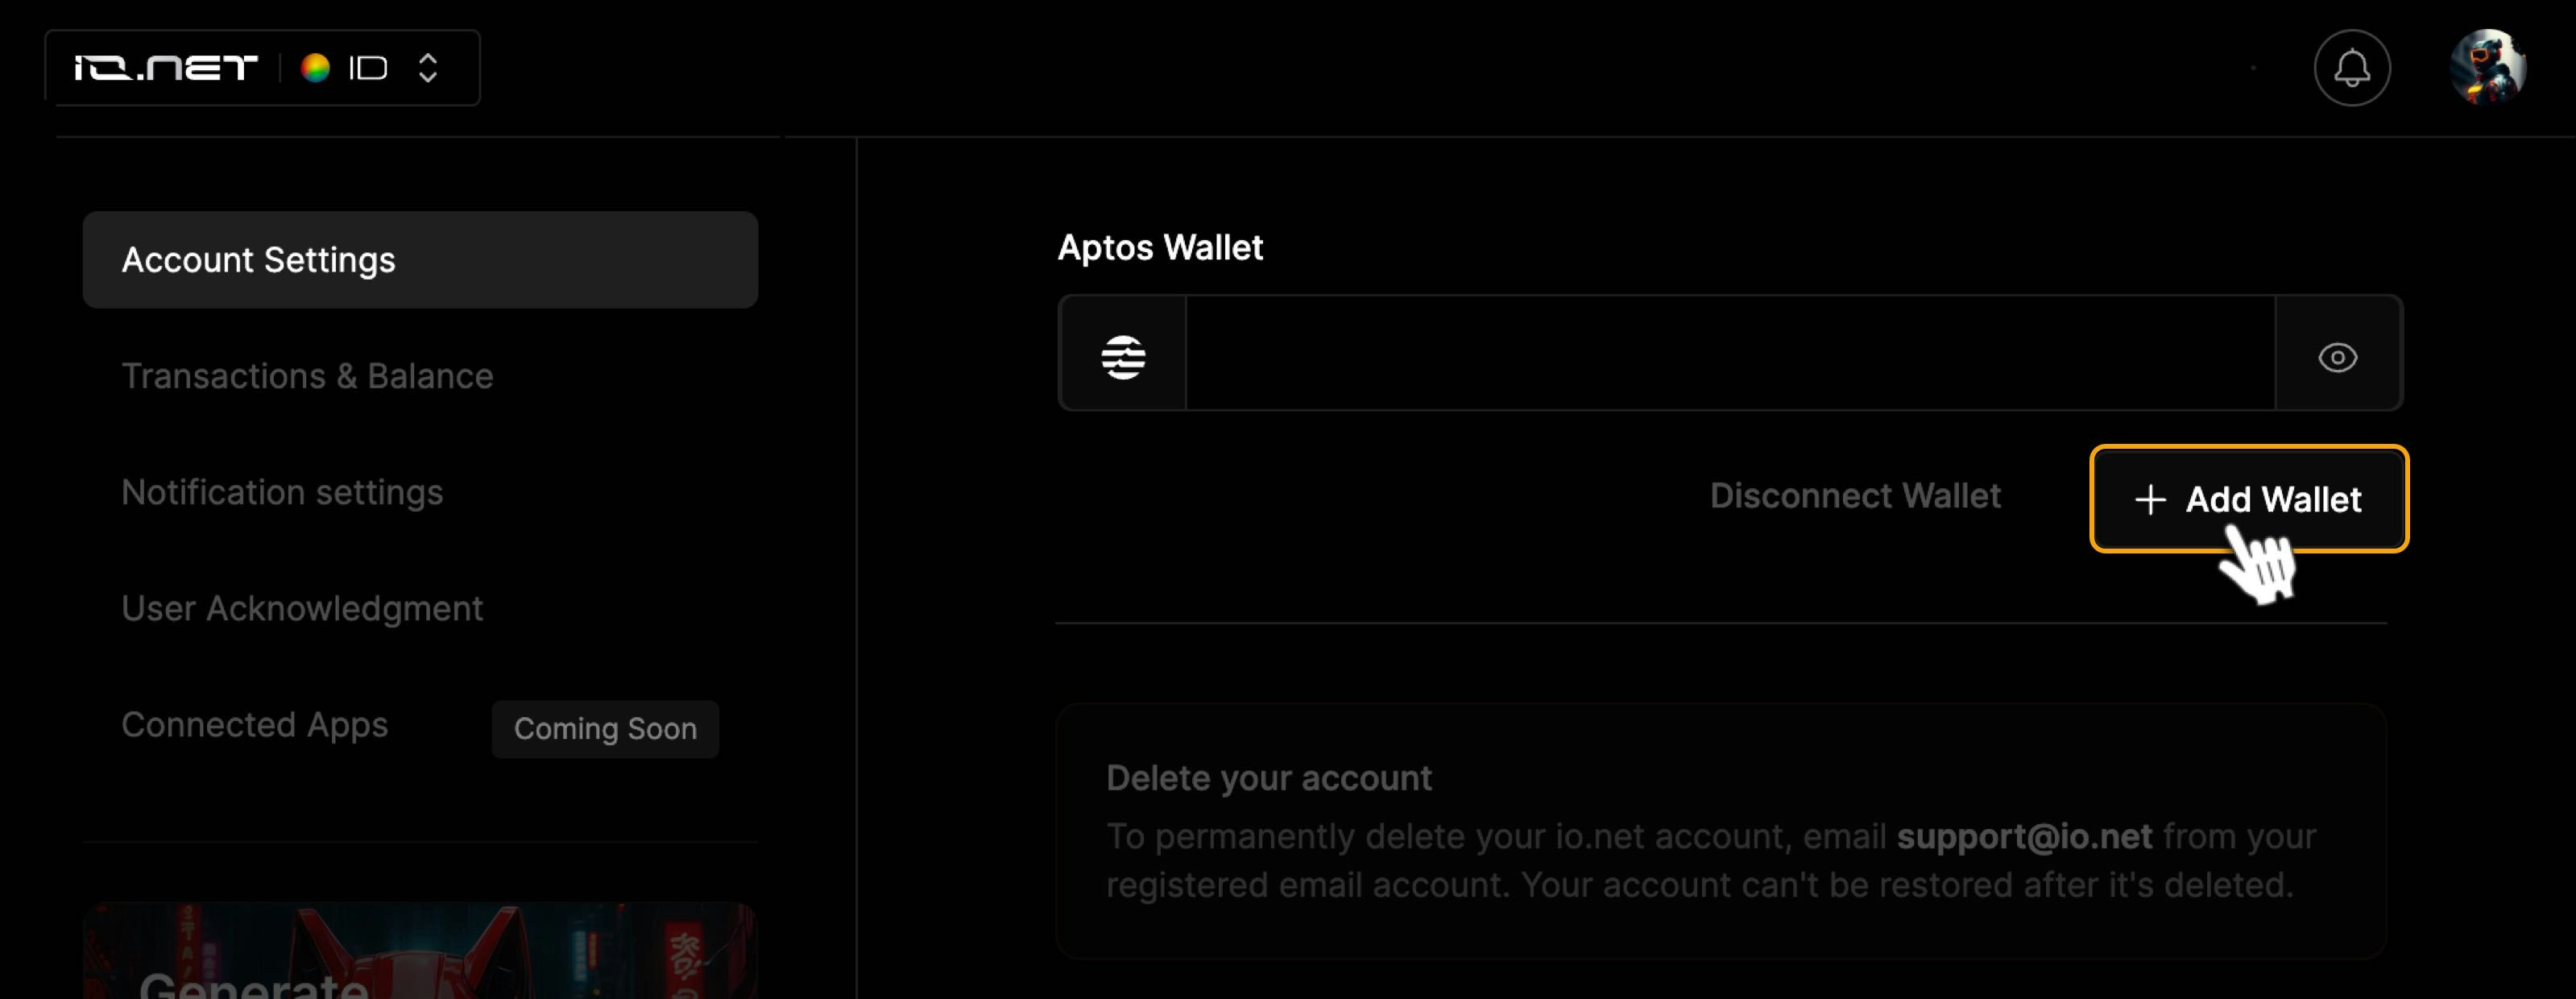
3. In the **Account Settings tab** (it's there by default), find the **Aptos Wallet** address field.
4. Click **Change Wallet** button
5. Enter your new **Aptos** wallet address.
6. Click **Connect** to add the new address.
**6. Go to your IO ID account to set your new APT wallet address.**
Follow the steps below to set your APT wallet address.
1. Log in to your io.net account.
2. Go to your **IO ID** profile.
3. In the **Account Settings tab** (it's there by default), find the **Aptos Wallet** address field.
4. Click **Change Wallet** button
5. Enter your new **Aptos** wallet address.
6. Click **Connect** to add the new address.