> ## Documentation Index
> Fetch the complete documentation index at: https://io.net/docs/llms.txt
> Use this file to discover all available pages before exploring further.
# CUDA Toolkit
> A step by step process for Downloading the CUDA Toolkit.
### What is CUDA?
The CUDA Toolkit is like a toolbox for programmers who want to make their software run faster using NVIDIA graphics cards. It has everything they need, like tools and instructions, to write code that takes advantage of the graphics card's power for tasks like math calculations, simulations, and artificial intelligence. Here are a few steps to install the CUDA Toolkit:
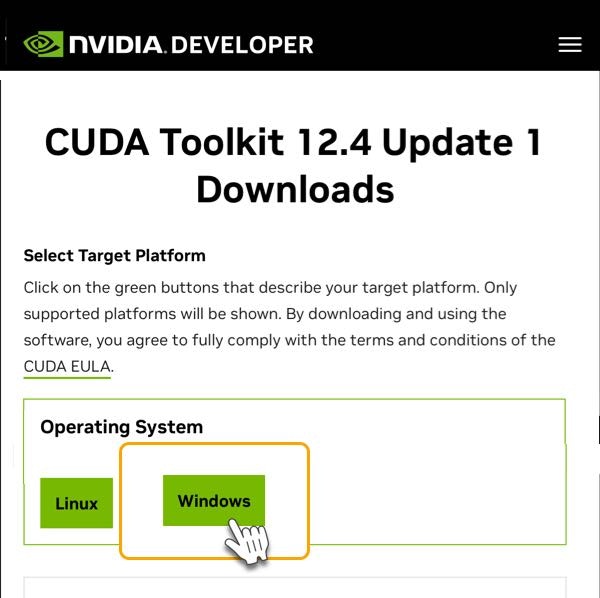
### 1. Go to [NVIDIA CUDA Toolkit](https://developer.nvidia.com/cuda-downloads) Download Page
Choose either the Windows or Linux operating system to access additional settings.
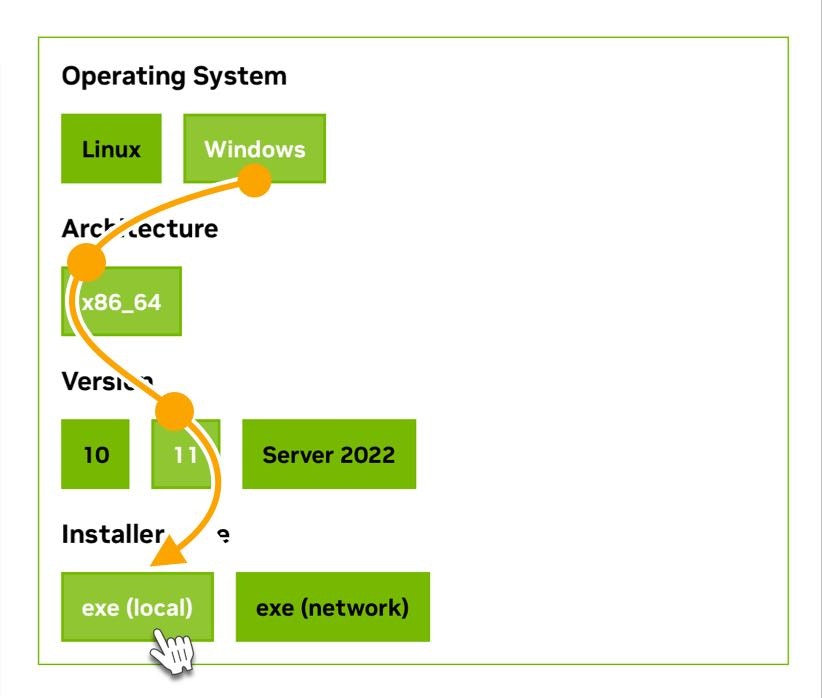
 ### 2. Provide Additional Information
For Windows, you need to choose your architecture, which is usually x86\_64 for 64-bit systems.
### 2. Provide Additional Information
For Windows, you need to choose your architecture, which is usually x86\_64 for 64-bit systems.
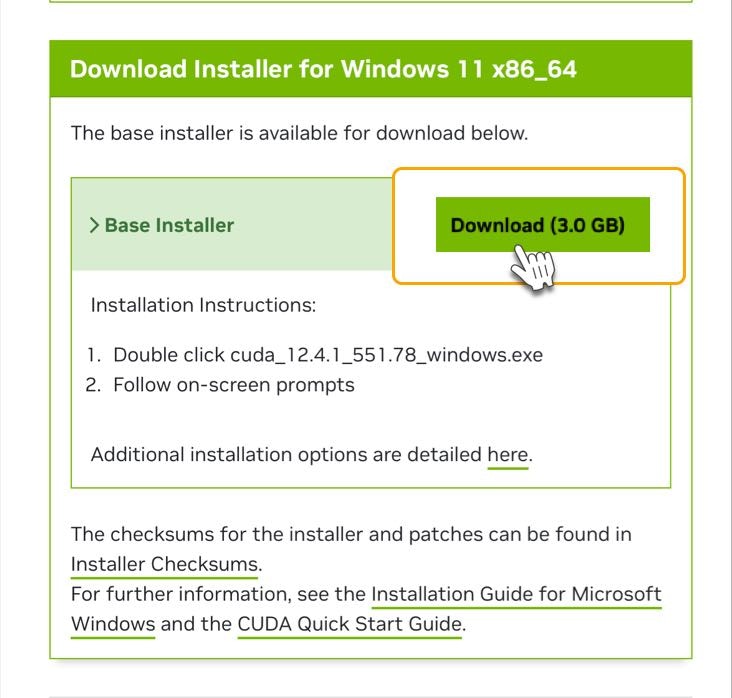
 ### 3. Download the Recommended Cuda Executable File
Downloading the Local Installer file may take some time. Please be patient. After downloading the file, run the installer.
### 3. Download the Recommended Cuda Executable File
Downloading the Local Installer file may take some time. Please be patient. After downloading the file, run the installer.
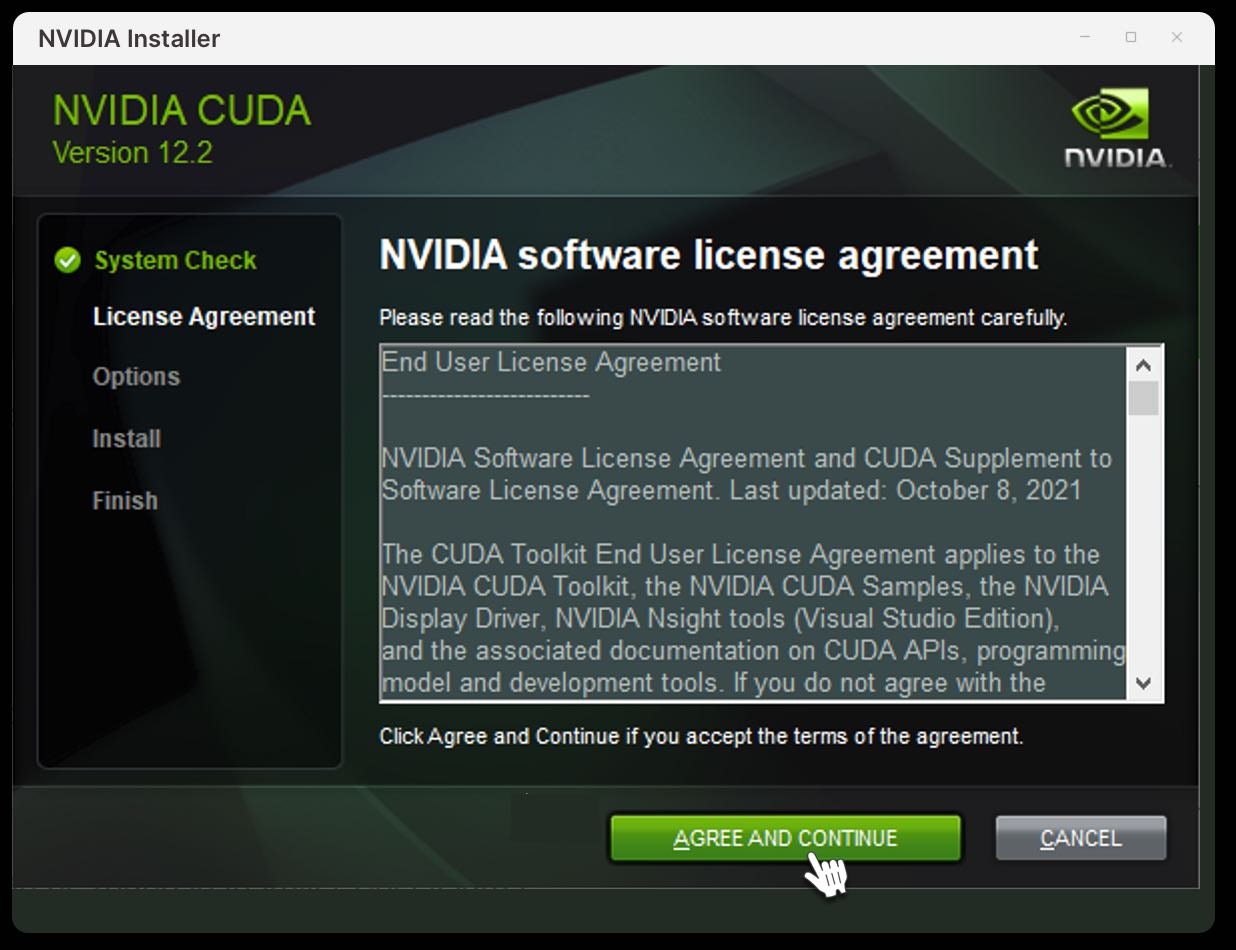
 ### 4. Open the .exe File and Proceed With the Installation Process
It includes steps such as agreeing to the terms and selecting installation options.
### 4. Open the .exe File and Proceed With the Installation Process
It includes steps such as agreeing to the terms and selecting installation options.
 ### 5. Fixing CUDA Toolkit Installation Errors
Installation errors while installing CUDA Toolkit are common issues encountered by many users.
### 5. Fixing CUDA Toolkit Installation Errors
Installation errors while installing CUDA Toolkit are common issues encountered by many users.
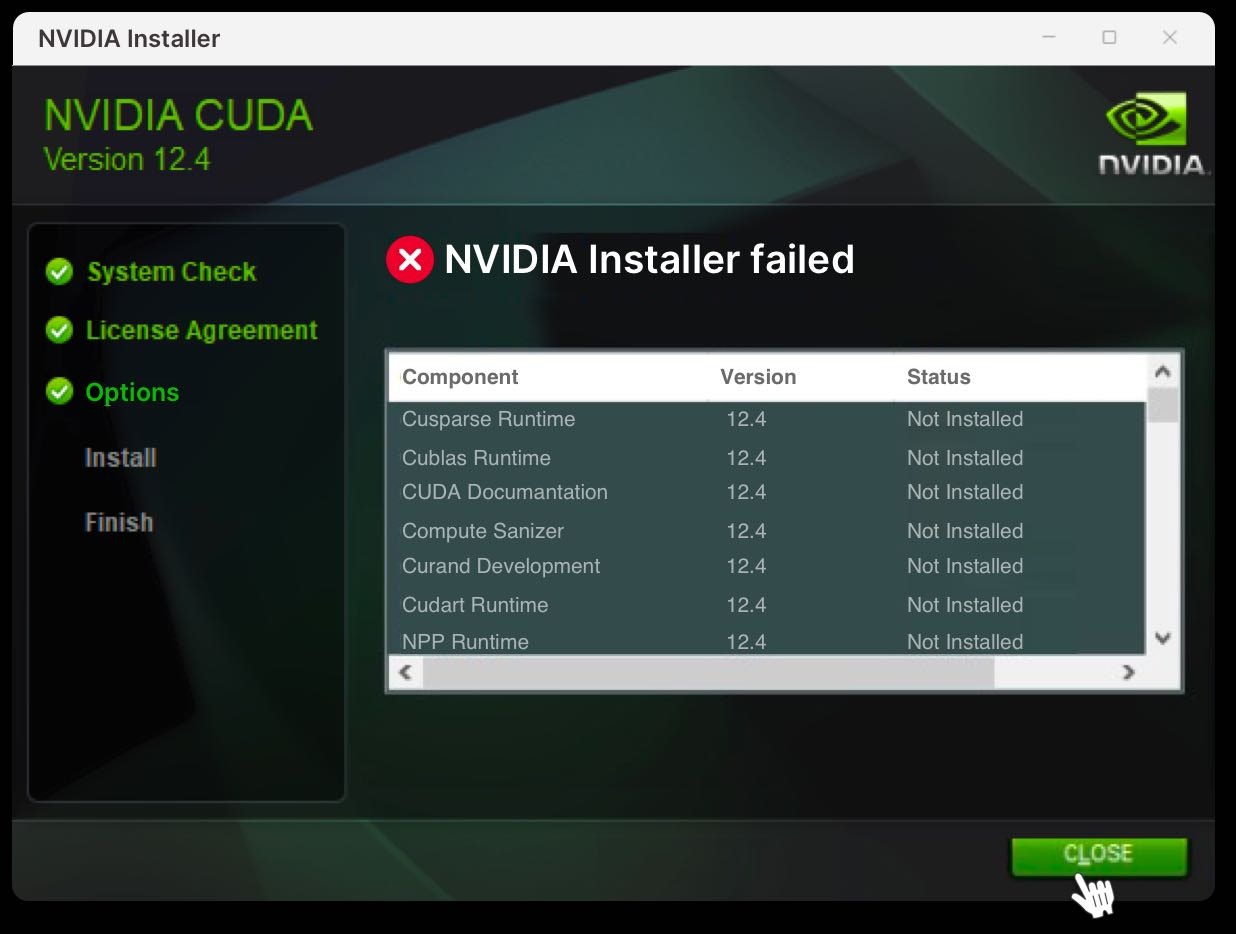 Follow these steps to resolve the error:
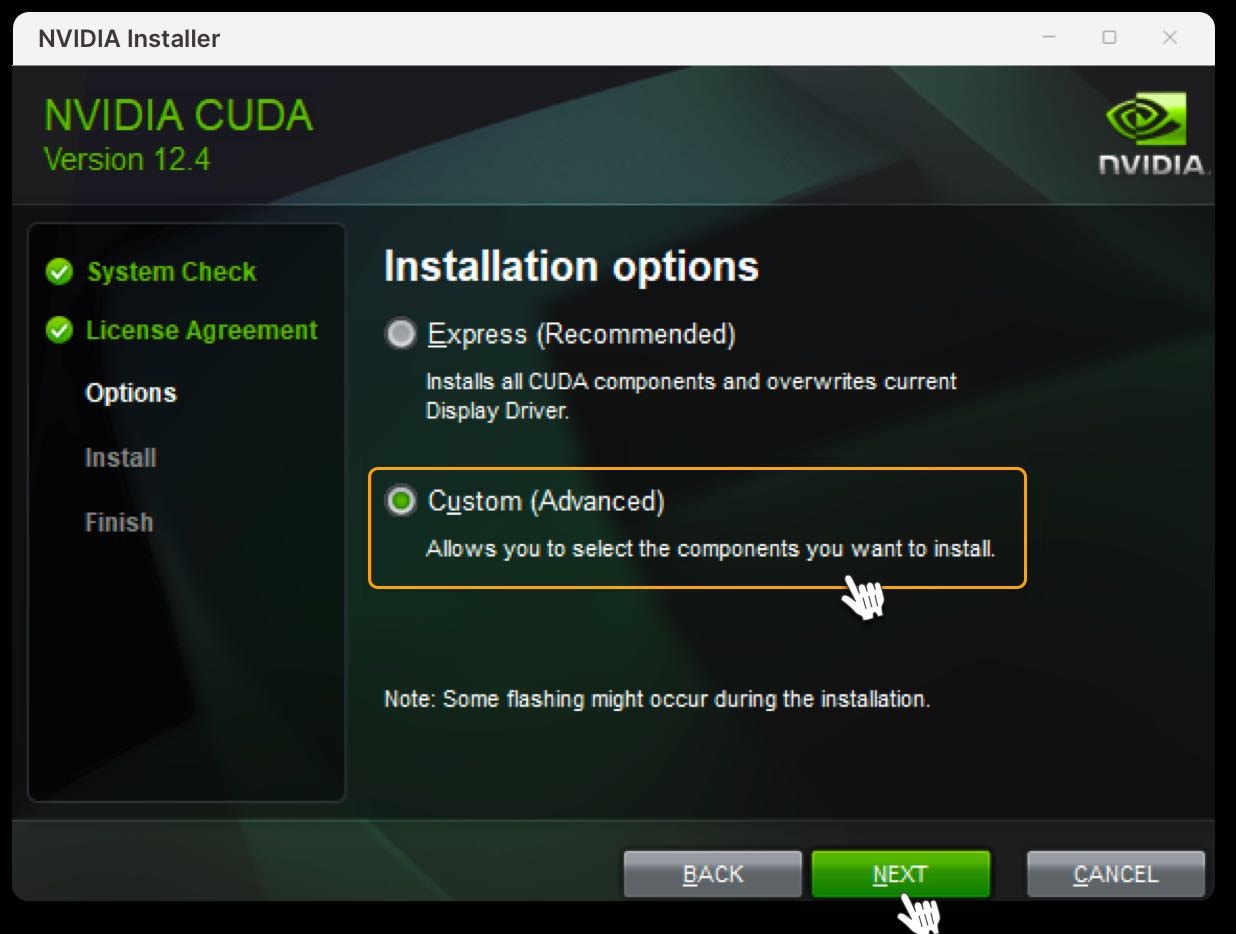
1. When reinstalling the CUDA Toolkit, opt for **Custom (Advanced)** installation.
Follow these steps to resolve the error:
1. When reinstalling the CUDA Toolkit, opt for **Custom (Advanced)** installation.
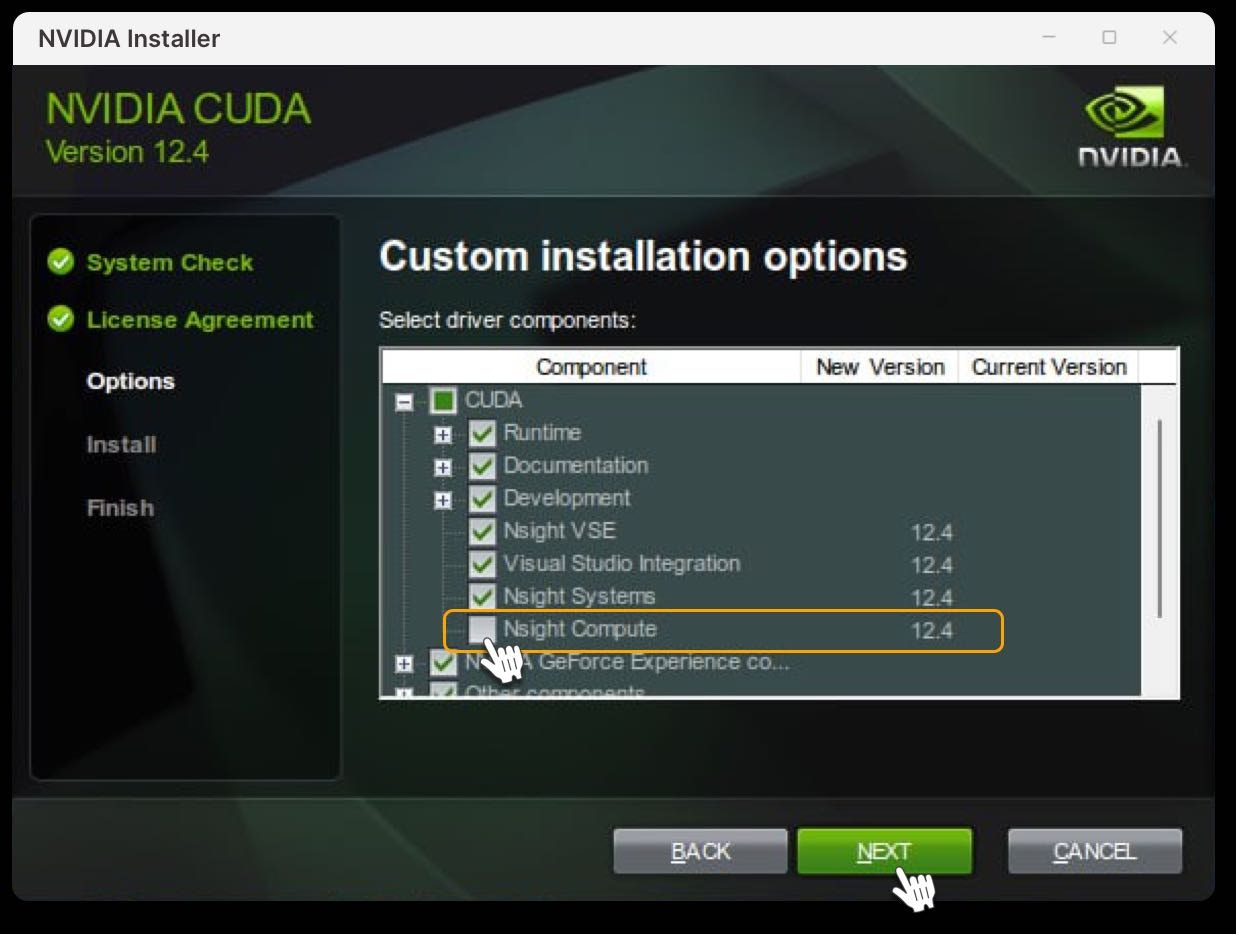
 2. After selecting the custom installation option, expand the **CUDA** section and uncheck the option for **Nsight Compute** to exclude it from the installation. This step ensures that only the necessary components are installed, reducing the likelihood of errors.
 3. Proceed with the installation process.
### 6. Verify the Installation Process
3. Proceed with the installation process.
### 6. Verify the Installation Process
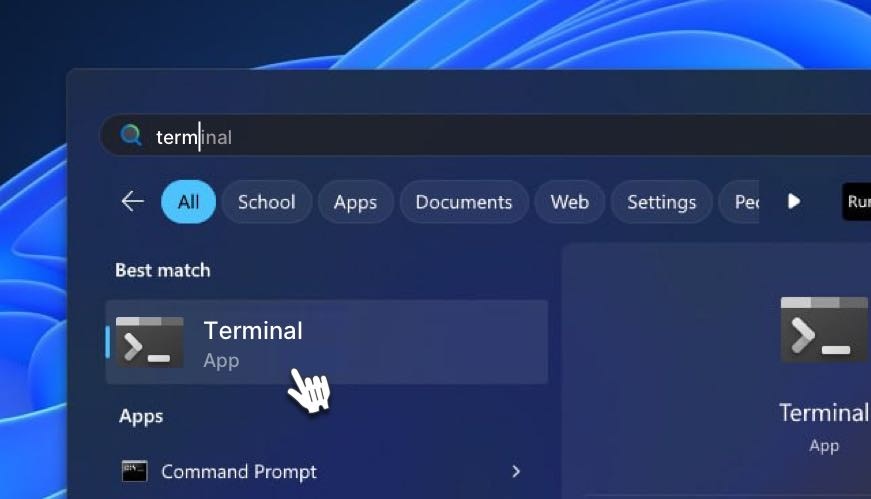 After the installation, open Windows Terminal and enter the following command:
```Text Terminal Command theme={null}
nvcc --version
```
You should receive a similar response:
```
nvcc: NVIDIA (R) Cuda compiler driver
Copyright (c) 2005-2022 NVIDIA Corporation
Built on Wed_Sep_21_10:41:10_Pacific_Daylight_Time_2022
Cuda compilation tools, release 11.8, V11.8.89
Build cuda_11.8.r11.8/compiler.31833905_0
```
### That’s It. You Have the Cuda Toolkit Installed and Ready
Now that CUDA Toolkit has been successfully installed and is running, you can proceed with [setting up the Worker](/docs/install-on-windows)
Feel free to [check our knowledge base](https://support.io.net/en/support/home) for answers, and if you still need help, don’t hesitate to open a support ticket!
After the installation, open Windows Terminal and enter the following command:
```Text Terminal Command theme={null}
nvcc --version
```
You should receive a similar response:
```
nvcc: NVIDIA (R) Cuda compiler driver
Copyright (c) 2005-2022 NVIDIA Corporation
Built on Wed_Sep_21_10:41:10_Pacific_Daylight_Time_2022
Cuda compilation tools, release 11.8, V11.8.89
Build cuda_11.8.r11.8/compiler.31833905_0
```
### That’s It. You Have the Cuda Toolkit Installed and Ready
Now that CUDA Toolkit has been successfully installed and is running, you can proceed with [setting up the Worker](/docs/install-on-windows)
Feel free to [check our knowledge base](https://support.io.net/en/support/home) for answers, and if you still need help, don’t hesitate to open a support ticket!