> ## Documentation Index
> Fetch the complete documentation index at: https://io.net/docs/llms.txt
> Use this file to discover all available pages before exploring further.
# MacOS: Install Docker
> A step-by-step guide for installing Docker on MacOS-based machines.
### What is Docker?
Let's take a quick look at what Docker is? Imagine Docker as a magic box where you put your software and everything it needs to run. This box can be easily carried to any computer, and when you open it, your software works just the way you packed it, without needing anything extra from that computer. Here are a few steps to install Docker:
### 1. Download Docker
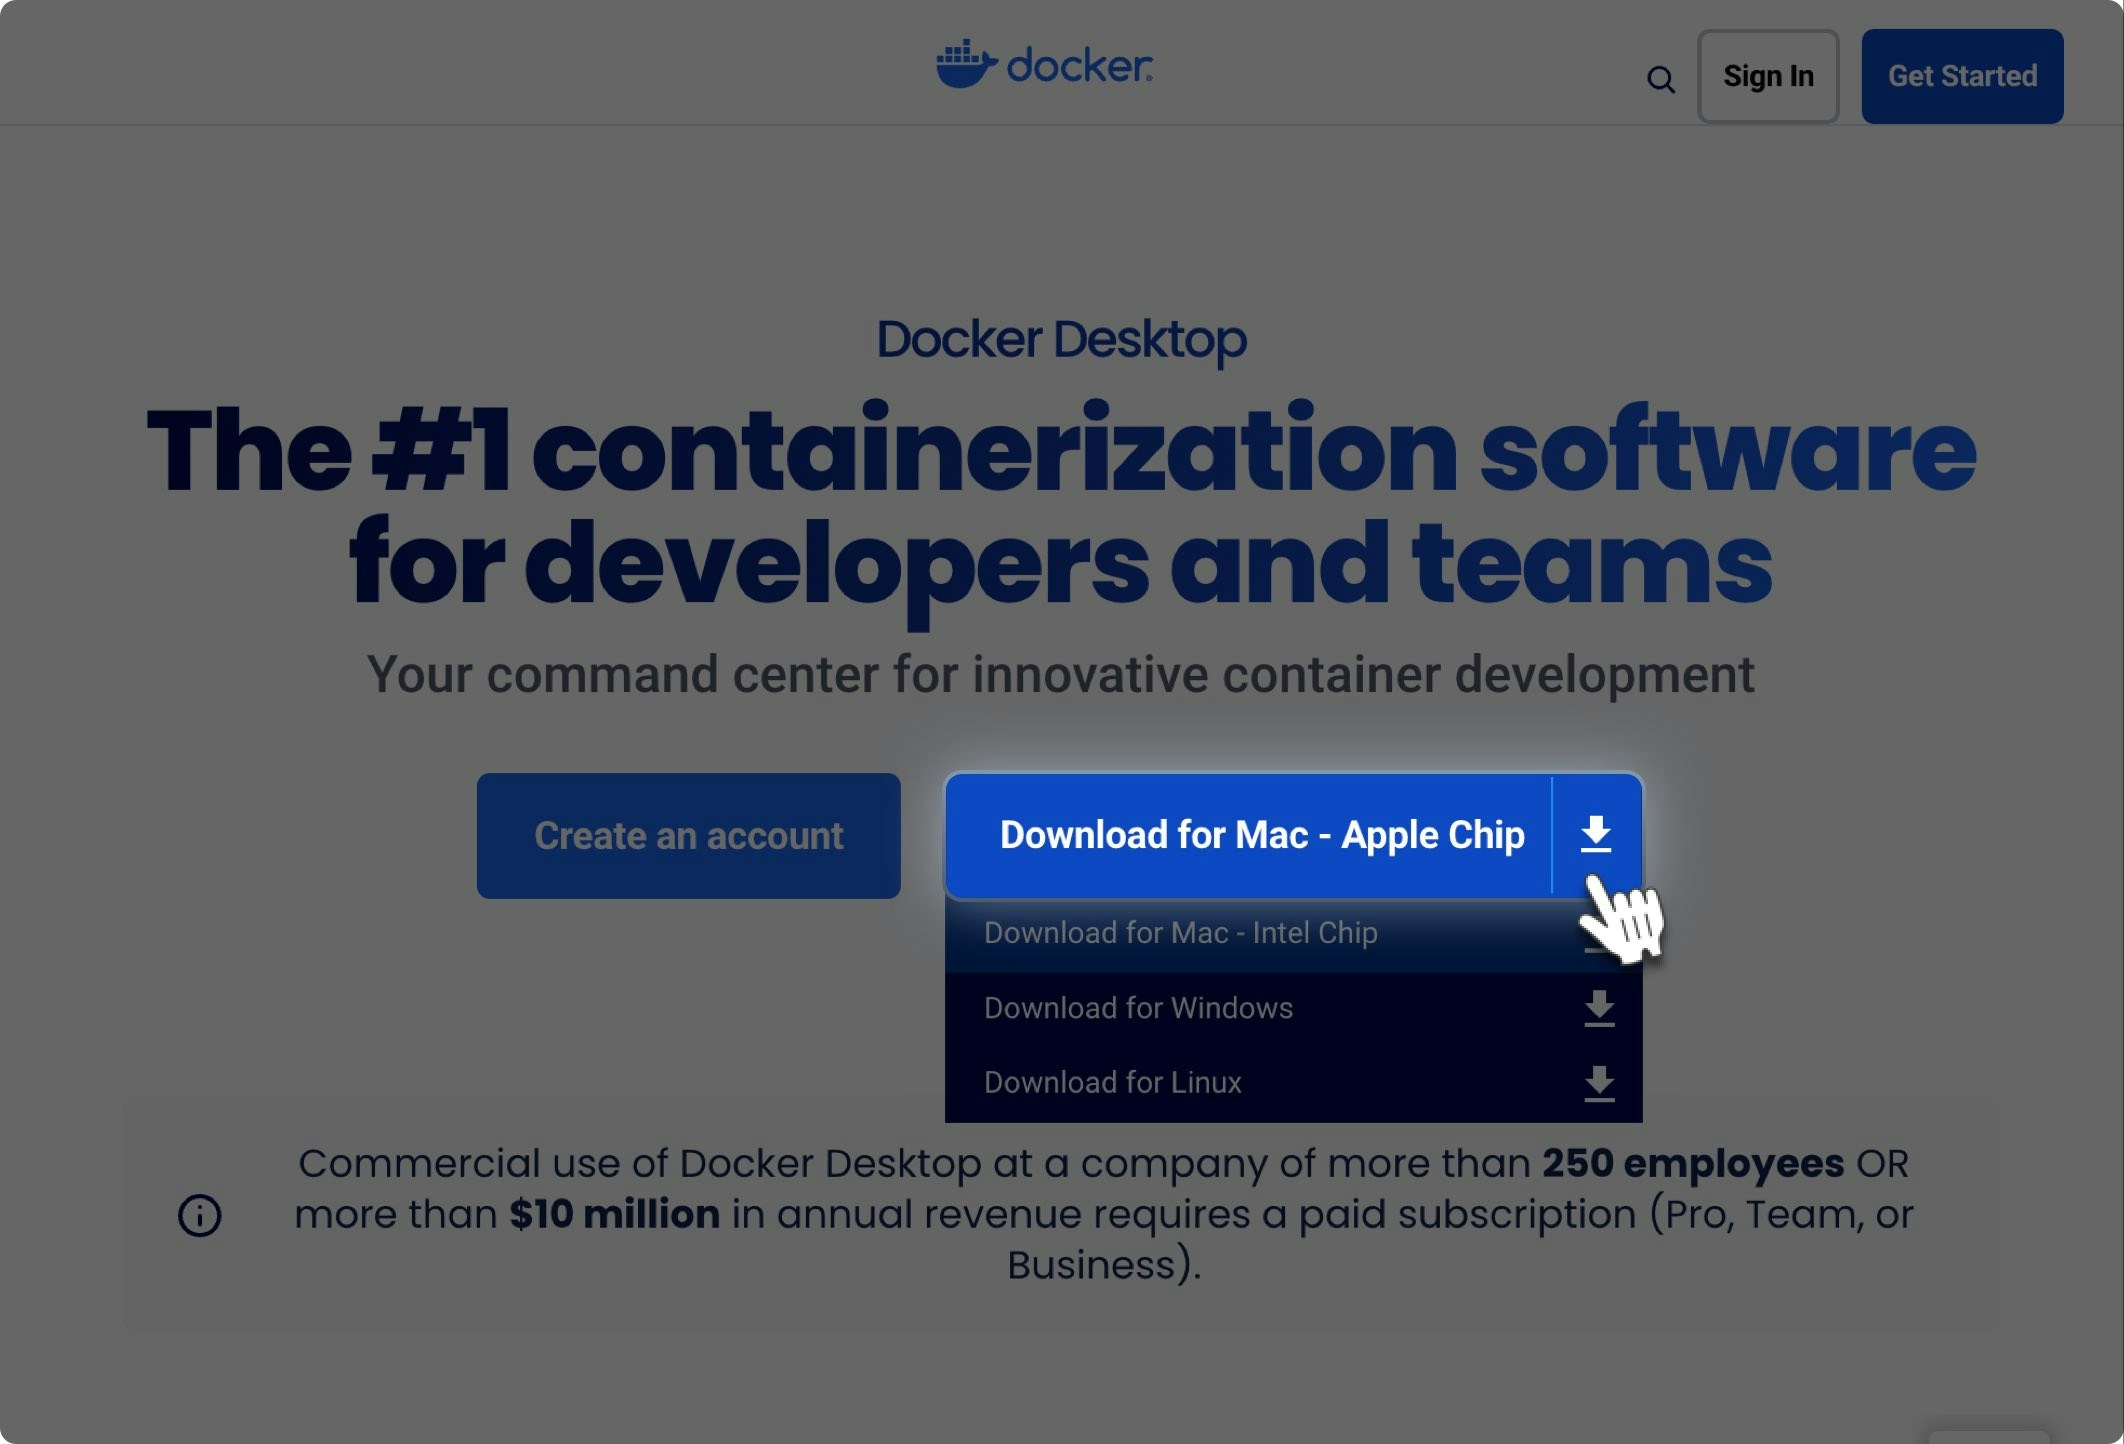
Go to the [Docker website](https://www.docker.com/products/docker-desktop/) and click on "**Download for Mac - Apple Chip.**"
Downloading the Docker file may take some time. Please be patient.
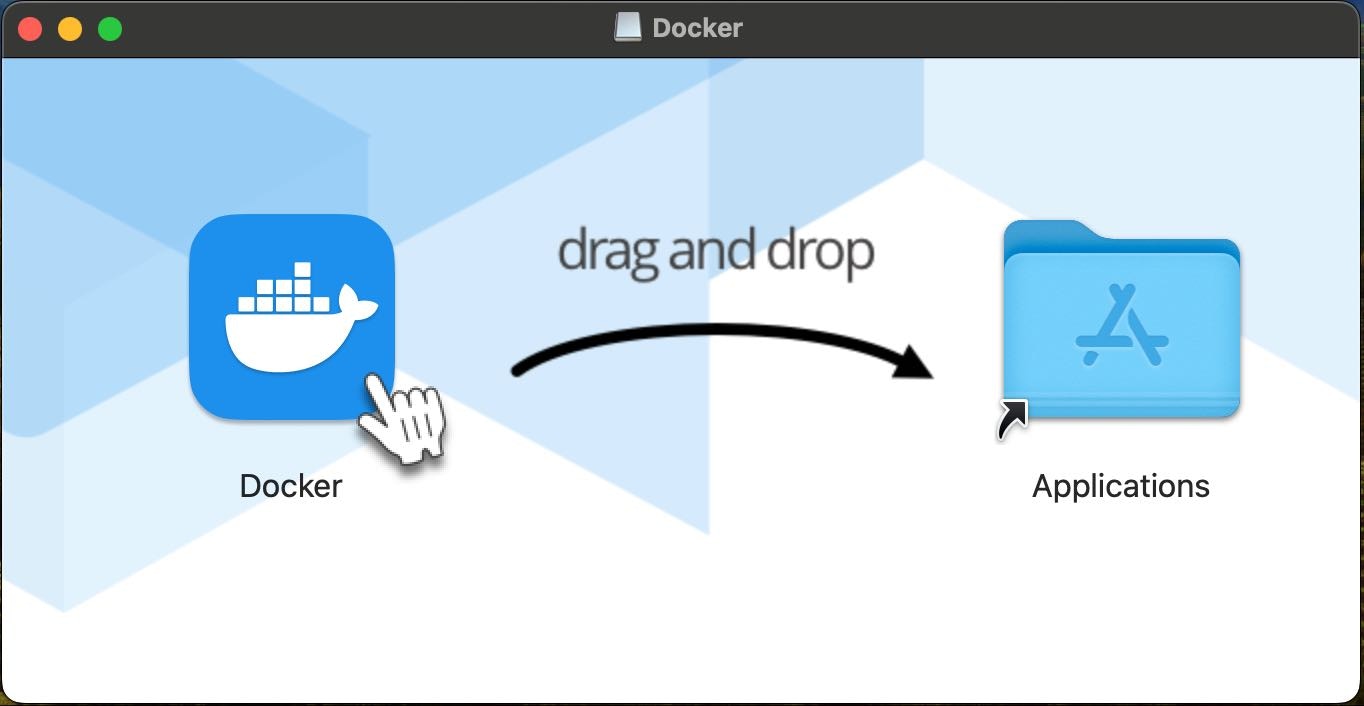
### 2. Open the docker.dmg File and Drag It Into the Applications Folder
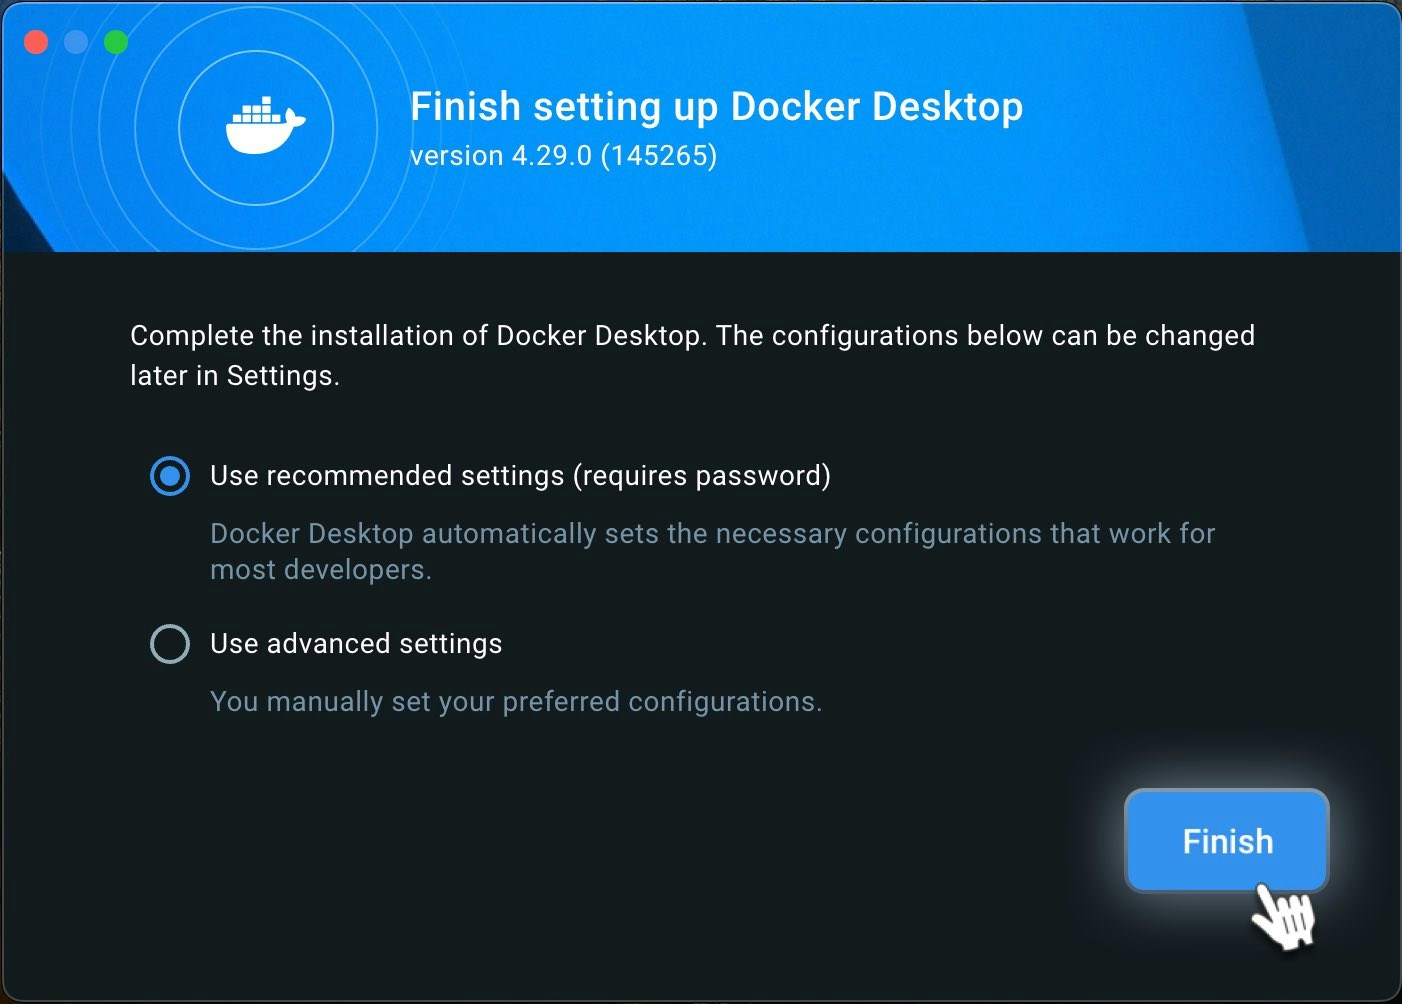
### 3. Start the Docker Installation From the Applications Folder
We recommend using the recommended settings during the installation wizard.
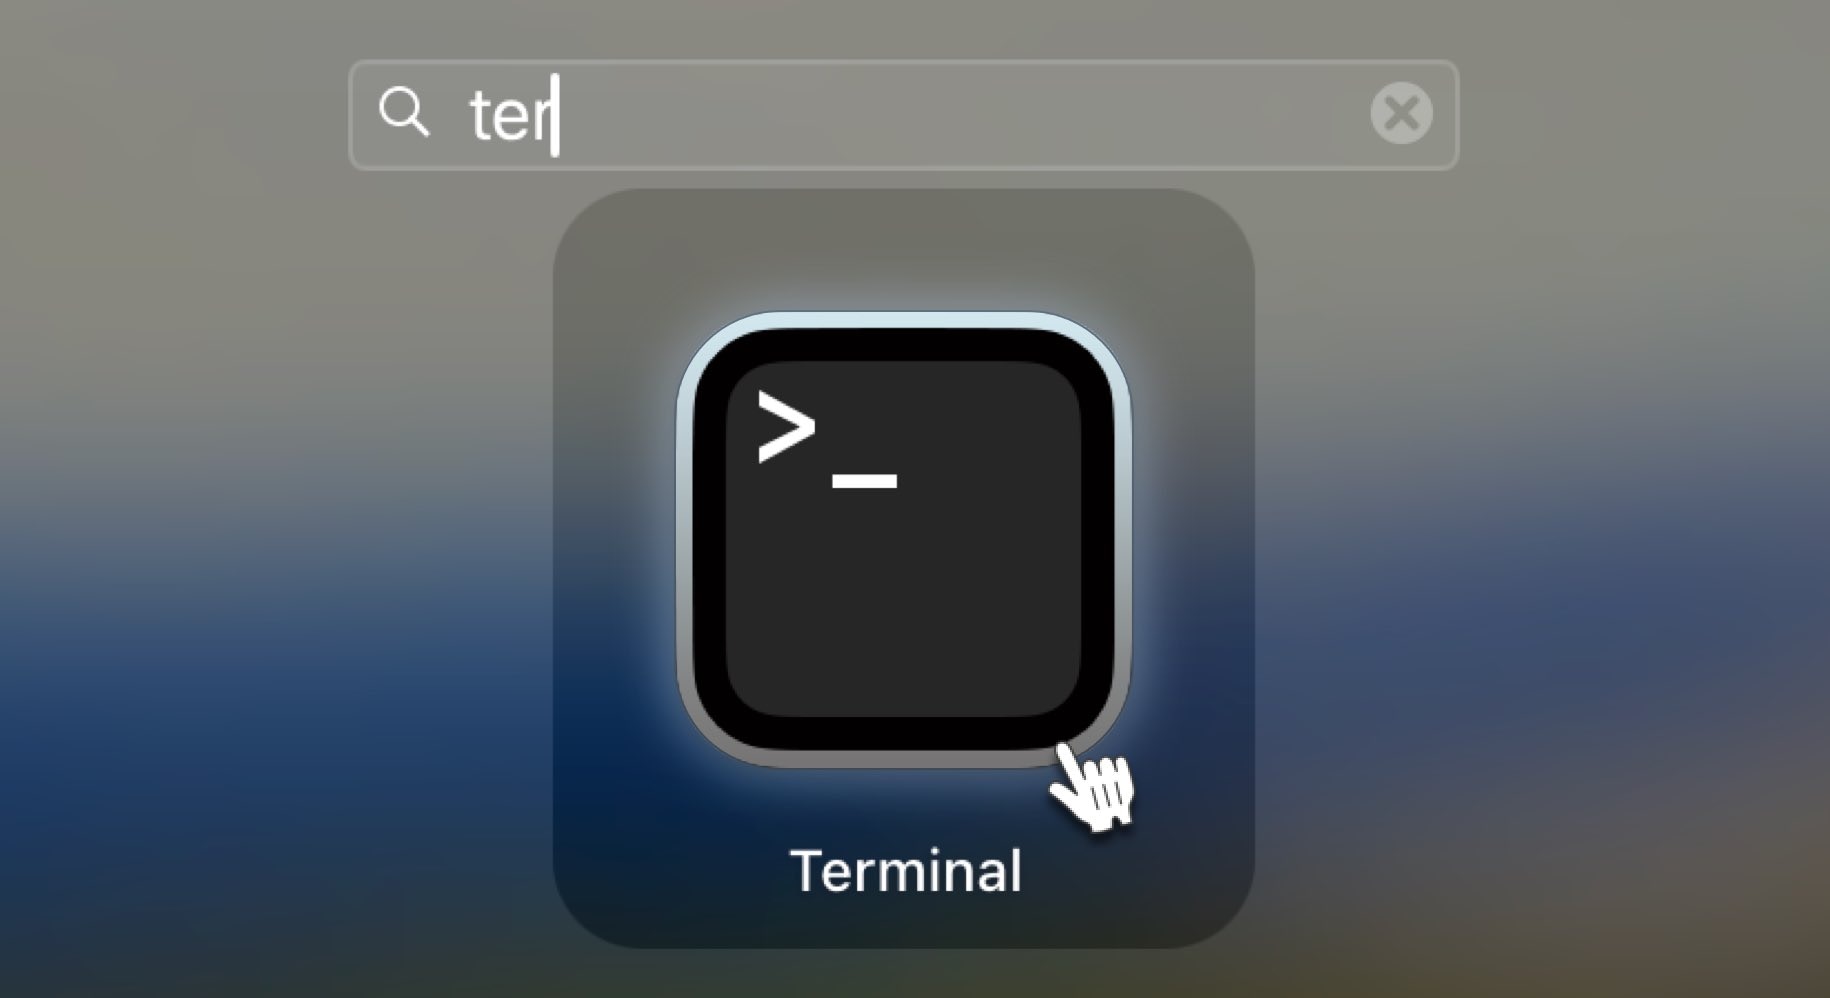
### 4. Open Terminal Through Launchpad
Click the Launchpad icon in the Dock, type Terminal in the search field, then click Terminal
### 5. Verify the Installation in Terminal
Copy and paste the following line into Terminal.
```Text Terminal Command theme={null}
docker --version
```
The result will be the current version of Docker.
```
Docker version 24.0.6, build ed223bc
```
### Expanding Virtual Disk Limit
1. Click **Settings**.
2. Go to **Resources** on the left nav.
3. Check the amount of space shown under **Virtual disk limit**. **Note:** Docker does not natively assign all of your disk space.
4. Drag the slider to your desired virtual disk limit amount.
5. Click **Apply & restart**.
### Congratulations on Successfully Setting up Docker
Now that Docker has been successfully installed and is running, you can proceed with [setting up the Worker](/guides/workers/install-on-macos).
Feel free to [check our knowledge base](https://support.io.net/en/support/home) for answers, and if you still need help, don’t hesitate to open a support ticket!
 ### 2. Open the docker.dmg File and Drag It Into the Applications Folder
 ### 3. Start the Docker Installation From the Applications Folder
We recommend using the recommended settings during the installation wizard.
### 3. Start the Docker Installation From the Applications Folder
We recommend using the recommended settings during the installation wizard.
 ### 4. Open
Terminal Through Launchpad
Click the Launchpad icon in the Dock, type Terminal in the search field, then click Terminal
### 4. Open
Terminal Through Launchpad
Click the Launchpad icon in the Dock, type Terminal in the search field, then click Terminal
 ### 5. Verify the Installation in Terminal
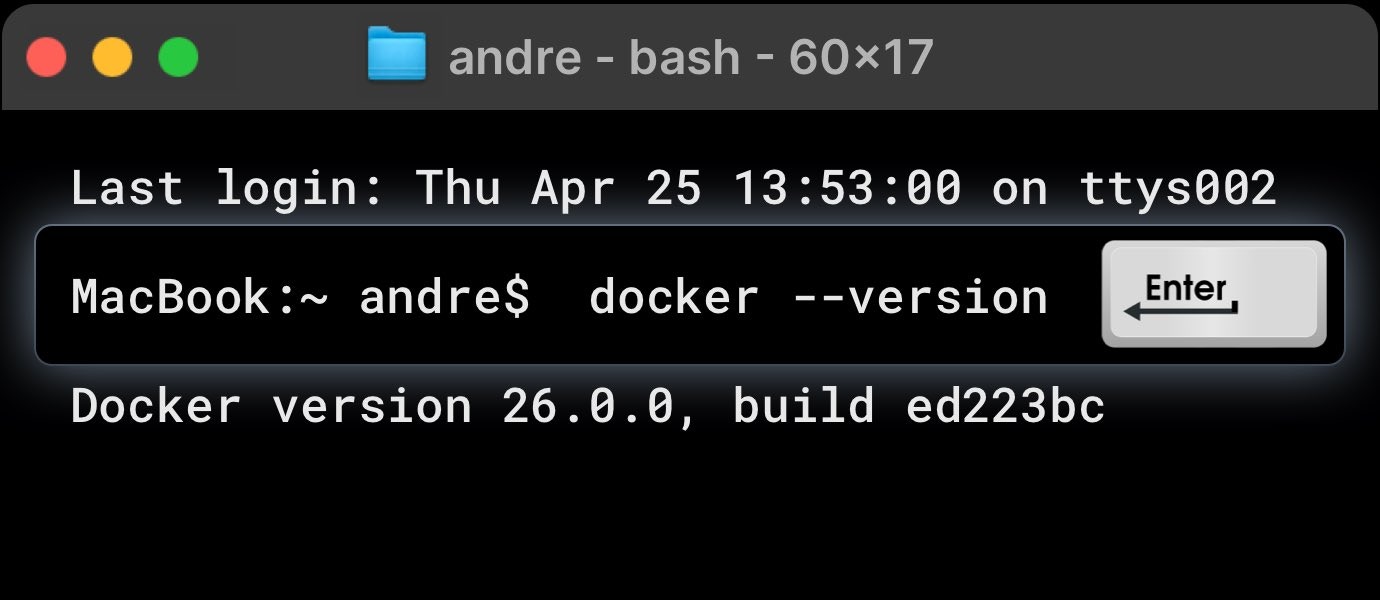 Copy and paste the following line into Terminal.
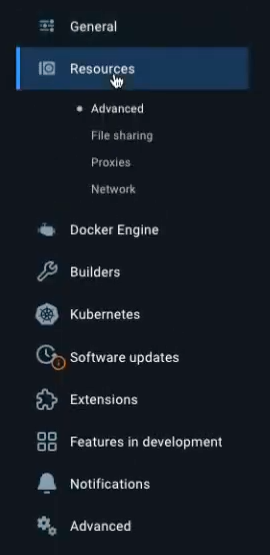 3. Check the amount of space shown under **Virtual disk limit**. **Note:** Docker does not natively assign all of your disk space.
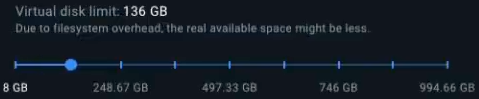 4. Drag the slider to your desired virtual disk limit amount.
5. Click **Apply & restart**.
### Congratulations on Successfully Setting up Docker
Now that Docker has been successfully installed and is running, you can proceed with [setting up the Worker](/guides/workers/install-on-macos).
4. Drag the slider to your desired virtual disk limit amount.
5. Click **Apply & restart**.
### Congratulations on Successfully Setting up Docker
Now that Docker has been successfully installed and is running, you can proceed with [setting up the Worker](/guides/workers/install-on-macos).