> ## Documentation Index
> Fetch the complete documentation index at: https://io.net/docs/llms.txt
> Use this file to discover all available pages before exploring further.
# Windows: Install Docker
> A step-by-step guide for installing Docker on Windows-based machines
### What is Docker?
Let's take a quick look at what **Docker** is? Imagine Docker as a magic box where you put your software and everything it needs to run. This box can be easily carried to any computer, and when you open it, your software works just the way you packed it, without needing anything extra from that computer. Here are a few steps to install Docker:
**Network Capability Issue on Docker Desktop for Windows**
We are currently investigating a network performance issue with Docker Desktop on Windows. This might be due to Docker's overhead, and we are exploring potential fixes.
**Recommendation**: \
If you experience this issue, we recommend switching to Linux as a temporary workaround.
Thank you for your understanding and patience.
### First, verify that Virtualization is Enabled on your Computer.
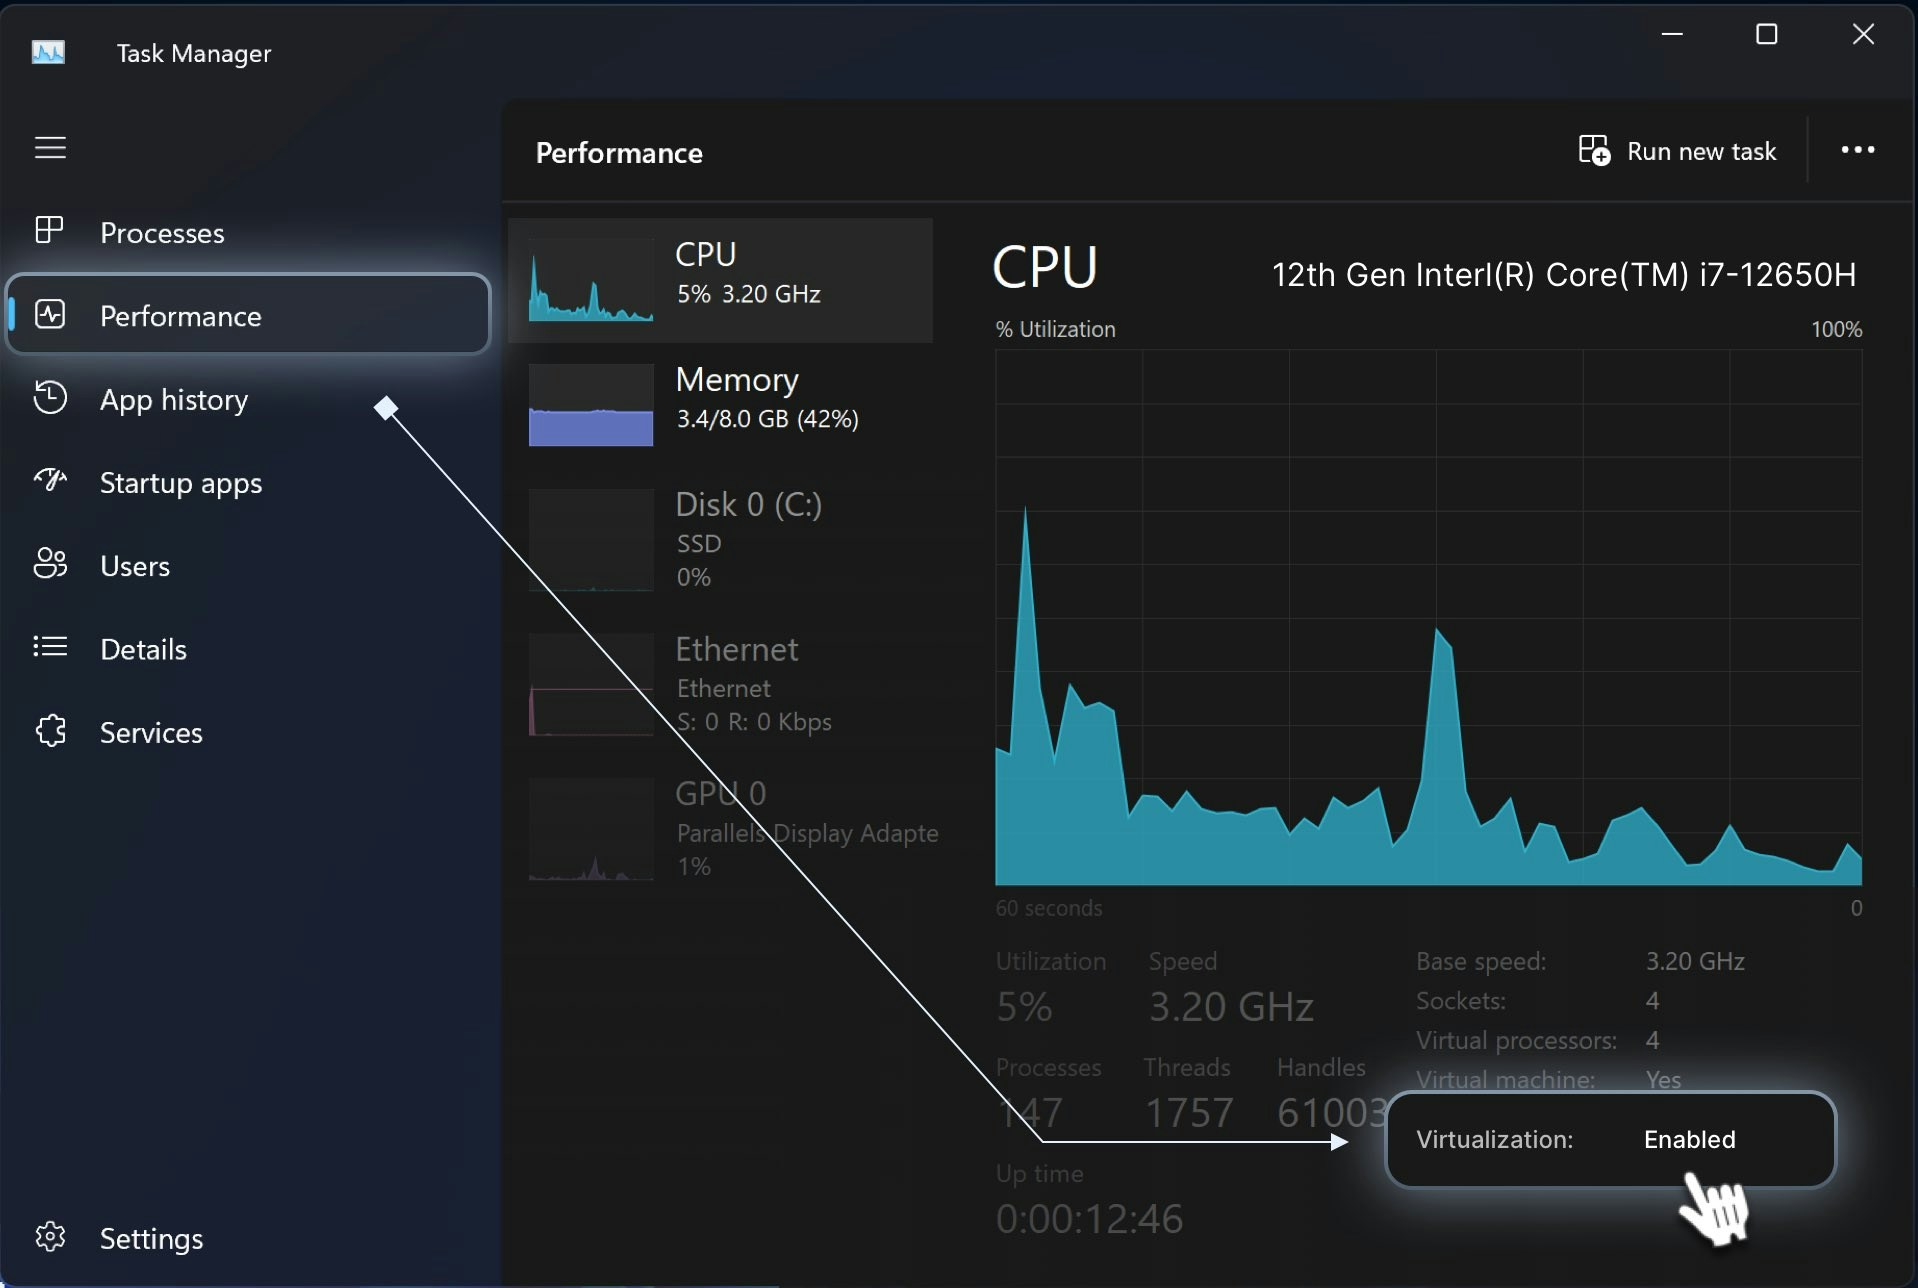
To verify if virtualization is enabled, open **Task Manager** by pressing Ctrl+Alt+Del. Select "**Performance**" and then click on the "**CPU**" tab to view the information in the bottom right corner, as shown in the image below:
If it's not enabled, follow these steps:
1. To enable virtualization technology in your BIOS or UEFI settings, you need to access your computer's BIOS or UEFI configuration menu during the boot process. The specific steps can vary depending on your computer's manufacturer and model, but here are the general steps to enable virtualization.
2. Install WSL 2 by opening the PowerShell as an Administrator. To do this, search for "PowerShell" in the Start menu, right-click on "Windows PowerShell," and select "Run as administrator."
3. Run the following command to enable the WSL feature in **Windows 10/11** in Terminal:
```Text Terminal Command theme={null}
dism.exe /online /enable-feature /featurename:Microsoft-Windows-Subsystem-Linux /all /norestart
```
4. Then **Enable** the Virtual Machine Platform Feature while still in the same PowerShell window by running the following command:
```Text Terminal Command theme={null}
dism.exe /online /enable-feature /featurename:VirtualMachinePlatform /all /norestart
```
5. Then set WSL 2 as the Default Version (you might be required to restart your machine sometimes):
```Text Terminal Command theme={null}
wsl --set-default-version 2
```
### 1. Download Docker
Go to the [Docker website](https://www.docker.com/products/docker-desktop/) and click on "**Download for Windows**." Downloading the Docker file may take some time. Please be patient.
### 2. Run the Installation Process
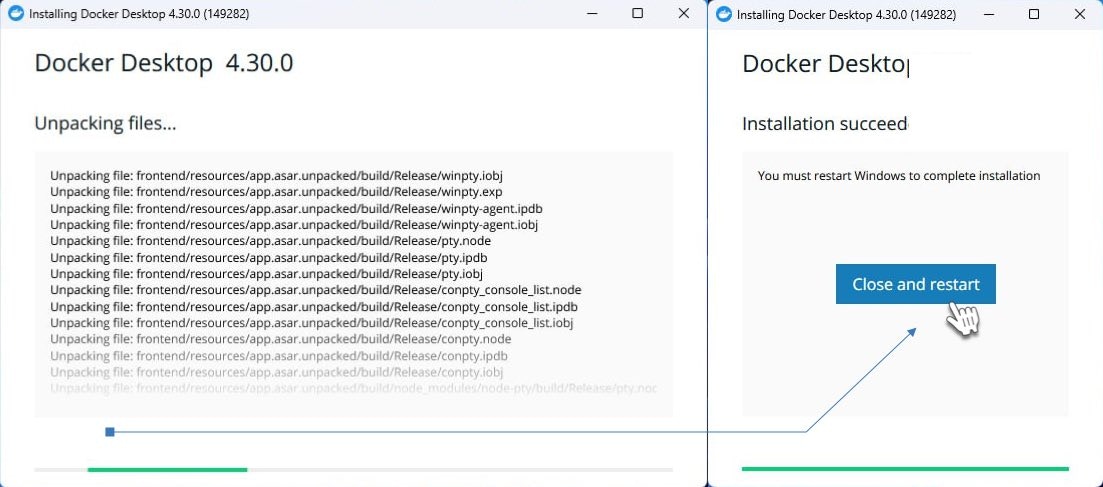
The installation starts when you open the file. Follow the prompts. When the installation process is completed, you need to **restart your computer.** Just click the "**Close and Restart**" button on the last step of the Docker wizard:
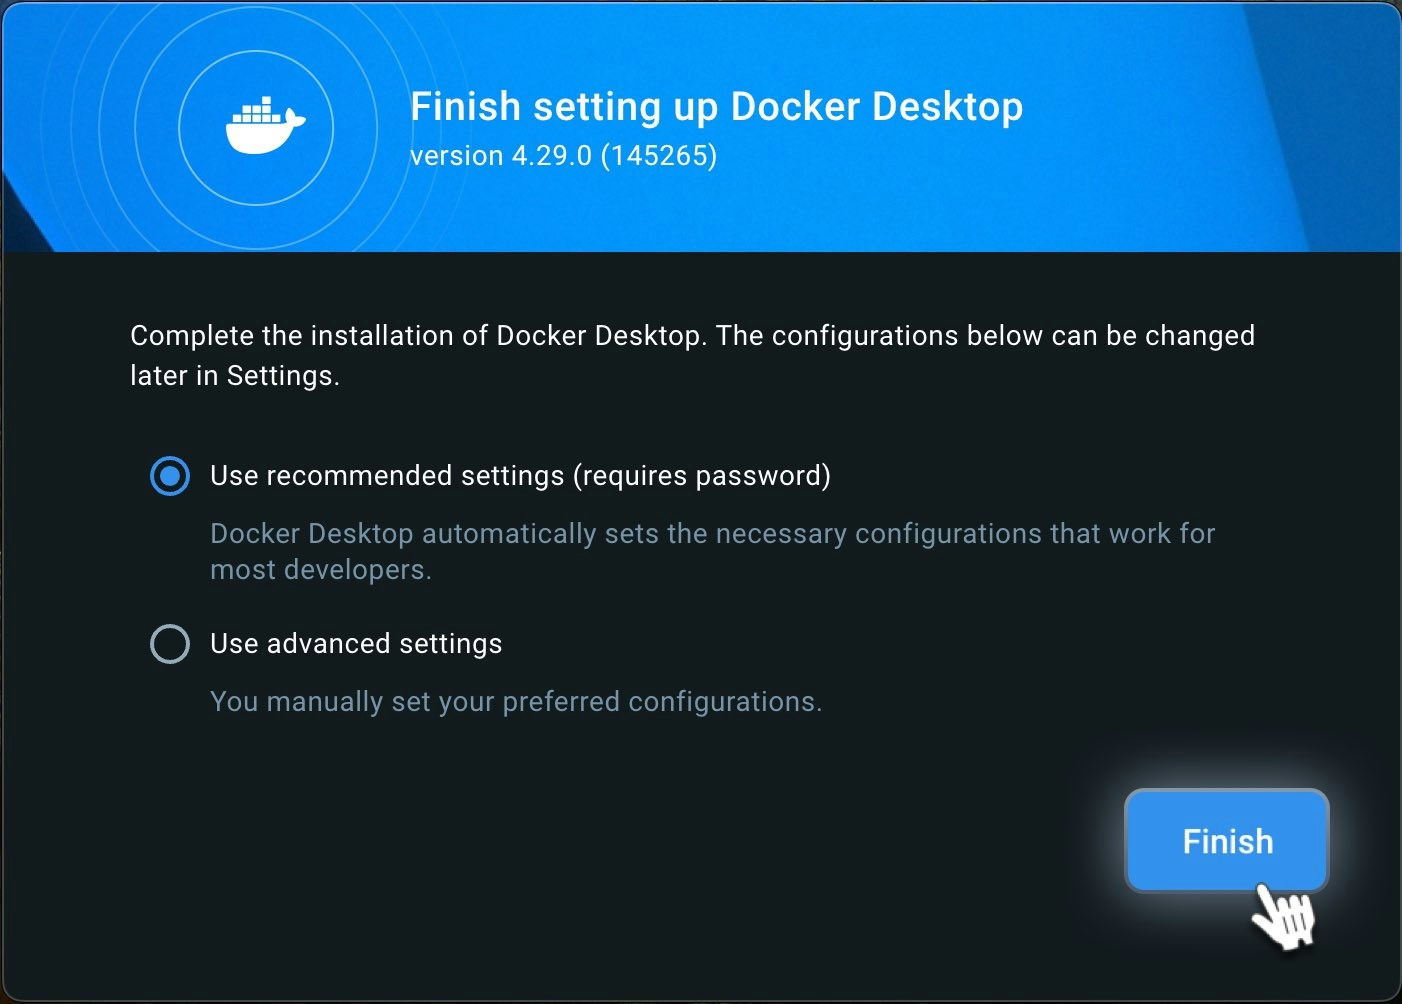
After rebooting, open Docker and use the recommended settings from the installation wizard:
### 3. Configure WSL2 to Integrate with Docker Settings
Open the Docker settings. In the Resources section, choose WSL 2 Integration and check the box for WSL 2 to integrate.
### 4. Open Terminal Through Start Menu
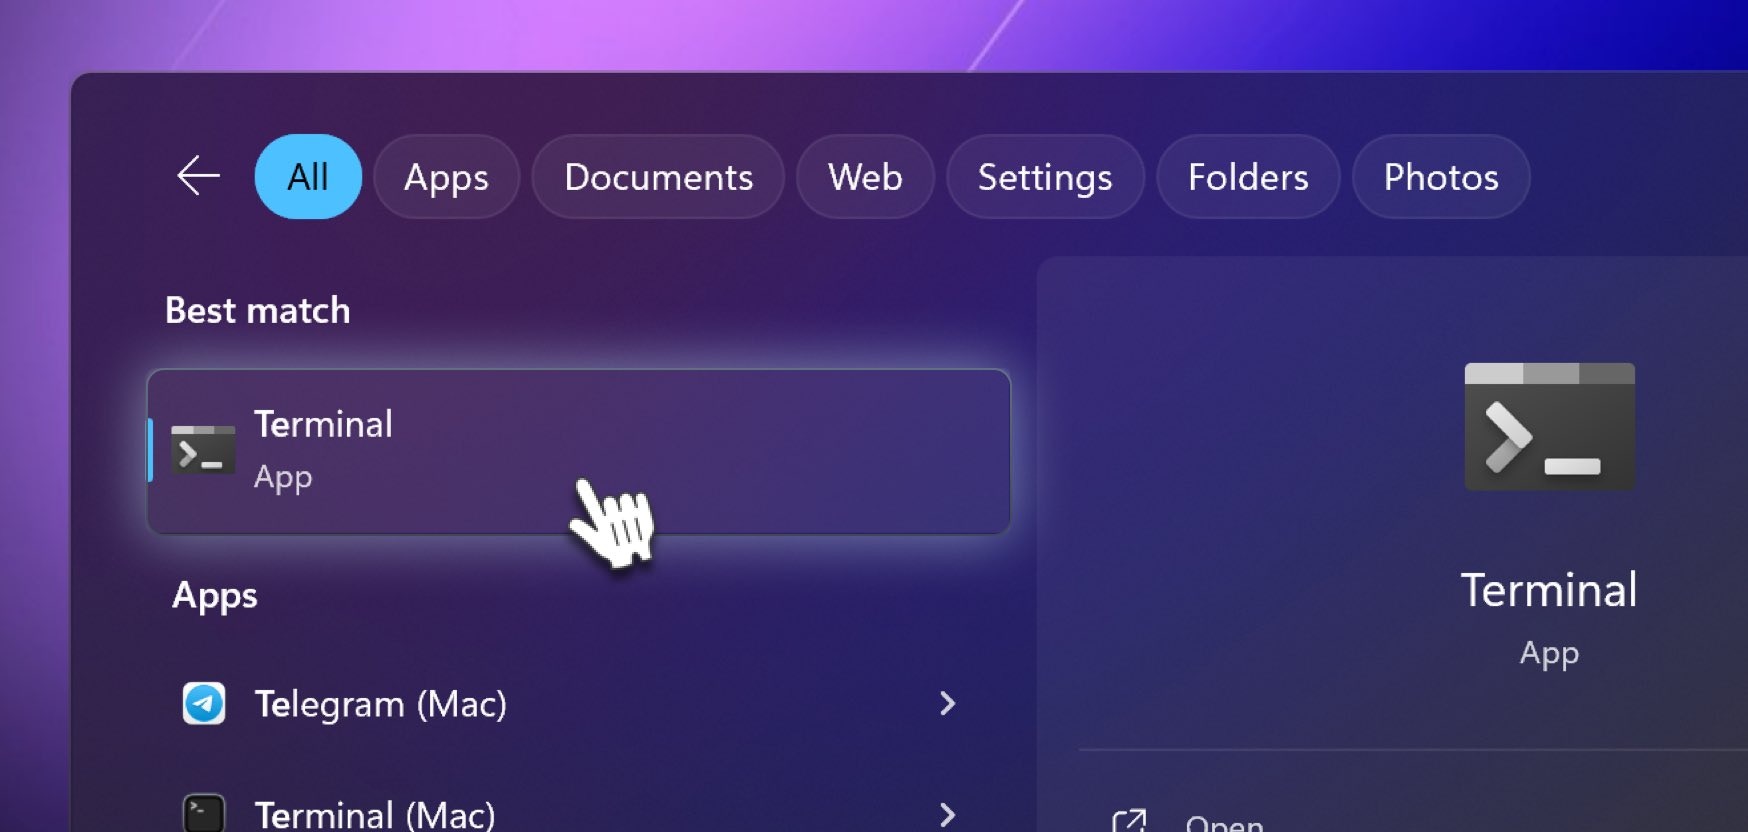
Click the Start Menu icon in the Popup Menu, type Terminal in the search field, then click Terminal
### 5. Verify the Installation in Terminal
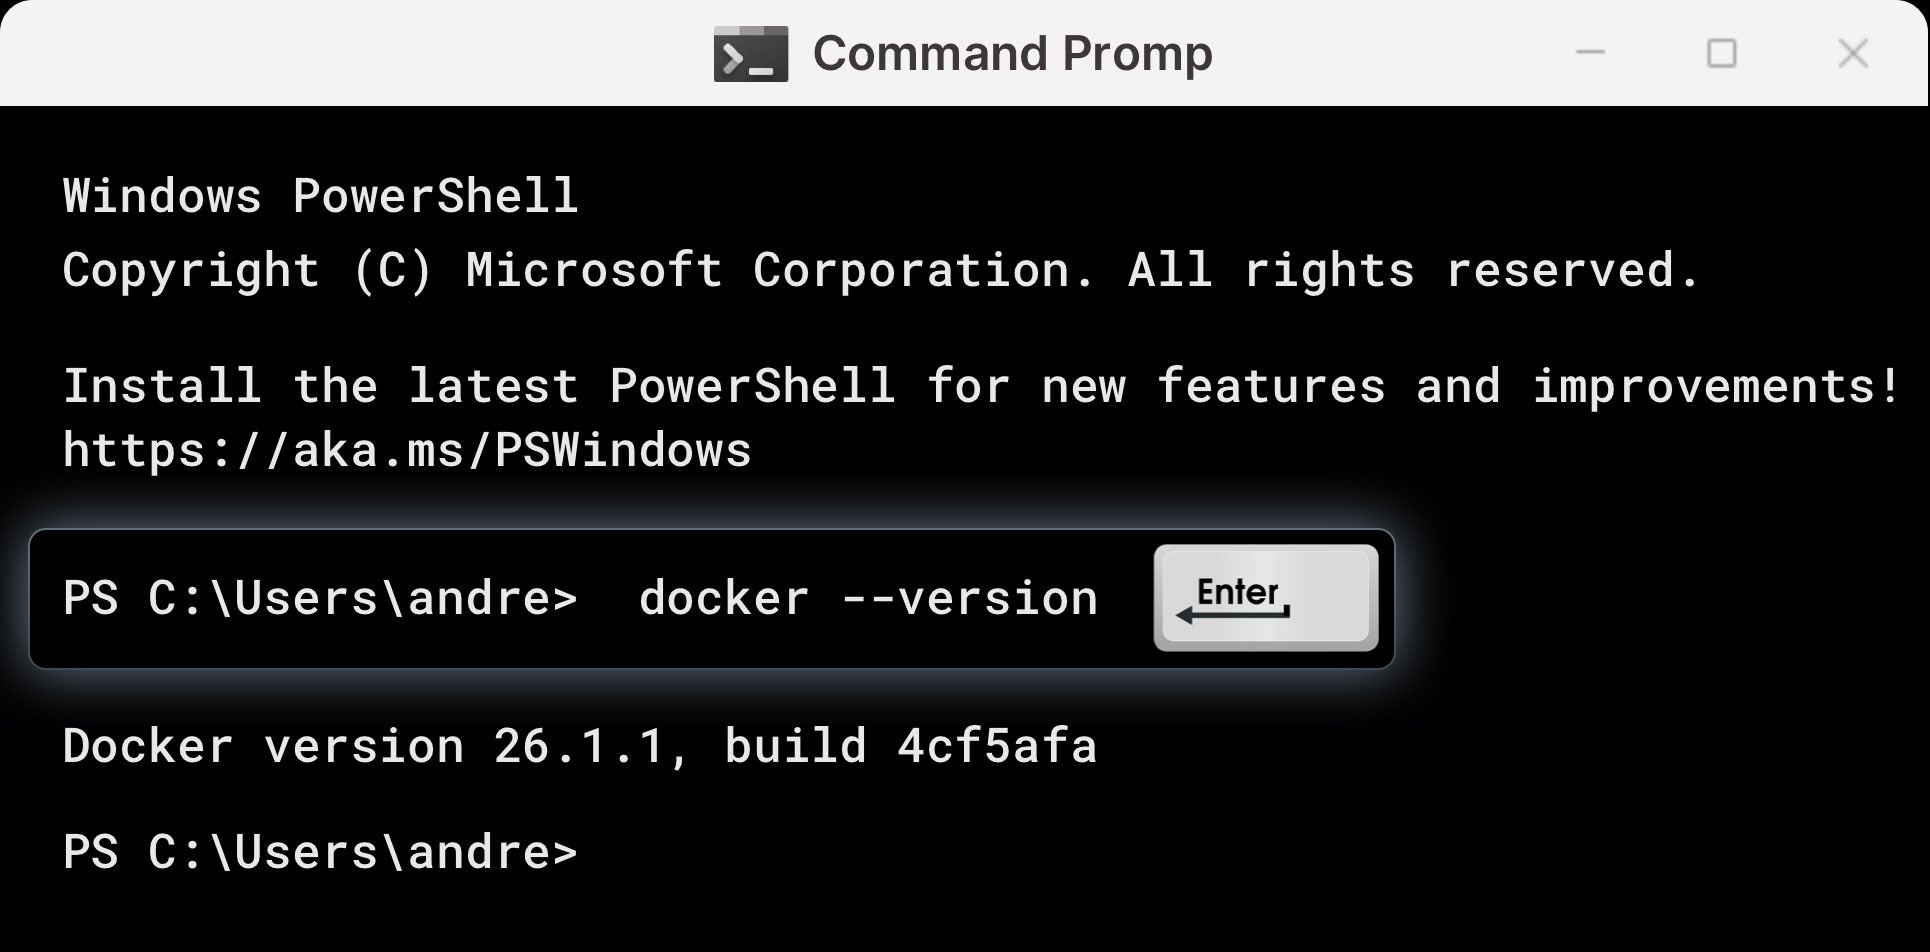
Copy and paste the following line into Terminal.
```Text Terminal Command theme={null}
docker --version
```
The result will be the current version of Docker.
```
Docker version 24.0.6, build ed223bc
```
### Congratulations on Successfully Setting up Docker
Now that Docker has been successfully installed and is running, you can proceed with [setting up the Worker](/guides/workers/install-on-windows).
If you encounter issues with Docker, please refer to our [Troubleshooting Docker guide](/guides/workers/troubleshoot-docker). If the problem persists or if you need further assistance, feel free to [check our knowledge base](https://support.io.net/en/support/home) for answers, and if you still need help, don’t hesitate to open a support ticket!
 ### 2. Run the Installation Process
The installation starts when you open the file. Follow the prompts. When the installation process is completed, you need to **restart your computer.** Just click the "**Close and Restart**" button on the last step of the Docker wizard:
### 2. Run the Installation Process
The installation starts when you open the file. Follow the prompts. When the installation process is completed, you need to **restart your computer.** Just click the "**Close and Restart**" button on the last step of the Docker wizard:
 After rebooting, open Docker and use the recommended settings from the installation wizard:
 ### 3. Configure WSL2
to Integrate with Docker Settings
Open the Docker settings. In the Resources section, choose
### 3. Configure WSL2
to Integrate with Docker Settings
Open the Docker settings. In the Resources section, choose 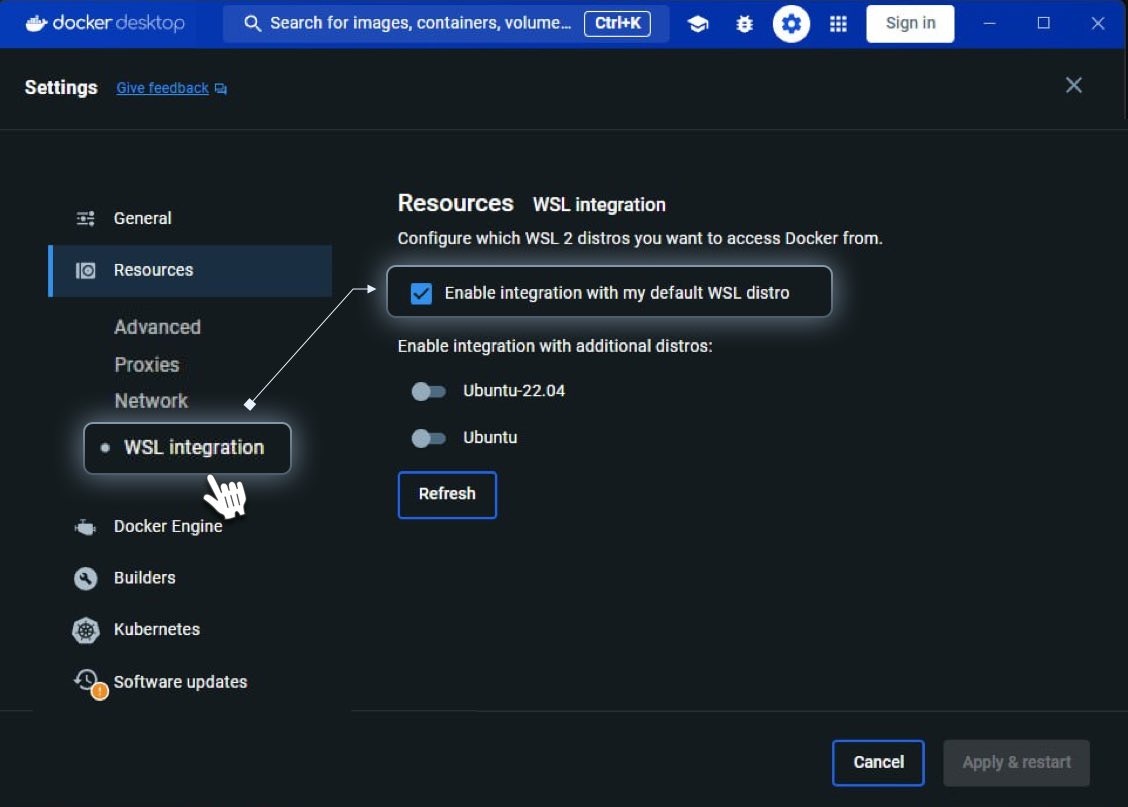 ### 4. Open
Terminal Through Start Menu
Click the Start Menu icon in the Popup Menu, type Terminal in the search field, then click Terminal
### 4. Open
Terminal Through Start Menu
Click the Start Menu icon in the Popup Menu, type Terminal in the search field, then click Terminal
 ### 5. Verify the Installation in Terminal
 Copy and paste the following line into Terminal.