> ## Documentation Index
> Fetch the complete documentation index at: https://io.net/docs/llms.txt
> Use this file to discover all available pages before exploring further.
# General Worker Troubleshooting
> Here we've compiled essential use cases for working with Workers.
### How to Resolve Unsupported GPU Issues on Windows and Linux?
If a user's supported GPU is listed as unsupported on the website, they should verify their NVIDIA driver configuration. Often, when a Docker container running **nvidia-smi** fails, the backend receives this information and marks the GPU as unsupported.
To check the configuration, running the following command should provide the correct output:
```
docker run --gpus all nvidia/cuda:11.0.3-base-ubuntu18.04 nvidia-smi
```
### If I received a "device code authorization returned: Bad Request" error?
If this error is displayed following authorization:
```
Error: device code authorization returned: Bad Request
Error: Error authenticating: provided token has expired or invalid. Please re-authenticate using --no_cache=true flag.
```
This error might be caused by an issue with network connections. Visit [https://auth0.io.solutions/activate](https://auth0.io.solutions/activate). If the page does not open, it means **Auth0** is not reachable for you.
### How can I pause or reset a Worker if it has disconnection issues?
If your worker has been disconnected, here are a few steps to fix it:
1. Go to your running **Worker Page** and click on **Pause** for the Worker (located at the top-right corner).
2. **Optionally**, restart the device as needed.
3. After restarting the device, open your Worker page at IO.NET and copy the command from the **Re-Run docker command** block on the **Worker Page**, then run it Terminal.
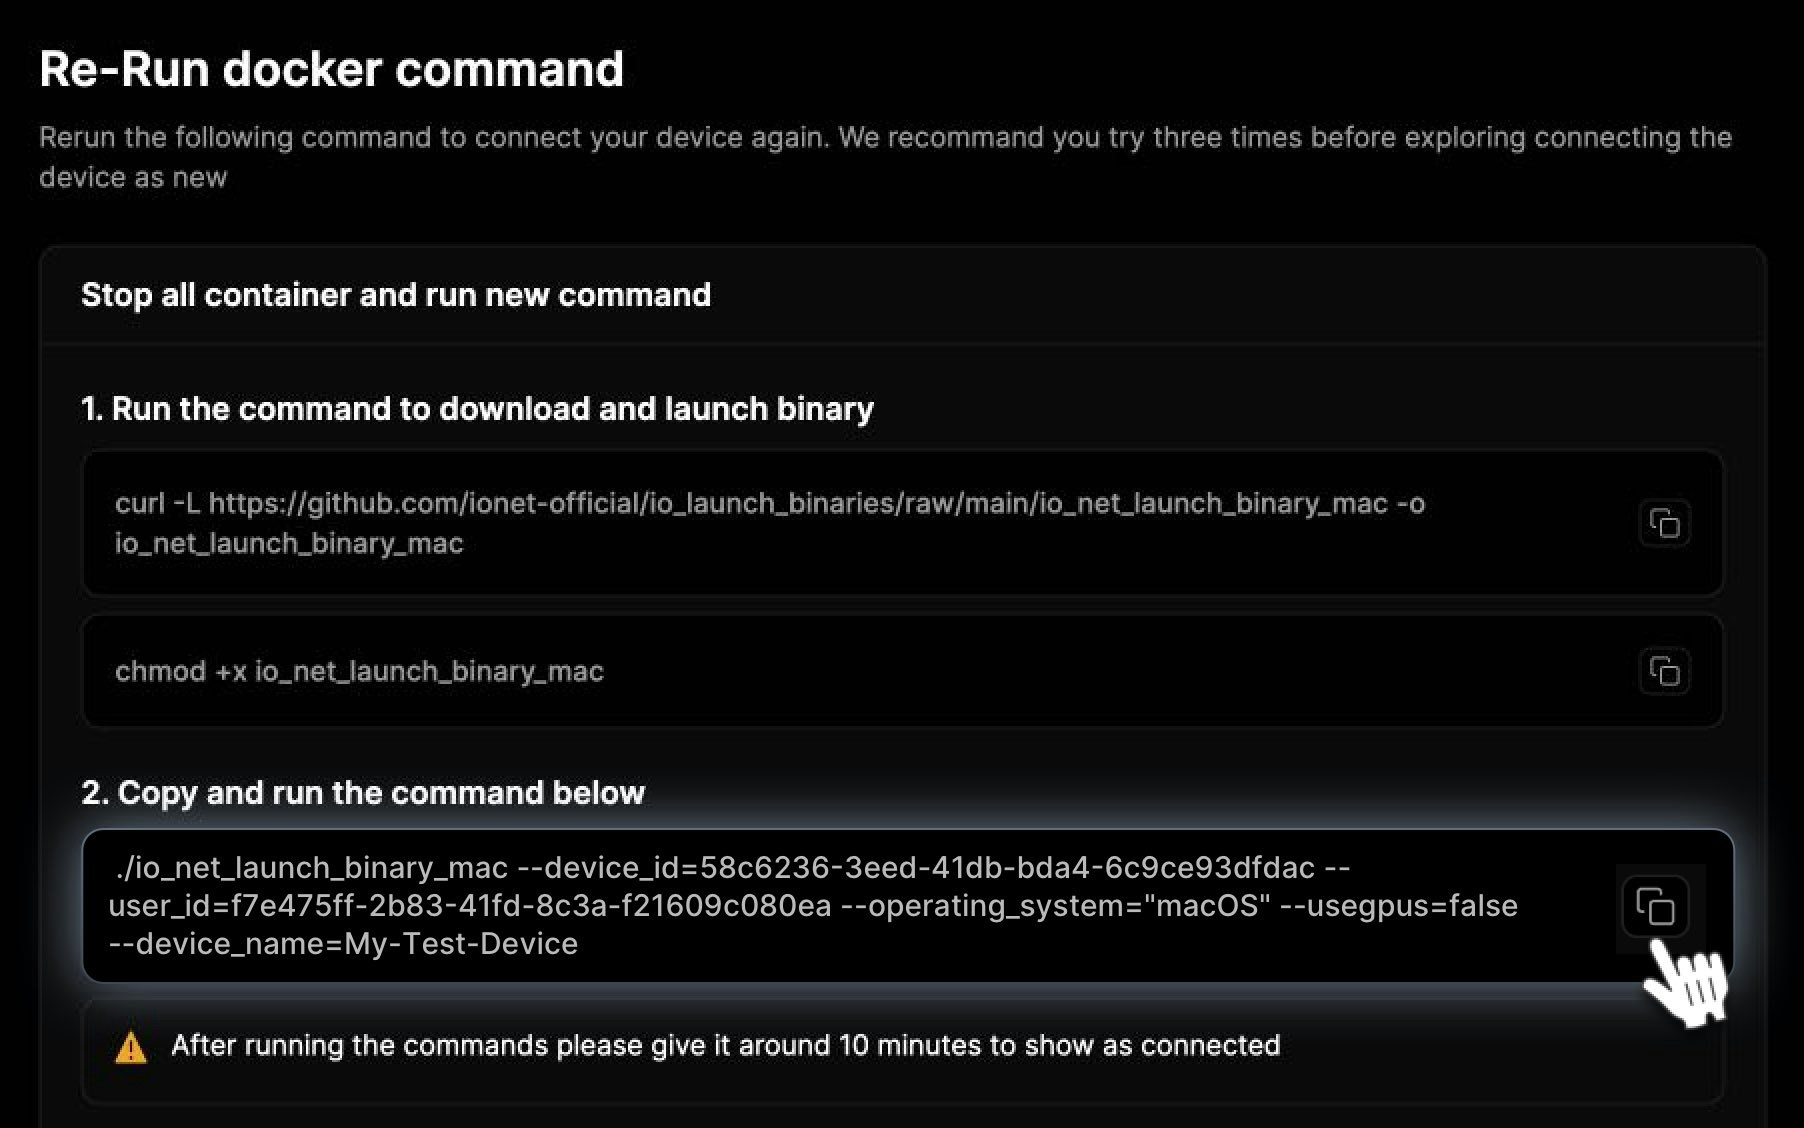 4. If prompted, authorize the device using IO.ID. Remember, you have about 3 minutes to complete the authorization.
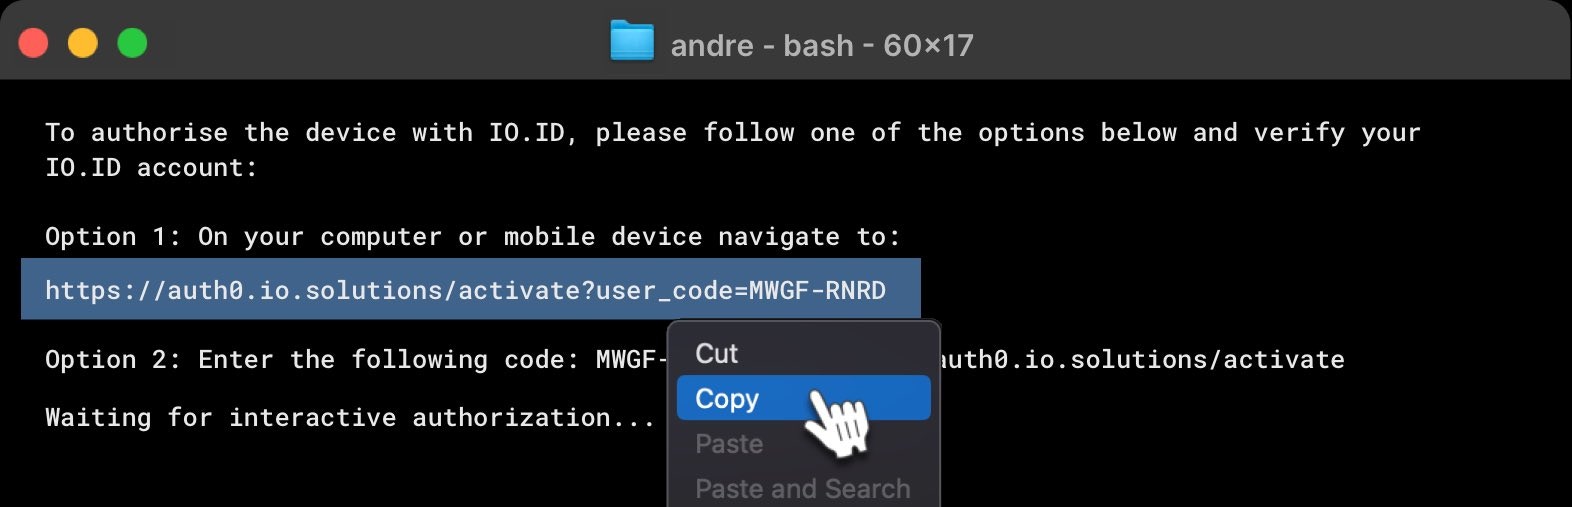 5. Confirm the removal of all previous containers in Docker.
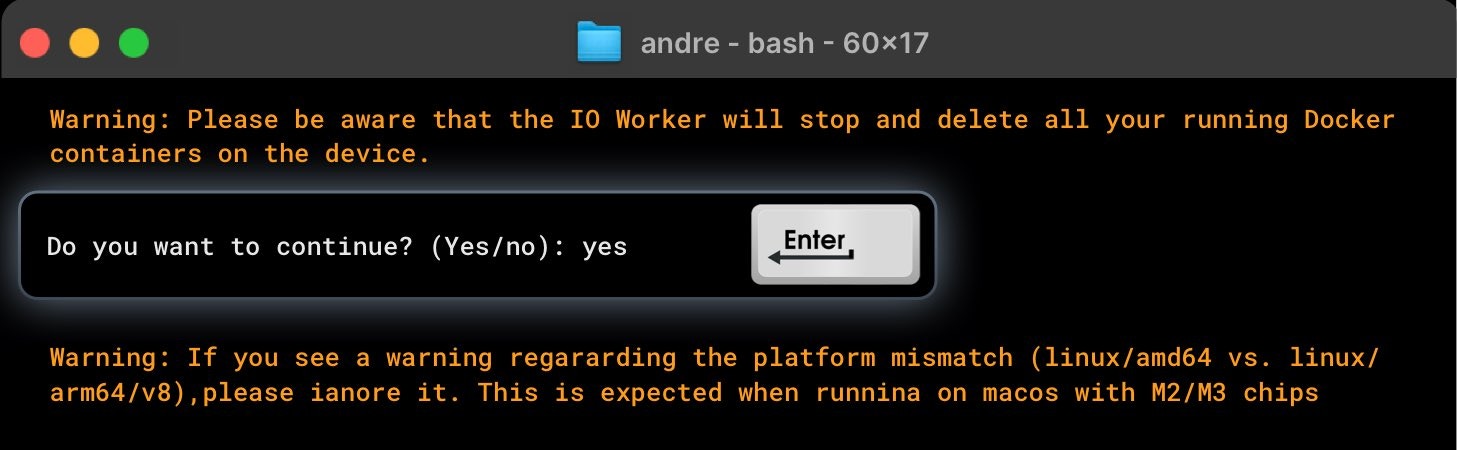 6. Wait for up to 10 minutes to see the progress. Your worker is now ready to use again.
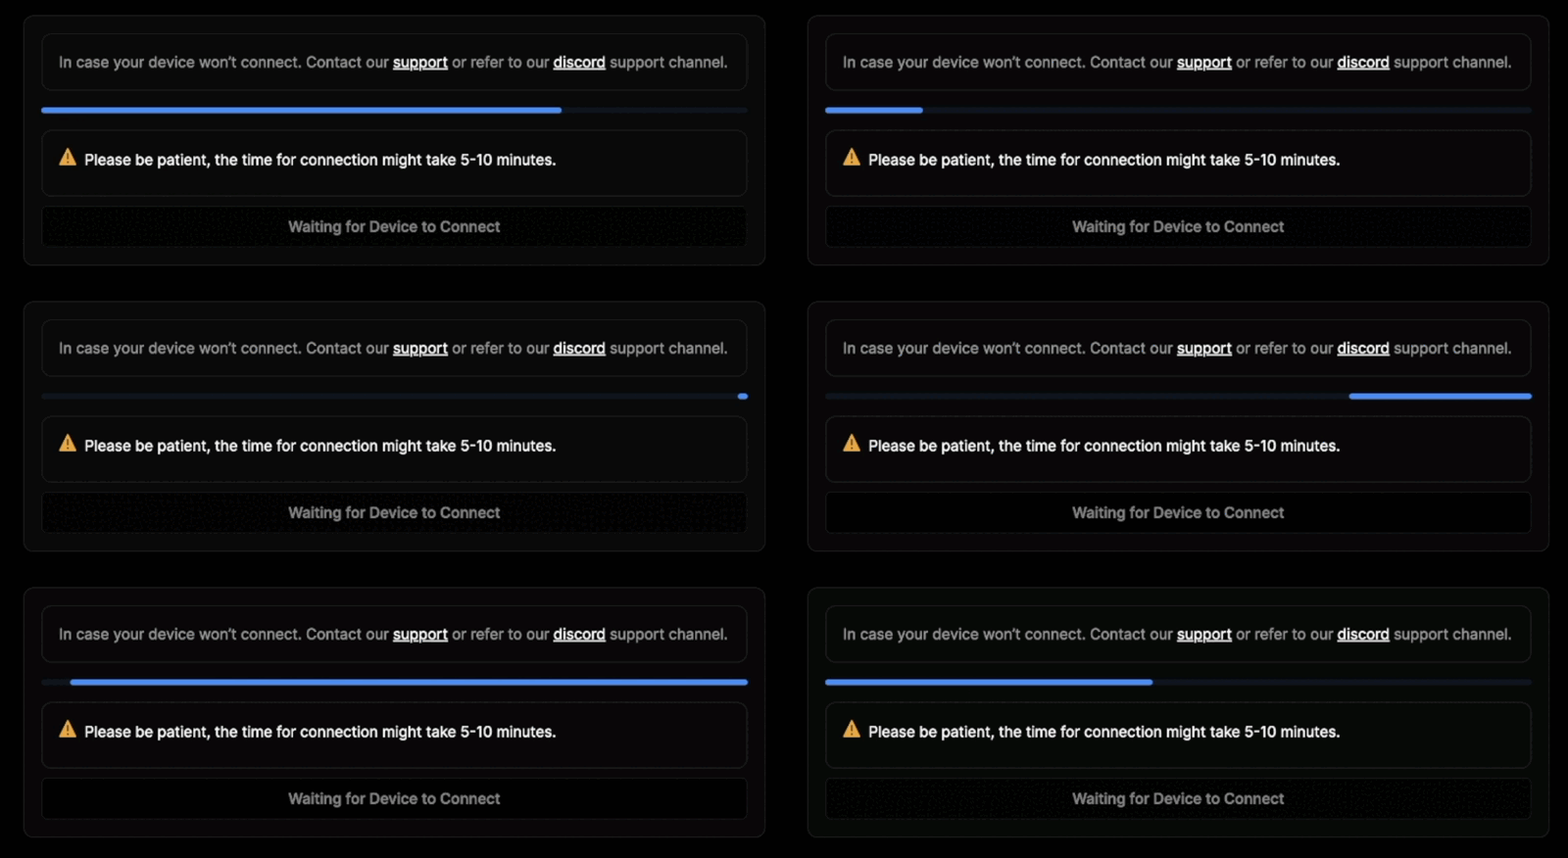 ### How can suppliers change their accounts in IO Worker?
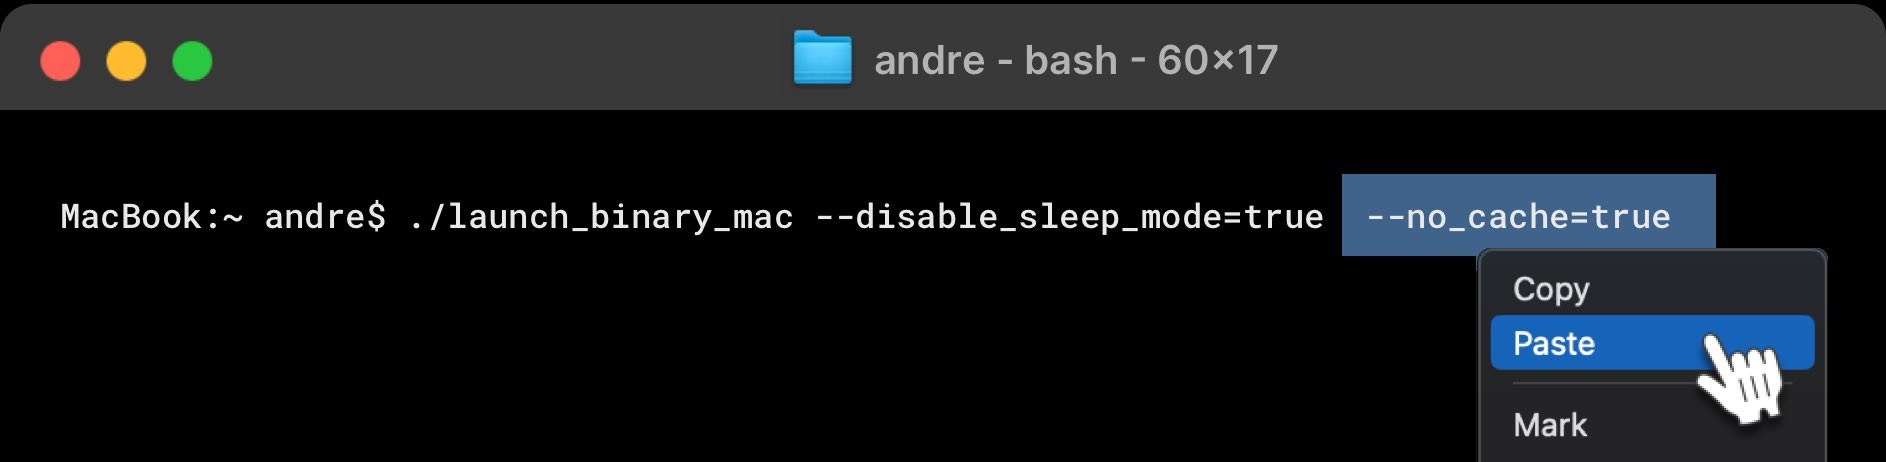
To change accounts, suppliers should include the **--no\_cache=true** flag in the binary run command. This triggers a re-authentication process. Simply add **--no\_cache=true** at the end of your main request when connecting the device with the new login.
```Text MacOs theme={null}
./launch_binary_mac --disable_sleep_mode=true --no_cache=true
```
```Text Windows theme={null}
./io_net_launch_binary_windows.exe --disable_sleep_mode=true --no_cache=true
```
```Text Linux theme={null}
./io_net_launch_binary_linux --disable_sleep_mode=true --no_cache=true
```
After one successful sign-in, the token will be saved in memory.
### How can suppliers change their accounts in IO Worker?
To change accounts, suppliers should include the **--no\_cache=true** flag in the binary run command. This triggers a re-authentication process. Simply add **--no\_cache=true** at the end of your main request when connecting the device with the new login.
```Text MacOs theme={null}
./launch_binary_mac --disable_sleep_mode=true --no_cache=true
```
```Text Windows theme={null}
./io_net_launch_binary_windows.exe --disable_sleep_mode=true --no_cache=true
```
```Text Linux theme={null}
./io_net_launch_binary_linux --disable_sleep_mode=true --no_cache=true
```
After one successful sign-in, the token will be saved in memory.
 ### How can you run an existing worker UUID in the new authentication and authorization system?
As of May 2024, we have transitioned to a new authentication and authorization system. Follow these steps to run your existing worker UUID again.
#### 1. Run the Command to Connect the Device
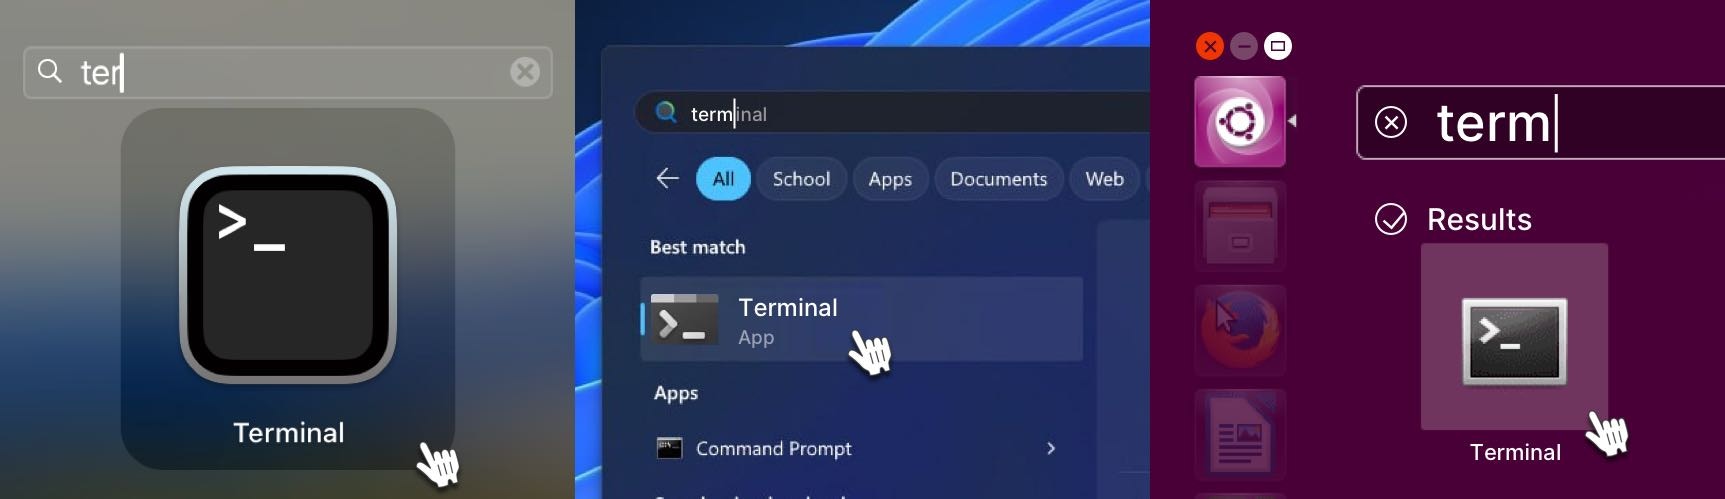
Open the Terminal on your system by navigating to the Start menu and using the search function. The process is similar regardless of your operating system.
### How can you run an existing worker UUID in the new authentication and authorization system?
As of May 2024, we have transitioned to a new authentication and authorization system. Follow these steps to run your existing worker UUID again.
#### 1. Run the Command to Connect the Device
Open the Terminal on your system by navigating to the Start menu and using the search function. The process is similar regardless of your operating system.
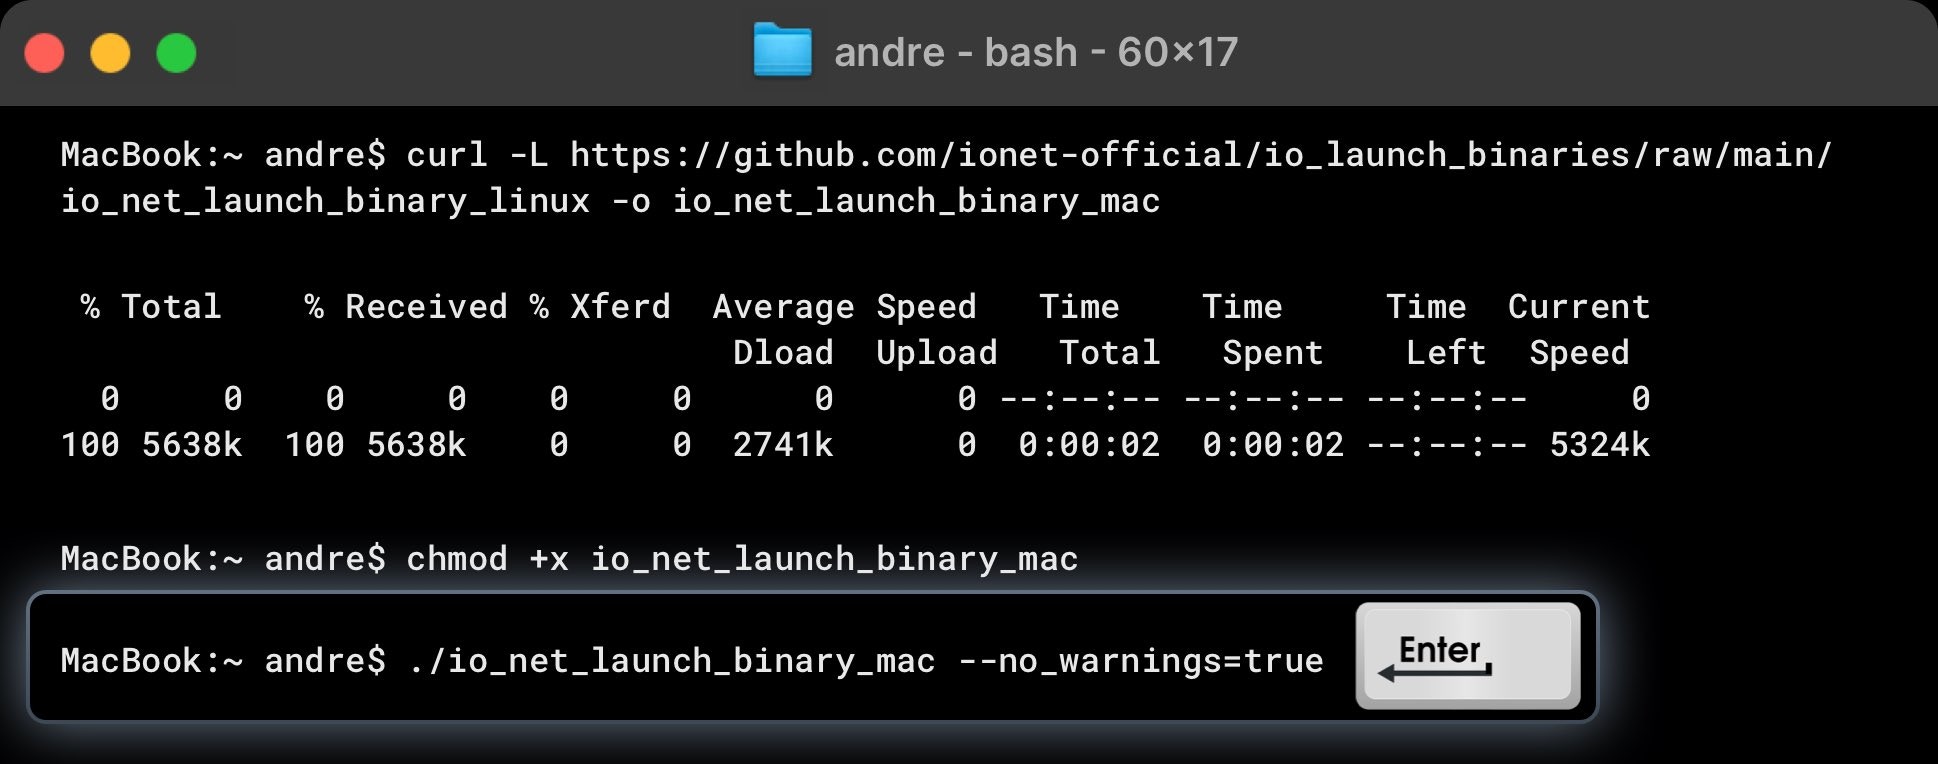
 Then run the command in the Terminal. For Windows, start by downloading and running the executable file.
* Download the binary for your operating system running command. [**For Windows you need to download the executable file. You can see how it's done here**](/docs/install-on-windows#7-download-and-launch-io-binary)
```Text MacOS theme={null}
curl -L https://github.com/ionet-official/io_launch_binaries/blob/main/io_net_launch_binary_mac -o io_net_launch_binary_mac
```
```Text Windows theme={null}
https://github.com/ionet-official/io_launch_binaries/raw/main/io_net_launch_binary_windows.exe
```
```Text Linux theme={null}
curl -L https://github.com/ionet-official/io_launch_binaries/blob/main/io_net_launch_binary_linux -o io_net_launch_binary_linux
```
* Use the following command to grant permissions to the new binary:
```Text MacOS theme={null}
chmod +x io_net_launch_binary_mac
```
```Text Linux theme={null}
chmod +x io_net_launch_binary_linux
```
* Launch the binary to connect your device to the platform.
```Text MacOS theme={null}
./io_net_launch_binary_mac --no_warnings=true
```
```Text Windows theme={null}
./io_net_launch_binary_windows.exe --no_warnings=true
```
```Text Linux theme={null}
./io_net_launch_binary_linux --no_warnings=true
```
Then run the command in the Terminal. For Windows, start by downloading and running the executable file.
* Download the binary for your operating system running command. [**For Windows you need to download the executable file. You can see how it's done here**](/docs/install-on-windows#7-download-and-launch-io-binary)
```Text MacOS theme={null}
curl -L https://github.com/ionet-official/io_launch_binaries/blob/main/io_net_launch_binary_mac -o io_net_launch_binary_mac
```
```Text Windows theme={null}
https://github.com/ionet-official/io_launch_binaries/raw/main/io_net_launch_binary_windows.exe
```
```Text Linux theme={null}
curl -L https://github.com/ionet-official/io_launch_binaries/blob/main/io_net_launch_binary_linux -o io_net_launch_binary_linux
```
* Use the following command to grant permissions to the new binary:
```Text MacOS theme={null}
chmod +x io_net_launch_binary_mac
```
```Text Linux theme={null}
chmod +x io_net_launch_binary_linux
```
* Launch the binary to connect your device to the platform.
```Text MacOS theme={null}
./io_net_launch_binary_mac --no_warnings=true
```
```Text Windows theme={null}
./io_net_launch_binary_windows.exe --no_warnings=true
```
```Text Linux theme={null}
./io_net_launch_binary_linux --no_warnings=true
```
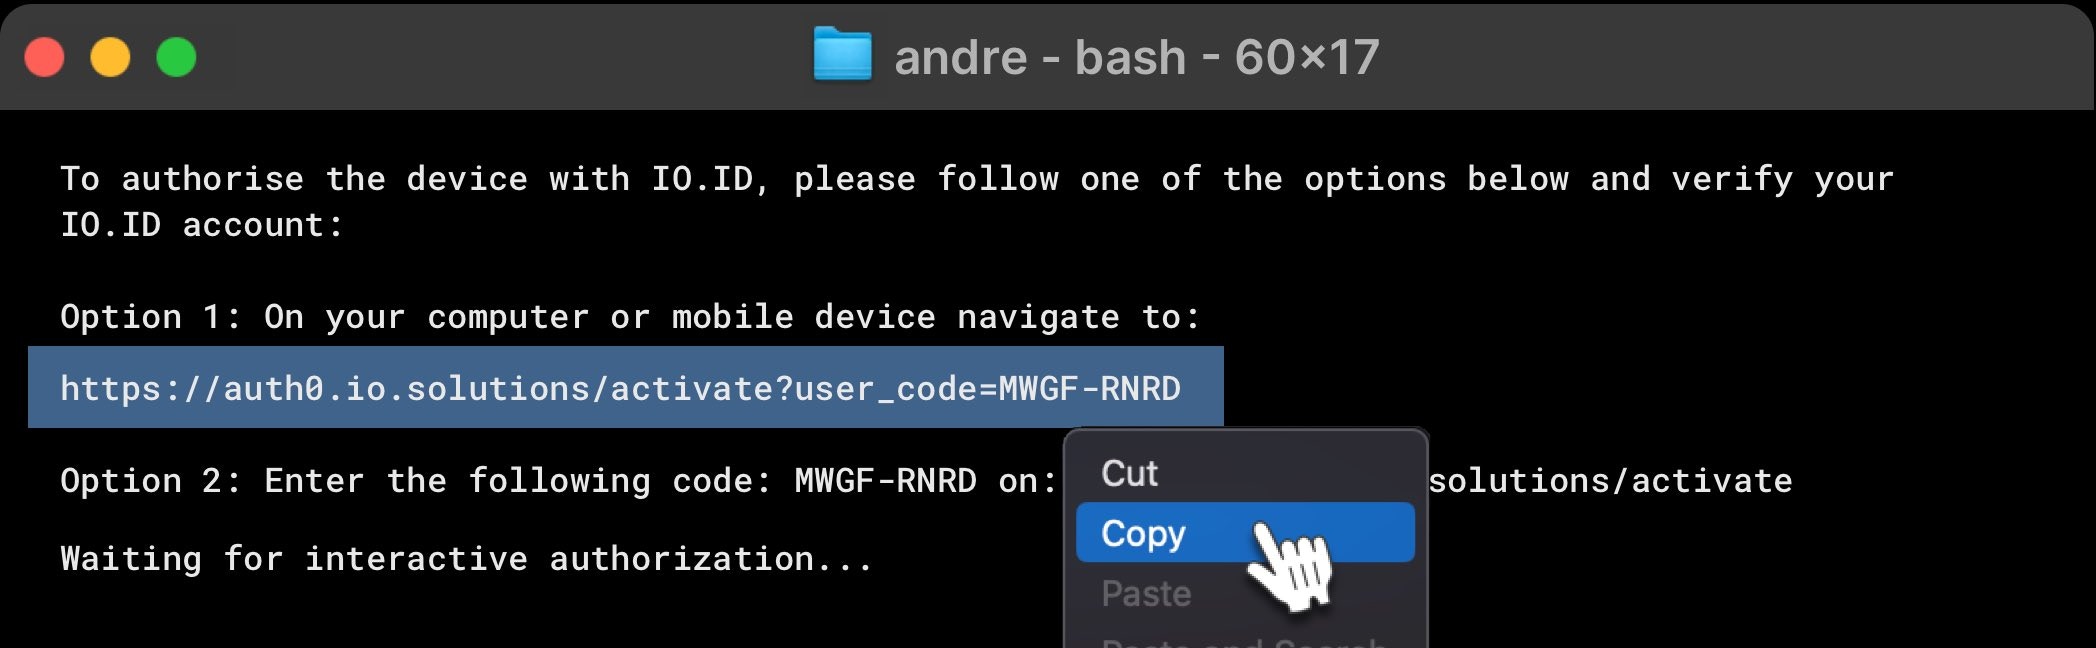
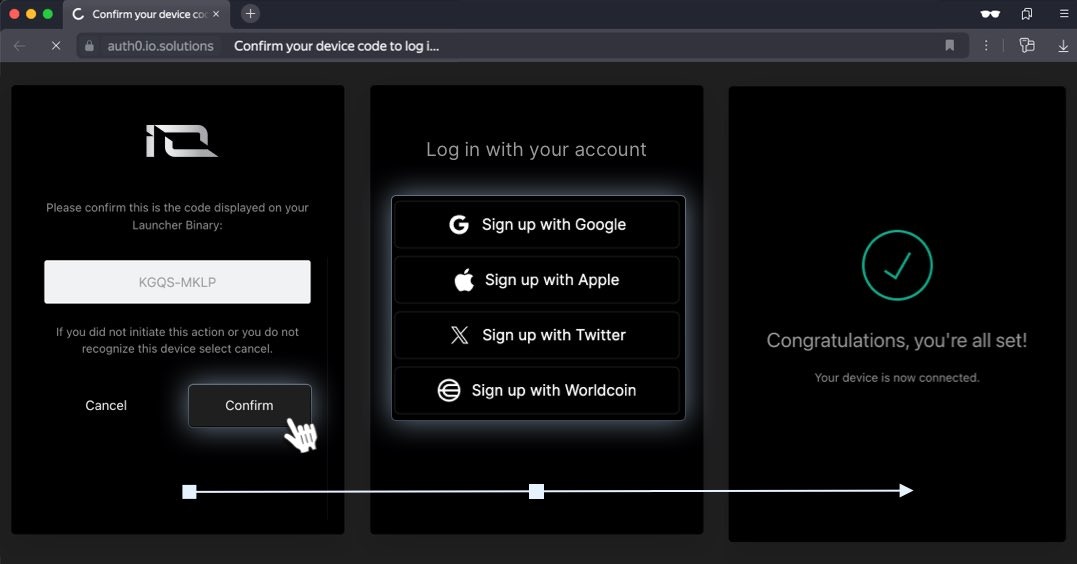
 #### 2: To authorize the device with [IO.ID](http://io.id/), follow one of the options below and verify your IO.ID account:
Remember, you will have about 1-2 minutes to complete the authorization of the device. If it expires, run the code again.
You can do this in two ways: **Copy the Link from the Terminal**: Paste it into your browser and confirm the action.
#### 2: To authorize the device with [IO.ID](http://io.id/), follow one of the options below and verify your IO.ID account:
Remember, you will have about 1-2 minutes to complete the authorization of the device. If it expires, run the code again.
You can do this in two ways: **Copy the Link from the Terminal**: Paste it into your browser and confirm the action.
 After confirmation, the system will prompt you to log in.
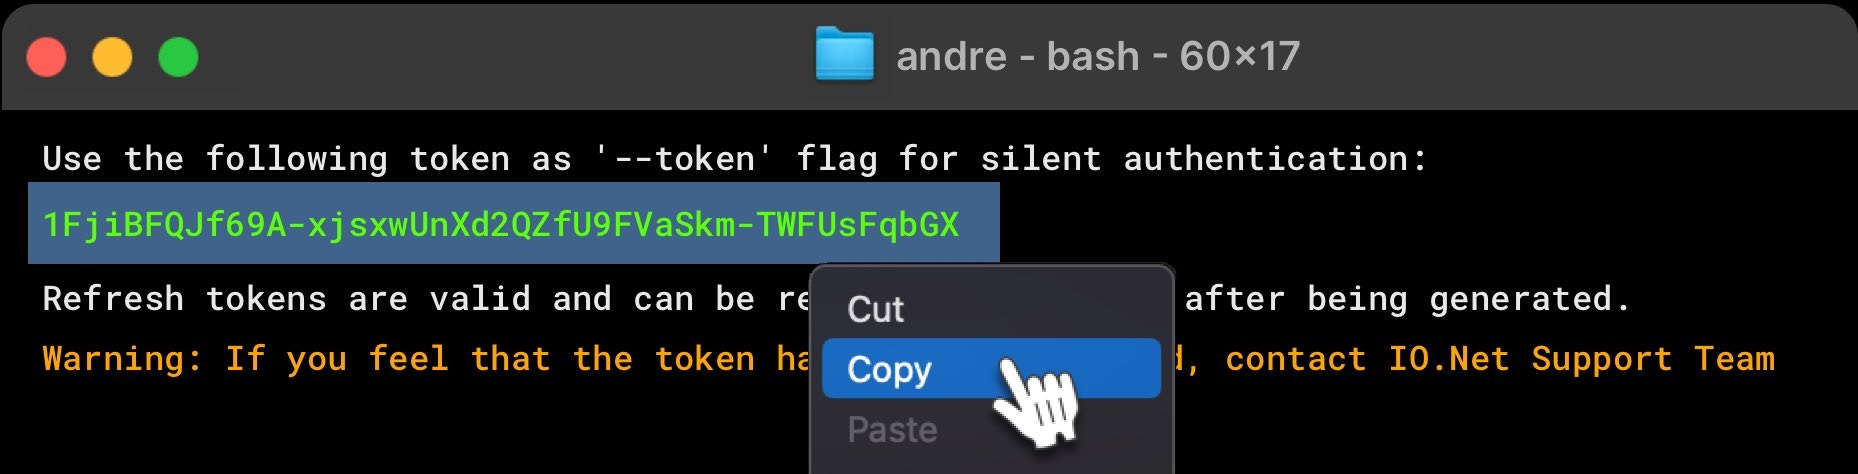
 #### 3. Save the Token
The information below is found in the CLI. Keep this token accessible.
#### 3. Save the Token
The information below is found in the CLI. Keep this token accessible.
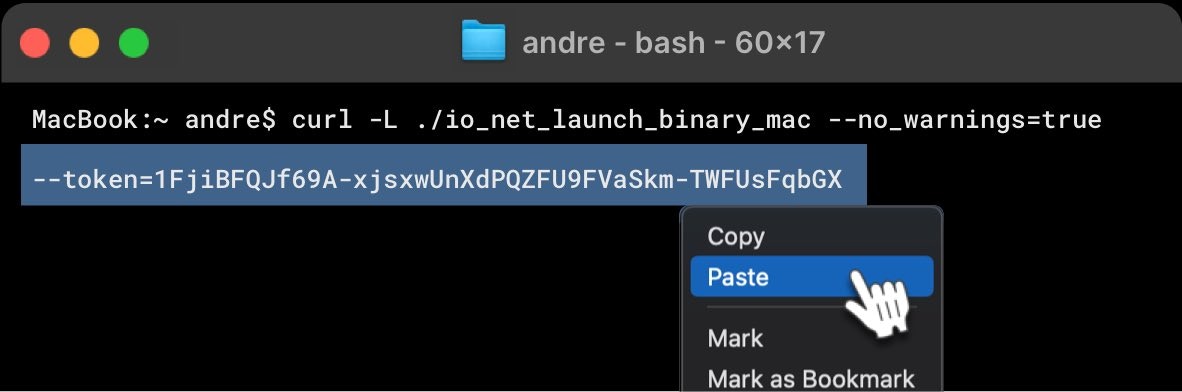
 #### 4. For all other machines use the saved token
This does not require manual reauthentication and can be used for all your worker nodes.
#### 4. For all other machines use the saved token
This does not require manual reauthentication and can be used for all your worker nodes.
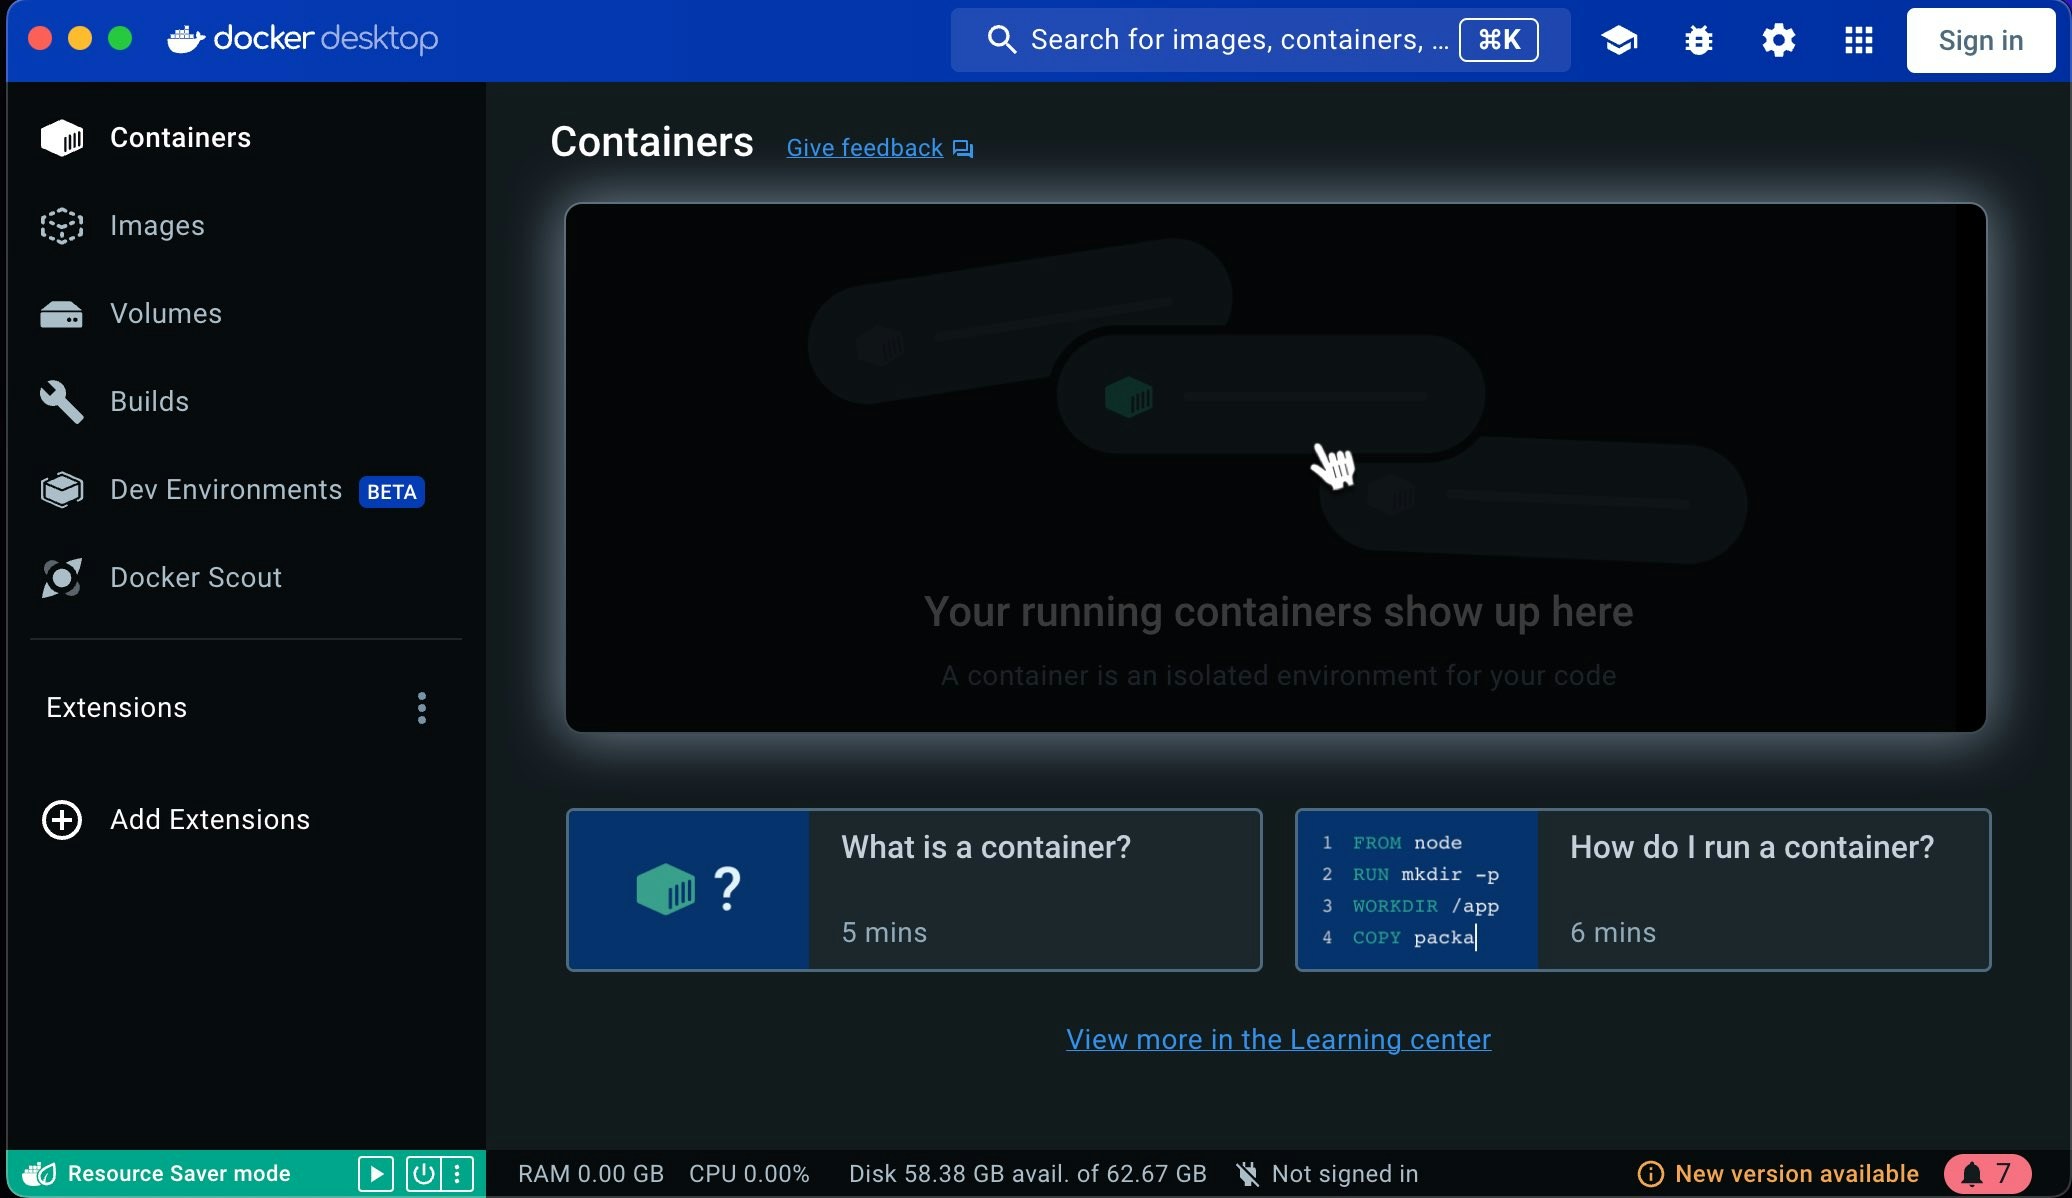
 ### Why Do Containers Disappear from Docker?
If the container disappears from docker, then your worker was likely blocked. If this happens, you must recreate the worker from scratch.
### Why Do Containers Disappear from Docker?
If the container disappears from docker, then your worker was likely blocked. If this happens, you must recreate the worker from scratch.
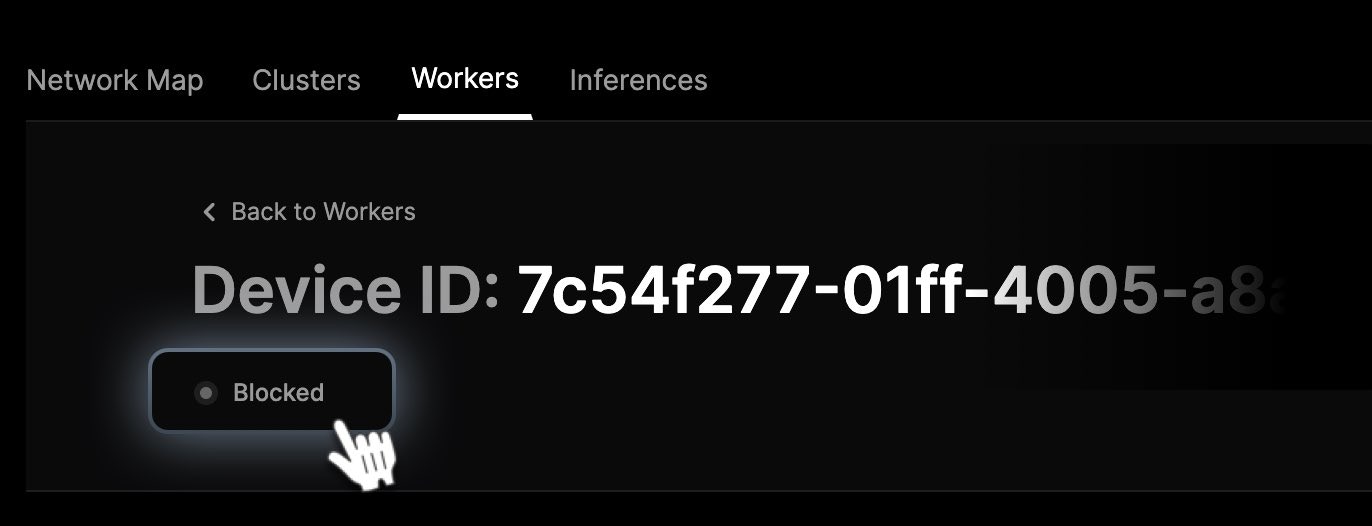
 ### Why Is My Worker Blocked?
Blocked status is indicative that our system detected GPU utilization that was not authorized by our internal checks. It's important that GPU availability is dedicated 100% to the task being volunteered for the health of the DePIN.
Blocked status can occur for a few different reasons, primarily:
* **Excessive GPU Utilization:** Activities such as playing games or using graphics-intensive applications. (You'll need to pause these activities before you start usage.)
* **Mining Detection:** Our team has implemented an update to detect mining devices and instances with high GPU usage, resulting in an automatic ban.
* **Device and Hardware Switching:** Our team has implemented a mechanism for blocking device if they were verified and later a different device with a different hardware was detected. If you need to use a new hardware, please create a new device
### Why Is My Worker Blocked?
Blocked status is indicative that our system detected GPU utilization that was not authorized by our internal checks. It's important that GPU availability is dedicated 100% to the task being volunteered for the health of the DePIN.
Blocked status can occur for a few different reasons, primarily:
* **Excessive GPU Utilization:** Activities such as playing games or using graphics-intensive applications. (You'll need to pause these activities before you start usage.)
* **Mining Detection:** Our team has implemented an update to detect mining devices and instances with high GPU usage, resulting in an automatic ban.
* **Device and Hardware Switching:** Our team has implemented a mechanism for blocking device if they were verified and later a different device with a different hardware was detected. If you need to use a new hardware, please create a new device
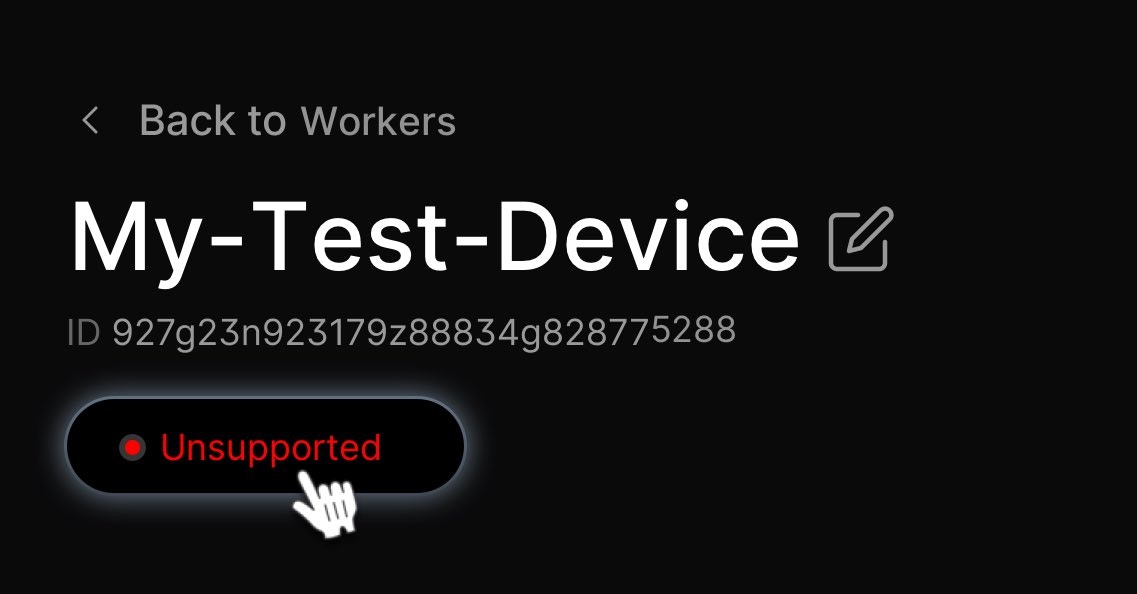
 ### Why Does My Worker Have an Unsupported Status?
This occurs when your GPU/CPU is not listed among the supported devices on the IO Network. You can check the list of supported devices [here](/docs/supported-devices).
### Why Does My Worker Have an Unsupported Status?
This occurs when your GPU/CPU is not listed among the supported devices on the IO Network. You can check the list of supported devices [here](/docs/supported-devices).
 ### Why Does My Worker Disappear from My Dashboard?
This issue can stem from a few main causes:
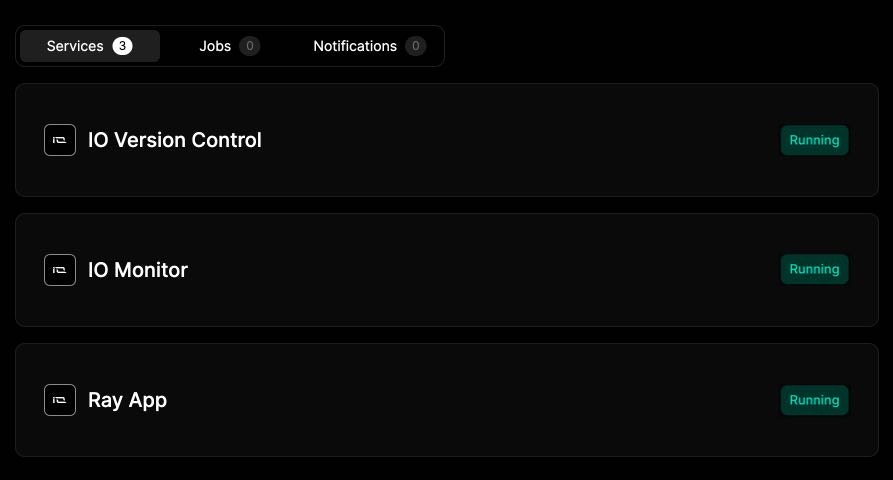
1. **Unsuccessful Connection**: You didn't successfully connect the new worker. Here's an example of a successful worker connection:
### Why Does My Worker Disappear from My Dashboard?
This issue can stem from a few main causes:
1. **Unsuccessful Connection**: You didn't successfully connect the new worker. Here's an example of a successful worker connection:
 2. **Unsupported Hardware**: If you successfully connected a new worker but the GPU/CPU you're using is not supported, you won't see your worker on the dashboard. You can check the list of supported devices [here](/docs/supported-devices).
3. **User Interface Issues**: If your worker was running normally and suddenly disappears from the dashboard, it could be due to a problem with the user interface (UI). In such cases, try refreshing the website. If the worker still doesn't appear, please try again later or [create a ticket](https://worker.io.net) for our support team to assist you.
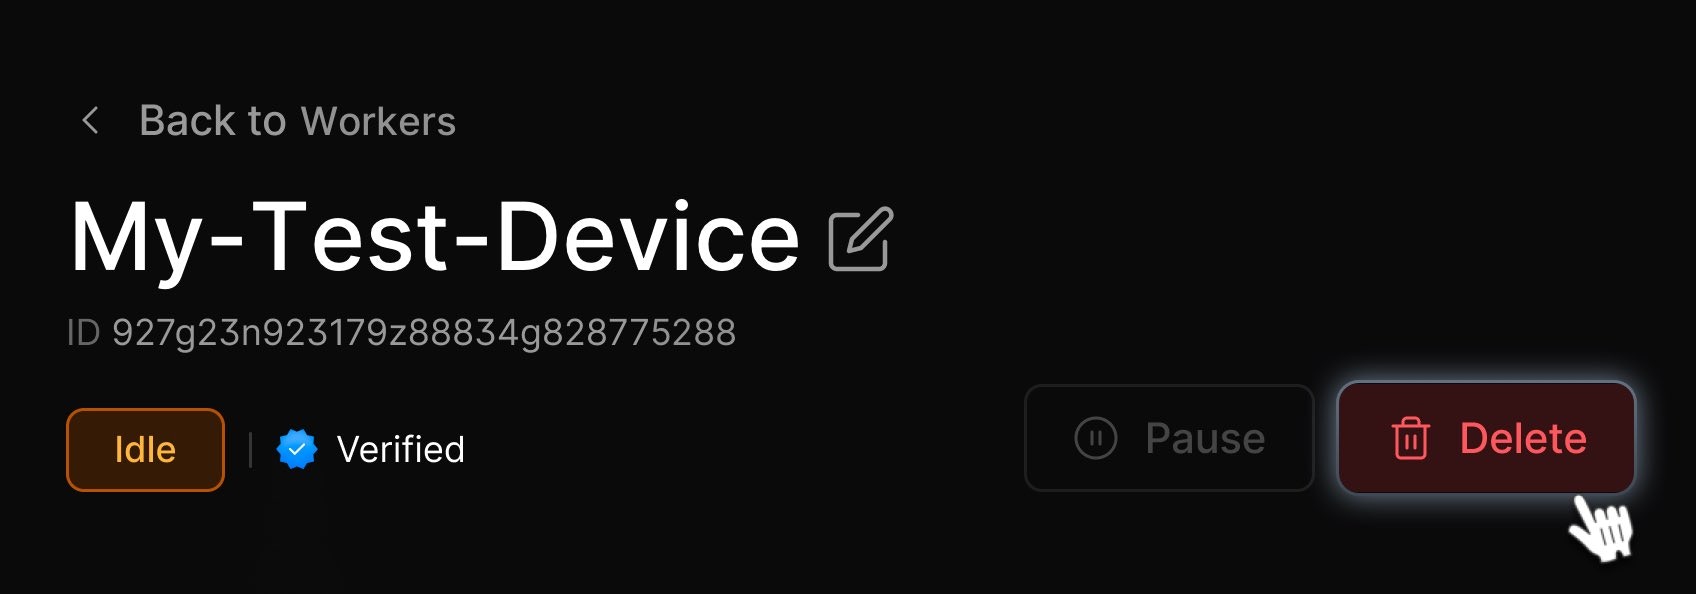
### Creating Multiple Workers from the Same Device
Users may inadvertently create a new worker each time the previous one fails instead of re-running the existing worker. To address this issue, you need to **Terminate the old workers** and learn how to restart Docker to continue running the existing worker. Follow the instructions [here](/docs/troubleshoot-worker-general#how-can-i-pause-or-reset-a-worker-if-it-has-disconnection-issues).
2. **Unsupported Hardware**: If you successfully connected a new worker but the GPU/CPU you're using is not supported, you won't see your worker on the dashboard. You can check the list of supported devices [here](/docs/supported-devices).
3. **User Interface Issues**: If your worker was running normally and suddenly disappears from the dashboard, it could be due to a problem with the user interface (UI). In such cases, try refreshing the website. If the worker still doesn't appear, please try again later or [create a ticket](https://worker.io.net) for our support team to assist you.
### Creating Multiple Workers from the Same Device
Users may inadvertently create a new worker each time the previous one fails instead of re-running the existing worker. To address this issue, you need to **Terminate the old workers** and learn how to restart Docker to continue running the existing worker. Follow the instructions [here](/docs/troubleshoot-worker-general#how-can-i-pause-or-reset-a-worker-if-it-has-disconnection-issues).
 ### Device Readiness Status
Your device status needs to be either **Cluster Ready** or **Hired** to be nominated for Block Rewards and be eligible for hiring. You can verify device status either on the device detail page or on the **Workers** tab in **IO Explore**. For more information, see the [Get Started - IO Worker](/docs/intro) doc.
The four possible **Readiness** statuses are:
| Status | Description |
| -------------------------- | -------------------------------------------------------------------------------------------------------------------------------------------------------------------------------------------------------------------------------------------------------------------------------------------------------------------------------------------------- |
| **Cluster Ready** | Device meets PoW requirements and passed several Cluster Formation verifications. |
| **Hired** | Device is currently hired by a cluster. |
| **Pending** | The device has joined the network and is currently undergoing both the PoW and Cluster Readiness test. This process can take up to 12 hours of cumulative uptime after onboarding, but may complete sooner if your device passes our tests early. If your device remains in a Pending state after more than 12 hours of uptime, please contact us. |
| **Not Block Reward Ready** | Device doesn't meet the criteria for block reward eligibility, mainly Cluster Formation verifications. |
**Not Block Reward Ready** offers one of three tooltips in the UI to provide troubleshooting tips.
* **Please check your device's computational capacity**- Your device's computational capacity is below the required threshold.
* **Please check your device setup and computational capacity**- Your device setup might not be configured correctly and its computational capacity is below the required threshold. Please refer to the worker setup guide.
* **Please check your device setup**- Your device setup might not be configured correctly. Please refer to the worker setup guide.
Feel free to [check our knowledge](https://support.io.net/en/support/home) base for answers, and if you still need help, don’t hesitate to open a support ticket!
### Device Readiness Status
Your device status needs to be either **Cluster Ready** or **Hired** to be nominated for Block Rewards and be eligible for hiring. You can verify device status either on the device detail page or on the **Workers** tab in **IO Explore**. For more information, see the [Get Started - IO Worker](/docs/intro) doc.
The four possible **Readiness** statuses are:
| Status | Description |
| -------------------------- | -------------------------------------------------------------------------------------------------------------------------------------------------------------------------------------------------------------------------------------------------------------------------------------------------------------------------------------------------- |
| **Cluster Ready** | Device meets PoW requirements and passed several Cluster Formation verifications. |
| **Hired** | Device is currently hired by a cluster. |
| **Pending** | The device has joined the network and is currently undergoing both the PoW and Cluster Readiness test. This process can take up to 12 hours of cumulative uptime after onboarding, but may complete sooner if your device passes our tests early. If your device remains in a Pending state after more than 12 hours of uptime, please contact us. |
| **Not Block Reward Ready** | Device doesn't meet the criteria for block reward eligibility, mainly Cluster Formation verifications. |
**Not Block Reward Ready** offers one of three tooltips in the UI to provide troubleshooting tips.
* **Please check your device's computational capacity**- Your device's computational capacity is below the required threshold.
* **Please check your device setup and computational capacity**- Your device setup might not be configured correctly and its computational capacity is below the required threshold. Please refer to the worker setup guide.
* **Please check your device setup**- Your device setup might not be configured correctly. Please refer to the worker setup guide.
Feel free to [check our knowledge](https://support.io.net/en/support/home) base for answers, and if you still need help, don’t hesitate to open a support ticket!