> ## Documentation Index
> Fetch the complete documentation index at: https://io.net/docs/llms.txt
> Use this file to discover all available pages before exploring further.
# Getting Started with CaaS API
> The CaaS API lets you programmatically deploy and manage high-performance containerized workloads on io.net’s decentralized GPU network.
## Generate an API key
You can obtain an API key for IO Cloud in two ways:
1. Via the web interface
2. By using a two-step process (first generate a JWT token, then request the API key using cURL).
### Option 1: Generate an API Key via Web Interface
IO Clouds APIs authenticate requests using API keys. You can [generate API keys from your user](https://ai.io.net/ai/api-keys) account. **Note: When generating an API key, make sure to specify the associated IO Cloud project.**
Always treat your API key as a secret. Do not share it or expose it in client-side code (e.g., browsers or mobile apps). Instead, store it securely in an environment variable or a key management service on your backend server.
### Option 2: Generate an API Key Using a JWT Token
#### Step 1. Get a JWT Token
IO's API is built around [RESTful](https://en.wikipedia.org/wiki/REST) principles. You can use IO's APIs to gain insights into different elements of our network.
To use IO's APIs, you must supply a JWT token in the header of your request. Follow the instructions below to generate a token:
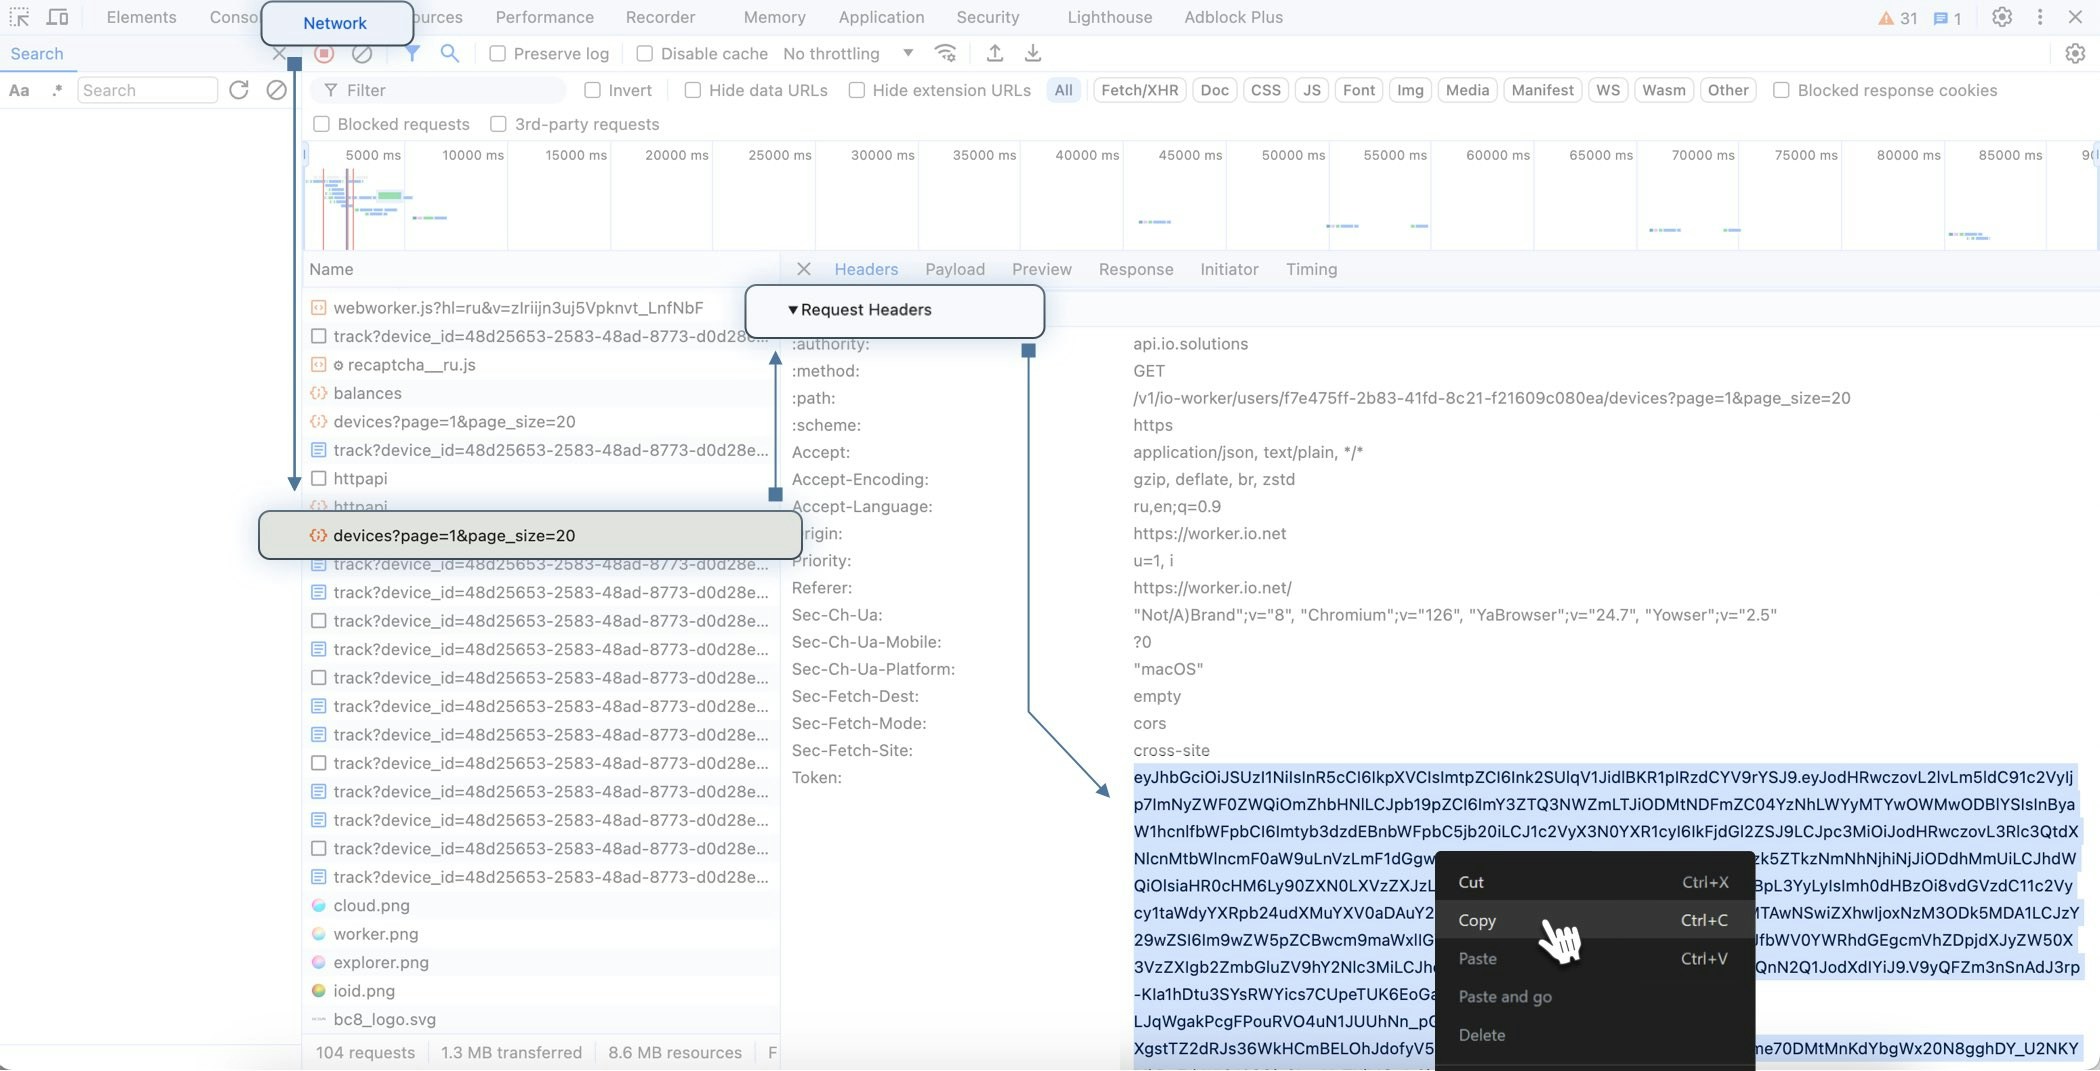
1. Go to **io.net** > **IO ID** > **io.cloud** tab.
2. In the UI, right-click and select **Inspect**.
3. In the Inspect tool, click **Network**.
4. Refresh the **io.cloud** page.
5. In the list of elements, click **Devices**.
6. Scroll down to the **Request Headers** section.
7. Copy and store the **Token**.
This token is valid for 21 days.
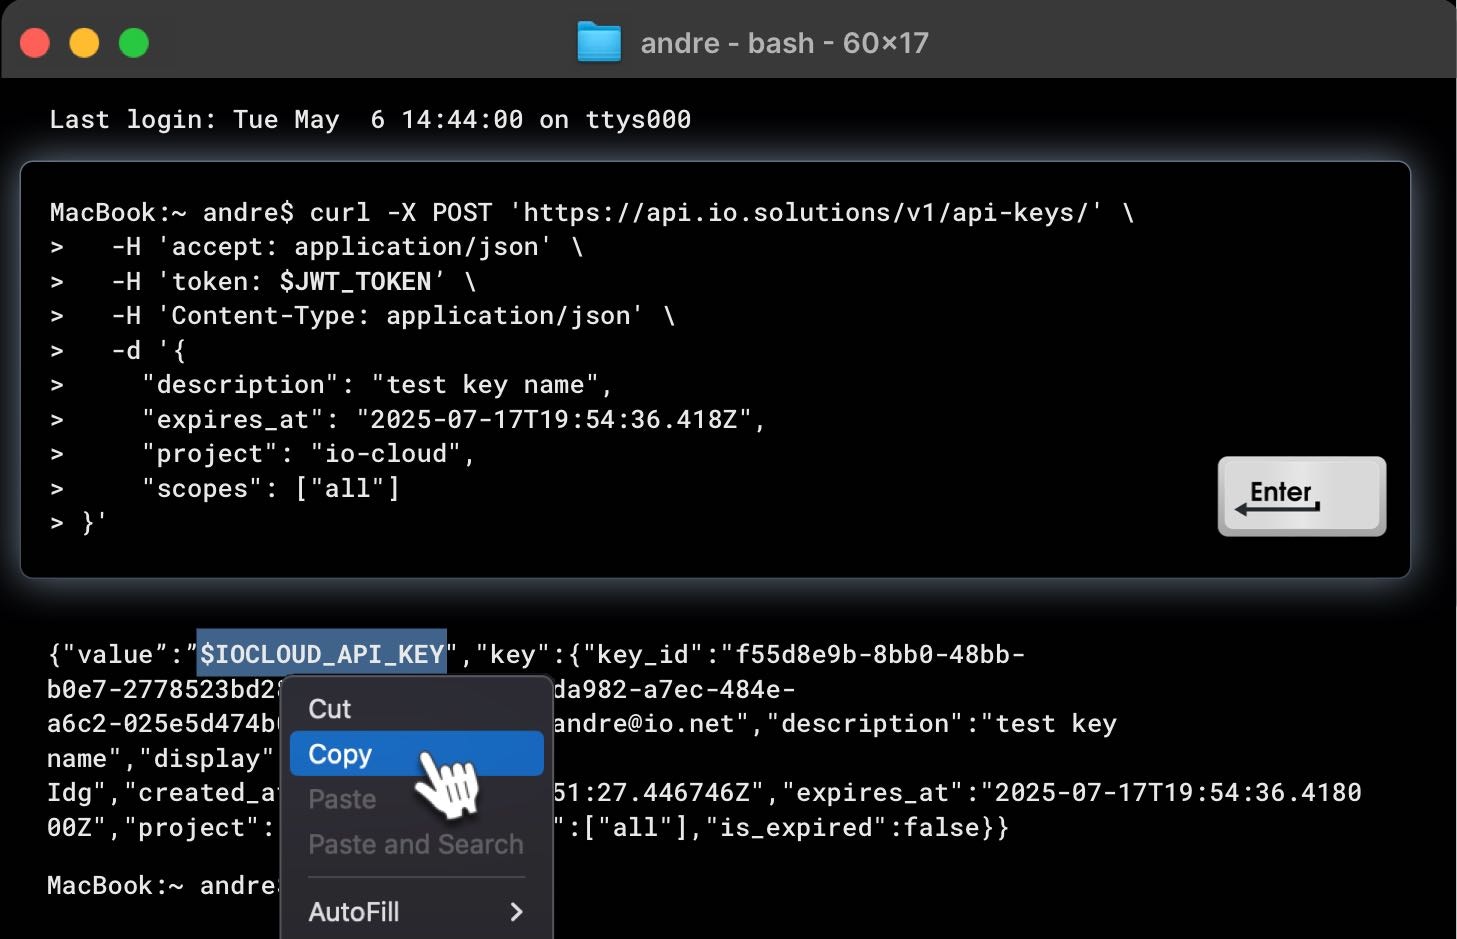
#### Step 2. Generate an API Key via `cURL`
Use the **JWT token** to request your API key:
```curl curl theme={null}
curl -X POST 'https://api.io.solutions/v1/api-keys/' /
-H 'accept: application/json' /
-H 'token: $JWT_TOKEN' /
-H 'Content-Type: application/json' /
-d '{
"description": "API Key Name",
"expires_at": "2025-07-17T19:54:36.418Z",
"project": "io-cloud",
"scopes": ["all"]
}'
```
Use the returned key with the `X-API-KEY` header in your requests.
Always treat your API key as a secret. Do not share it or expose it in client-side code (e.g., browsers or mobile apps). Instead, store it securely in an environment variable or a key management service on your backend server.
## Making requests
Accessing APIs requires IO Credits. Please make sure to request IO credits before using any API endpoints. Contact support or visit the [IO Credits](/docs/guides/payment/io-credits) page for more information.
Include the API key in an `Authorization` HTTP header for all API requests:
```
Authorization: X-API-KEY \$IOCLOUD_API_KEY
```
Replace `$IOCLOUD_API_KEY` with your actual **API key.**
### Example: Check Available Replicas per Location
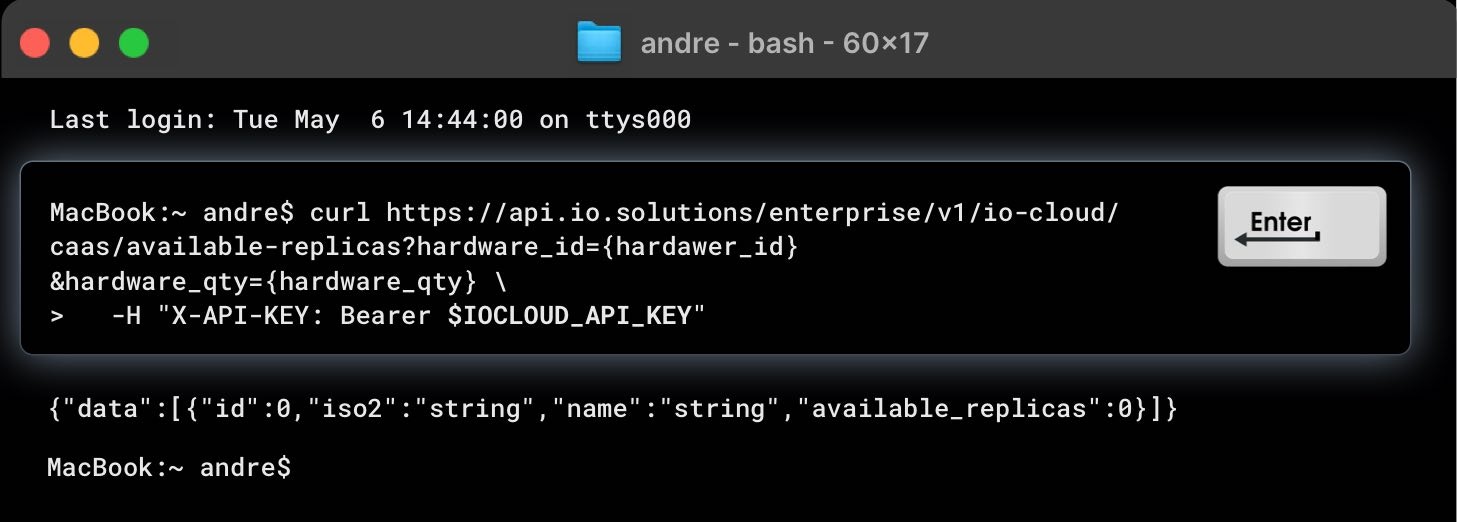
Here is an example `cURL` command to check available replicas per location in IO Cloud:
```curl curl theme={null}
curl https://api.io.solutions/enterprise/v1/io-cloud/caas/available-replicas?hardware_id={hardawer_id}&hardware_qty={hardware_qty} /
-H "X-API-KEY: \$IOCLOUD_API_KEY"
```
This request should return a response as follows:
```json json theme={null}
{
"data": [
{
"id": 0,
"iso2": "string",
"name": "string",
"available_replicas": 0
}
]
}
```
 #### Step 2. Generate an API Key via `cURL`
Use the **JWT token** to request your API key:
#### Step 2. Generate an API Key via `cURL`
Use the **JWT token** to request your API key:
 ## Making requests
 This request should return a response as follows: